Welcome to the second part of the two-part series on running selenium tests with GitHub Actions. In the first article, we outlined how to get started and how to set up your repo for Actions. In this guide, we’ll outline how to run email integration tests and pass secrets to GitHub Actions.
To start… Why would you want to test emails with live email services in the first place? Can’t you simply write to a log file or standard out? Yes… and no. Writing to log files or standard out is ok at the beginning of the application lifecycle. Building out the email send feature takes a back seat to ensure the application actually works.
But let’s say your application is almost ready for its initial release. You want to test that you can even connect to an SMTP server. Or test to ensure the right message can go to the right inbox. Testing via log files or standard out starts to get a bit limiting in that regard. Additionally, say you want to be really sure that the contents of an email you send are what you expect them to be. At this point, you’d like to simulate as much of the email delivery as possible.
You can accomplish this with a disposable email service like Mailsac.
Allow us to plug our mail service
At Mailsac we focus on the developer experience around email automation and testing. That’s why we’ve made it so you can test out the API mentioned in this guide with a free account. You can sign up here.
So let’s lay out our testing goal:
- Simulate an email send with our sample application.
- Refer to our Guide To Stress Free Email Testing with Next.js for more information on how we created this sample application
- Use Selenium to drive the form and hit send
- Use our capture service API to send the email
- Use Mailsac’s API to read the email from the destination inbox
- Verify the contents of said email
- Do all this on GitHub Actions
Let’s get started.
API Credentials
If you don’t already have one, go ahead and create a mailsac account and generate an API key.
Plug those API keys in a file called .env at the root of the project:
MAILSAC_USERNAME=$MAILSAC_USERNAME
MAILSAC_API_KEY=$MAILSAC_GENERATED_KEY
MAILSAC_HOST=capture.mailsac.com
MAILSAC_PORT=5587
.env
Craft the Email
Let’s craft the email by driving Selenium through the form. Start by crafting a selenium test:
const chrome = require('selenium-webdriver/chrome');
const {Builder, Browser, By } = require('selenium-webdriver');

const screen = {
  width: 1920,
  height: 1080
};

(async function emailSendTest() {

  let driver = await new Builder()
    .forBrowser(Browser.CHROME)
    // .setChromeOptions(new chrome.Options().headless().windowSize(screen))
    .build();

  try {
    await driver.get('<http://localhost:3000>');
    let didSendButtonRender = await driver.findElement(By.id('sendbutton')).isDisplayed()

    if (!didSendButtonRender){
      throw new Error(`Send button was not rendered properly.`);
    }

    await driver.findElement(By.id('email')).sendKeys("[email protected]");
    await driver.findElement(By.id('comment')).sendKeys("This is some text from our Selenium test.");
    await driver.findElement(By.id('sendbutton')).click();

  } finally {
    await driver.quit();
  }
})();
tests/email-send.js
Note: I left the headless option off for this first test. You’ll want to turn the headless option back on for the test run via our continuous integration environment.
You can do a local test by running
node tests/email-send.js
And checking the inbox we tested ([email protected]) manually:
Success! Though that’s part of the way there. Let’s assert that the email contents match via the API.
Read the Email via Mailsac’s API
Thankfully, Mailsac has not only a robust API but also lots of sample code inside the docs. We’ll lift the sample email read from here:
https://docs.mailsac.com/en/latest/services/reading_mail/reading_mail.html
Note that you’ll need to install a couple of dev packages to get this to work: dotenv and superagent. dotenv is needed in this instance since our tests don’t load the entire next framework and as such, we need a method to read your .env file. superagent is a small client-side HTTP request library for doing quick HTTP calls like the one we’re about to do.
So go ahead and add them to your developer dependencies:
npm install --save-dev dotenv superagent
And add our own text comparison to Mailsac’s sample code:
require('dotenv').config()

const superagent = require('superagent')
const mailsac_api_key = process.env.MAILSAC_API_KEY
const expected_message = 'This is some text from our Selenium test.'

superagent
  .get('<https://mailsac.com/api/addresses/[email protected]/messages>')
  .set('Mailsac-Key', mailsac_api_key)
  .then((messages) => {
      const messageId = messages.body[0]._id
      superagent
          .get('<https://mailsac.com/api/text/[email protected]/>' + messageId)
          .set('Mailsac-Key', mailsac_api_key)
              .then((messageText) => {
                  if (messageText.text !== expected_message)  {
                    throw new Error(`Message '${messageText.text}' does not match expected text '${expected_message}'`)
                  }
                  else{
                    console.log("Message comparison passed");
                  }
              })
  })
  .catch(err => {
      console.log(err.message)
			process.exit(-1)
  })
tests/email-read.js
Running the test locally should result in a passing test:
$ node tests/email-read.js
Message comparison passed
Of course, if we’ll run these tests many times we’ll also want to ensure that we delete the email contents after our successful read. Let’s add a cleanup step to our read test:
require('dotenv').config()

const superagent = require('superagent')
const mailsac_api_key = process.env.MAILSAC_API_KEY;
const expected_message = 'This is some text from our Selenium test.';
const testInbox = '[email protected]';

superagent
.get(`https://mailsac.com/api/addresses/${testInbox}/messages`)
  .set('Mailsac-Key', mailsac_api_key)
  .then((messages) => {
      const messageId = messages.body[0]._id
      superagent
          .get(`https://mailsac.com/api/text/${testInbox}/` + messageId)
          .set('Mailsac-Key', mailsac_api_key)
              .then((messageText) => {
                  if (messageText.text !== expected_message)  {
                    throw new Error(`Message to delete '${messageText.text}' does not match expected text '${expected_message}'`)
                  }
                  else{
                    console.log("API Read Op: Message comparison passed");
                    superagent
                    .delete(`https://mailsac.com/api/addresses/${testInbox}/messages/${messageId}`)
                    .set('Mailsac-Key', mailsac_api_key)
                    .then((messageResponse) => {
                        console.log(`API Deletion Op: ${messageResponse.body.message}`)
                    })
                  }
              })
  })
  .catch(err => {
      console.log(err.message)
      process.exit(-1)
  })
tests/email-read.js
Let’s add it to a test script and our workflow YAML file:
"scripts": {
    "dev": "next dev",
    "build": "next build",
    "start": "next start",
    "lint": "next lint",
    "external-tests": "node tests/external-login.js",
    "test": "node tests/button-render.js && npm run mail-tests",
    "mail-tests": "node tests/email-send.js && node tests/email-read.js",
    "e2e-test": "start-server-and-test dev <http://localhost:3000> test"
  },
package.json
Note that we added a run mail-tests script to our end-to-end testing.
Try your end-to-end script locally to ensure it works:
GitHub Action Test
Now that you have a working test on your local workstation, it’s time to push it up so GitHub Actions can start running your tests. If you haven’t already, read through the first article to catch up on GitHub Actions configuration and initialization.
As a reminder, this is our main.yml workflow file:
on: [push]

jobs:
  tests:
    runs-on: ubuntu-latest
    name: Run Selenium Tests
    steps:
    - name: Start selenoid
      uses: Xotabu4/selenoid-github-action@v2

    - uses: actions/checkout@v1
    - run: npm ci

    - name: Run end to end tests
      run: npm run e2e-test

    - name: Run external login test
      run: npm run external-tests
.github/workflows/main.yml
With all that said, let’s try and see if this email test sends an email on GitHub.
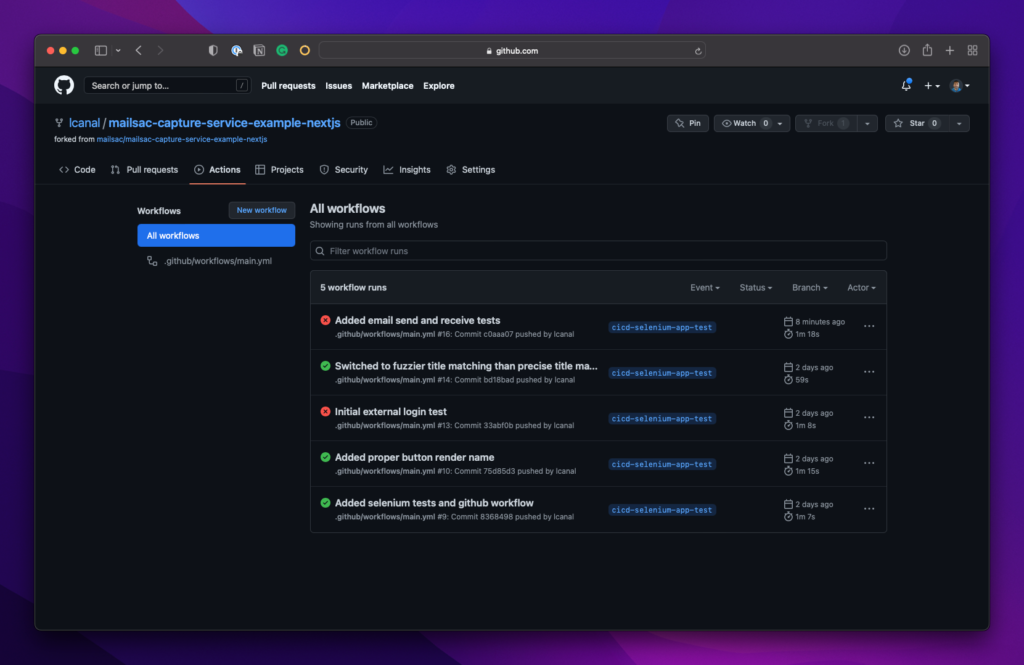
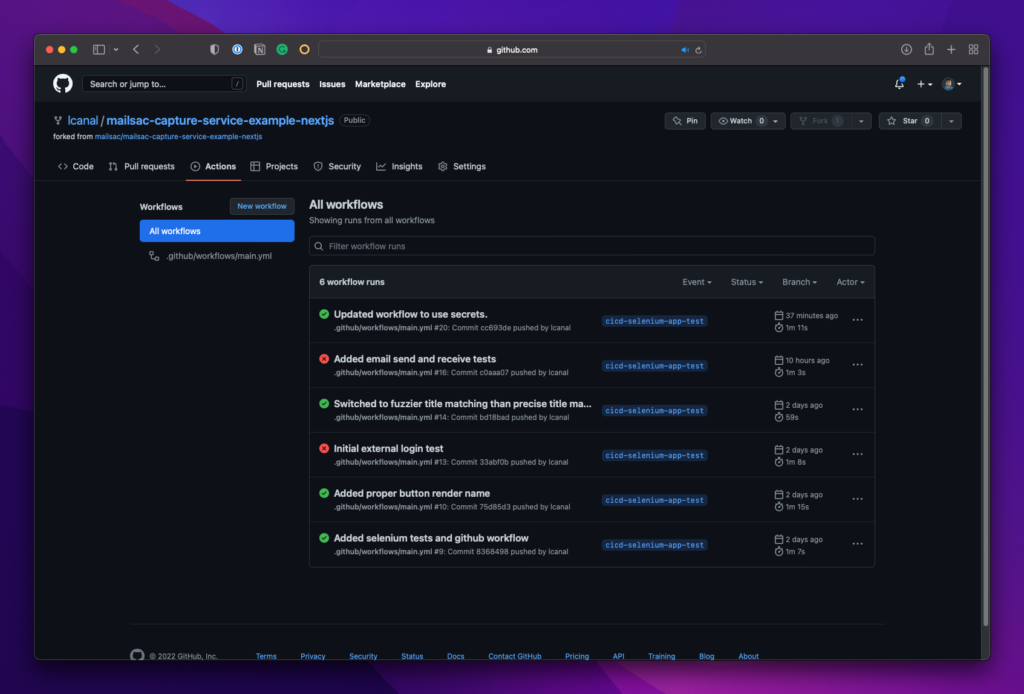
Do a git push and check your results on GitHub:
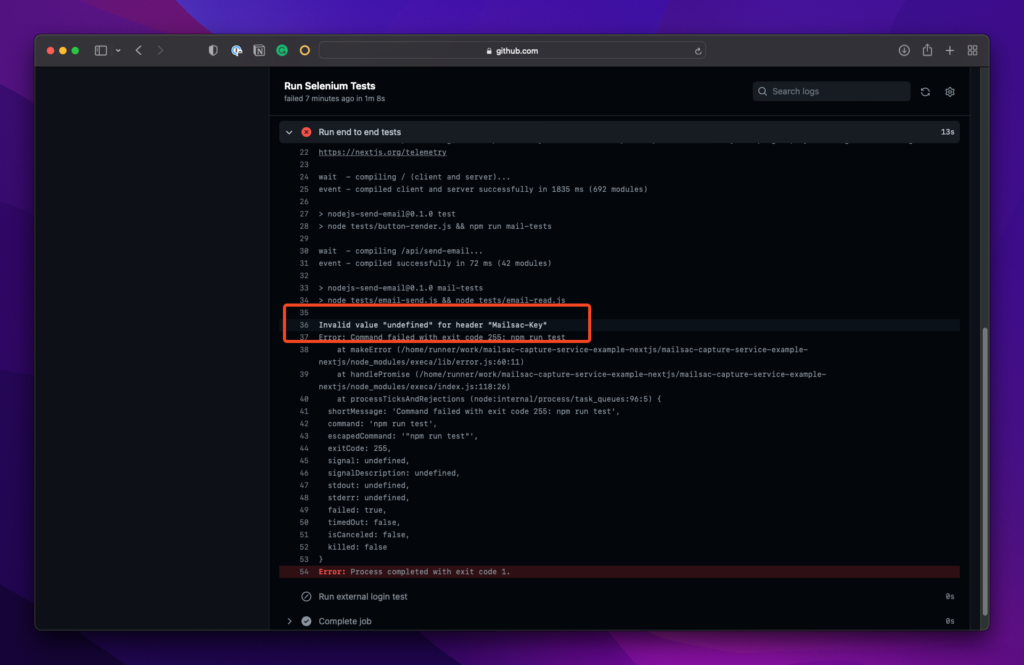
Looks like a failure. On closer inspection:
Ah, that’s right! We forgot to set our API keys at the GitHub level. Let’s go ahead and do that.
GitHub Actions Secrets
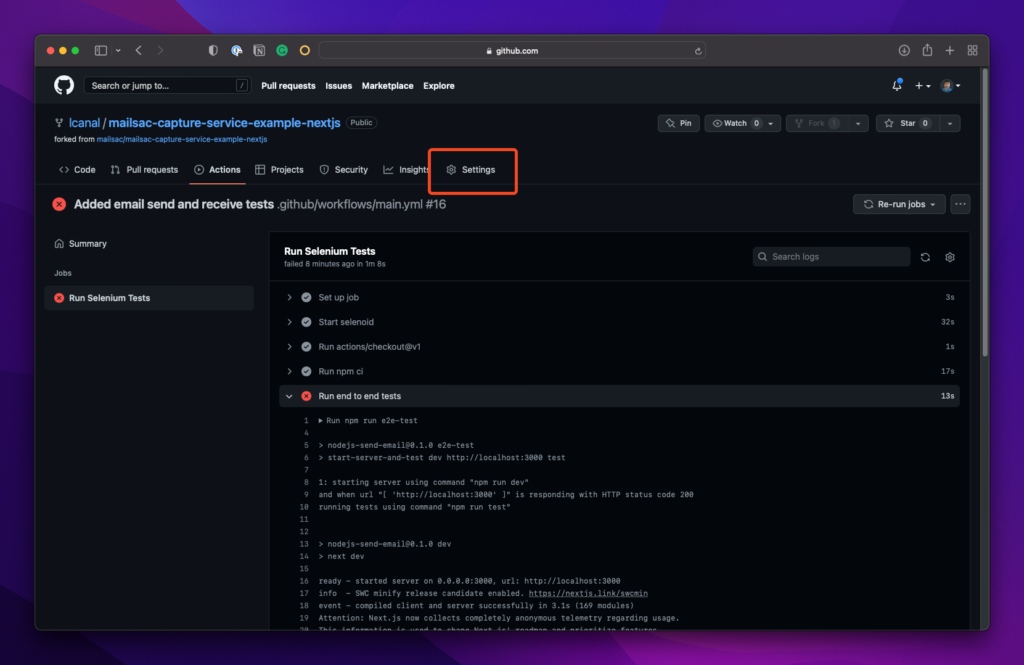
You can find it under Settings in your repo:
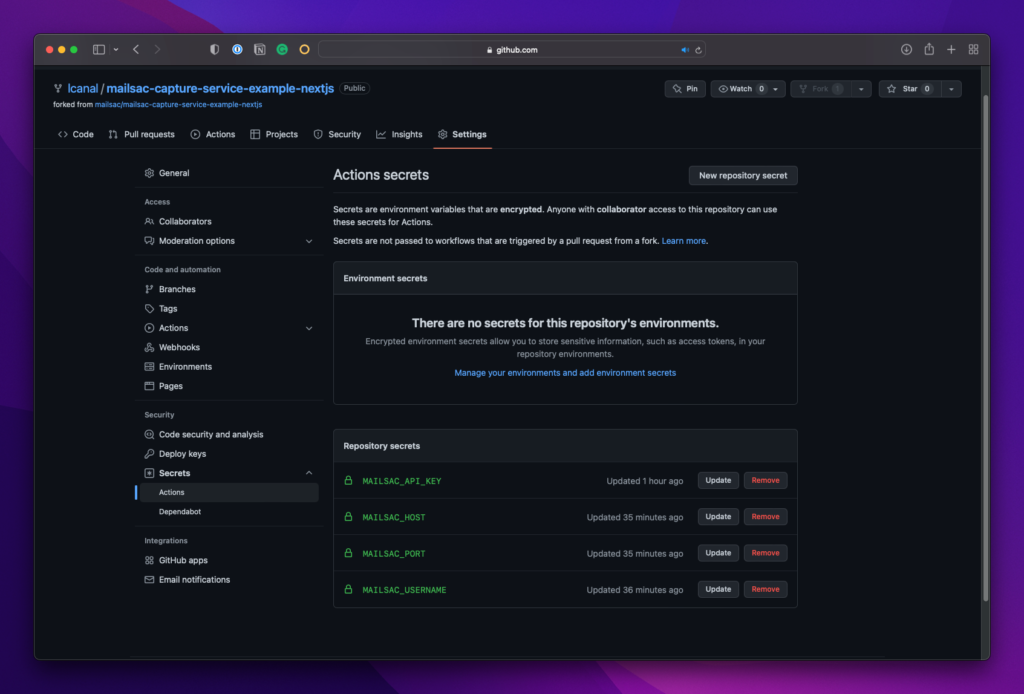
Then under Secrets → Actions click New repository secret
Add each secret that will be needed:
Finally, ensure you add it to the workflow file:
- name: Run end to end tests
      run: npm run e2e-test
      env:
        MAILSAC_API_KEY:  ${{secrets.MAILSAC_API_KEY}}
        MAILSAC_USERNAME: ${{ secrets.MAILSAC_USERNAME }}
        MAILSAC_HOST:     ${{ secrets.MAILSAC_HOST }}
        MAILSAC_PORT:     ${{ secrets.MAILSAC_PORT }}
.github/workflows/main.yml
Do a git commit and git push and see the results on GitHub:
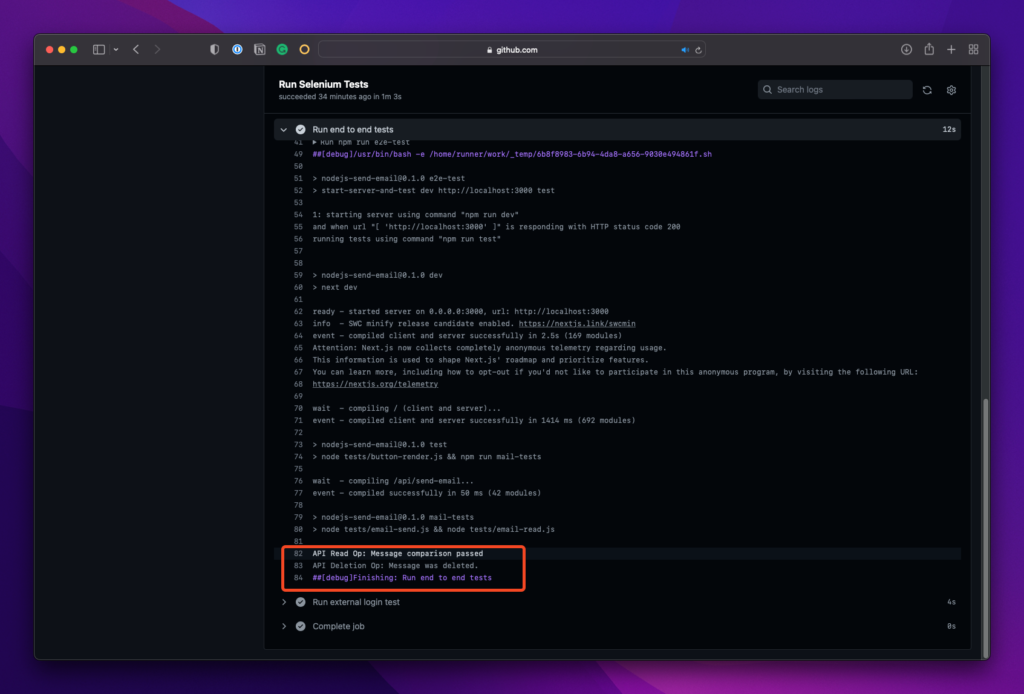
Success! You can check the details to ensure the API read and write options fire fired off:
Conclusion
GitHub Actions is a powerful CI/CD tool and we have only scratched the surface of its capabilities with Selenium. We’ve also shown the power of email testing and how you can ensure the contents of every email are intentional.
We hope you enjoyed the guide, and hope to hear from you on our forums or follow our other content on LinkedIn.


