This release focuses on improving team account management, inbox performance, and frontend reliability across the Mailsac web app.
Summary
New “elevate to root” permission for safer admin delegation
Inbox UI rewritten with improved pagination and clarity
Faster debugging tools and message analytics
MFA enforcement tightened for account security
Features
Elevate to Root User
Team users can now be granted an “elevate to root” permission. This allows a user to temporarily assume root-level privileges within their session without exposing root account credentials.
Use cases:
Safer offboarding (no shared root access to rotate)
Delegating admin tasks without sharing credentials
Elevation is session-scoped and requires re-authentication.
Individual Inbox Refresh
The inbox UI has been rewritten on the new frontend framework.
Improvements:
Faster, more complete pagination and message navigation
Clearer indication of public vs private inboxes
Reduced UI latency when loading large inboxes
General Improvements
Continued migration to the new frontend framework across multiple app pages.
Faster loading for inbound message debugging and message count charts.
Direct access to forwarded inboxes from the Enhanced Addresses list.
POP3 settings consolidated into the Enhanced Address Management screen.
Security & Fixes
MFA is now required, as an additional security step, to remove MFA from both team and root accounts.
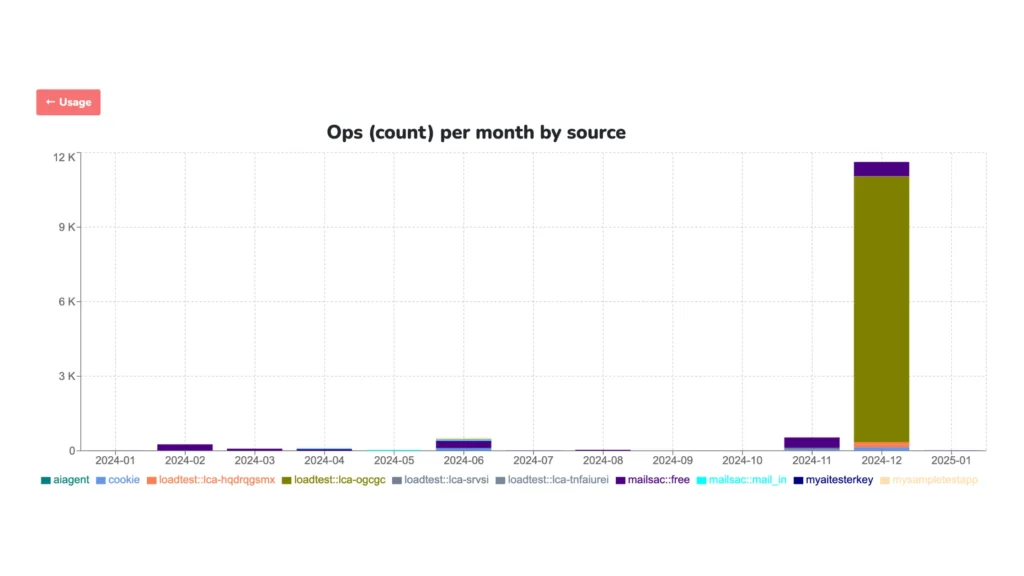
Fixed an issue where some inbound mail was not tracked correctly. As a result, Ops usage may increase for affected accounts.
Removed the spam feature due to low usage.
Upgraded frontend dependencies to address known security vulnerabilities.
Behavior Changes
Spam feature removed – account.disableSpam property no longer present.
We continue to enhance the Mailsac platform and have improved the performance of the throttling engine that is at the heart of our inbound email service. It helps us separate non-customer email from spam.
Login failures lock users out of your app. From forgotten passwords to broken authentication flows, a bad login experience is a nightmare for both users and support teams.
While a simple login screen seems easy to test, complexity grows fast when you introduce two-factor authentication (2FA), magic links, SSO, or team-based accounts. Can your tests keep up?
In this guide, we’ll show you how to automate 2FA email verification using Selenium and Mailsac. You’ll send a real email, extract the one-time password (OTP) programmatically, and validate authentication—ensuring your app’s login works flawlessly.
Selenium & Mailsac Prep
You’re already familiar with Selenium—after all, it’s a core tool for browser automation. (Fun fact: we’re a proud Selenium sponsor!)
Have you worked directly with WebDriver? WebDriver is what allows Selenium to control a browser just like a real user—clicking buttons, filling out forms, and navigating pages. For our automated 2FA test, we’ll use WebDriver to interact with the login flow, retrieve the OTP from an email, and complete authentication.
You’ll also need to install chromedriver by manually downloading it from Google or from your package manager. For example for macOS:
brew install chromedriver
Step 2: Sign Up At Mailsac for Email Testing
Mailsac provides disposable email addresses and an API to fetch incoming emails. We’ll use it to verify that a 2FA email is received and contains the correct code.
Why Use Mailsac?
Eliminate reliance on real email accounts → No need to clutter your inbox with test emails or use shared email accounts.
Prevents rate-limiting & spam issues → Disposable email addresses is the core feature and is extremely quick.
Automates email verification → You can fetch emails instantly via API or receive them over web sockets.
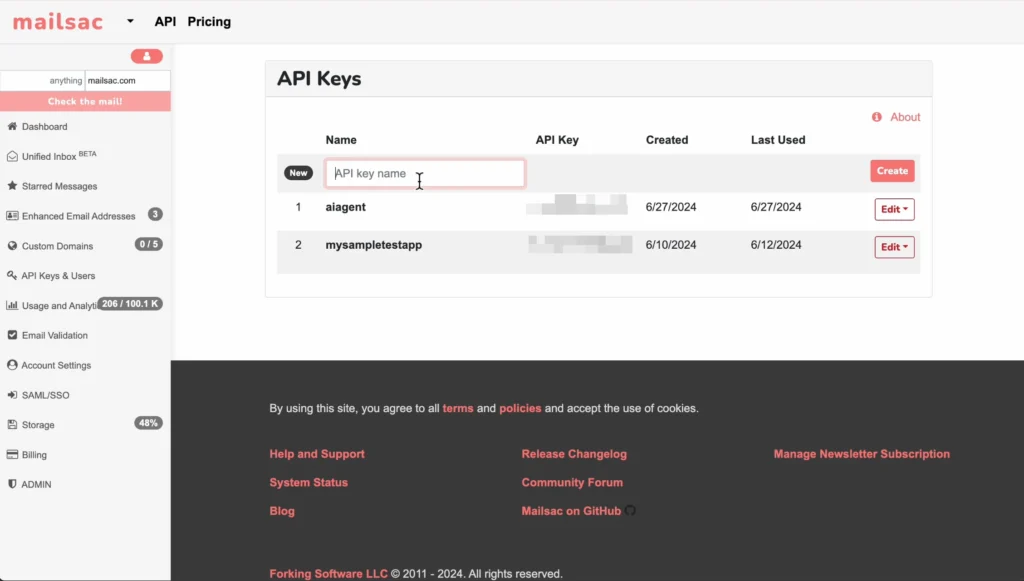
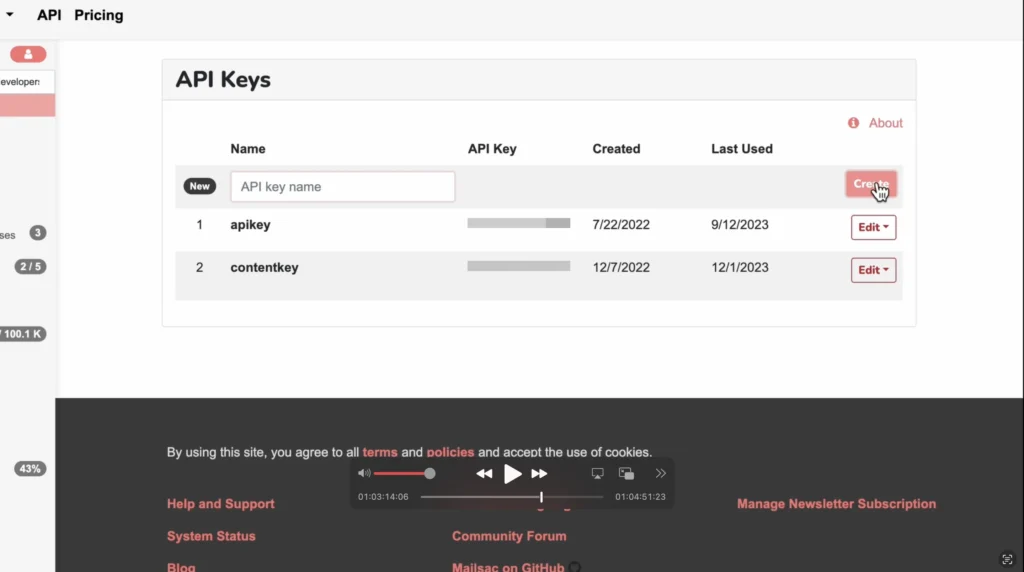
Navigate to your Dashboard then Credentials and API Keysto generate an API key.
2. Install Mailsac’s API Client
Install the official mailsac API client:
npm install @mailsac/api dotenv
3. Store Your API Key Securely
Never hardcode your API key. Use environment variables by creating a .env file:
MAILSAC_API_KEY=your-api-key-here
Now that we’ve installed Selenium and set up our Mailsac account, we can start writing our test script to automatically log in, retrieve the 2FA code, and verify it in our application.
Our Sample App
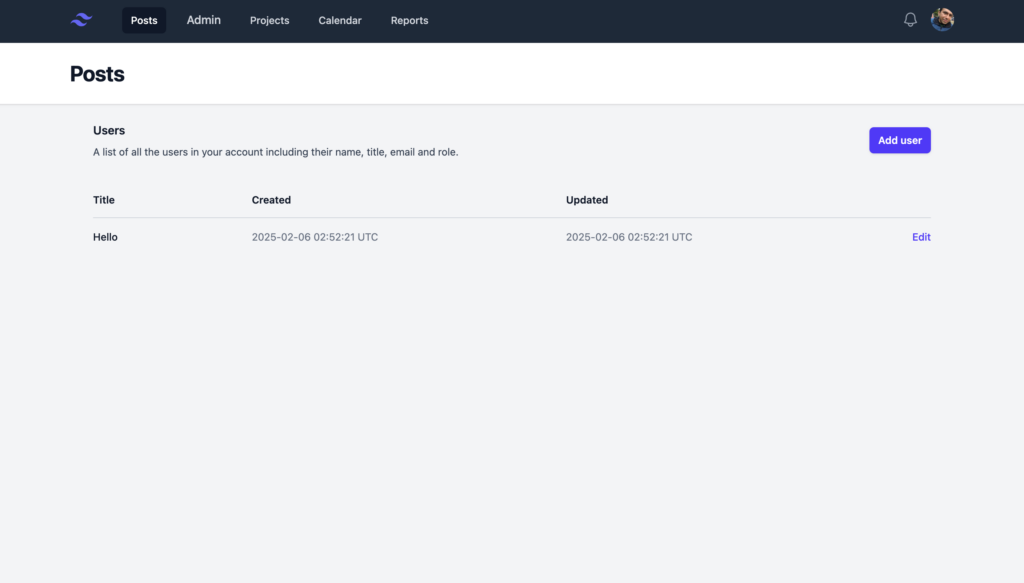
Let’s introduce our sample application that we’re going to test, called “Active Forums”. It’s an early version of a forum application. It’s got the basic logic of Sign In, the landing page that shows you all your posts, and the Admin Panel
Pages We’re Interested In Testing
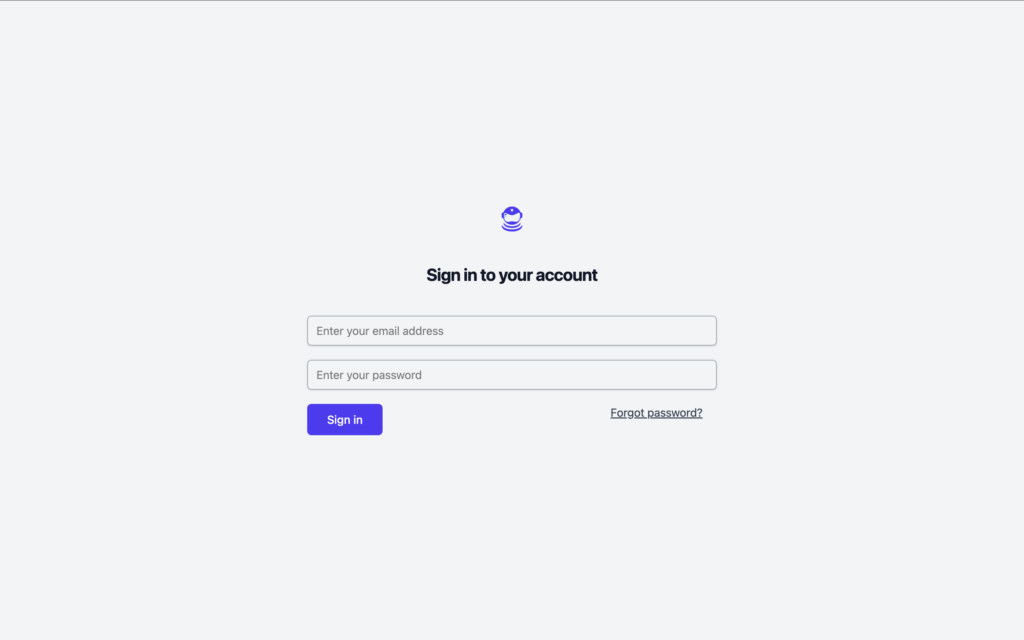
Sign In
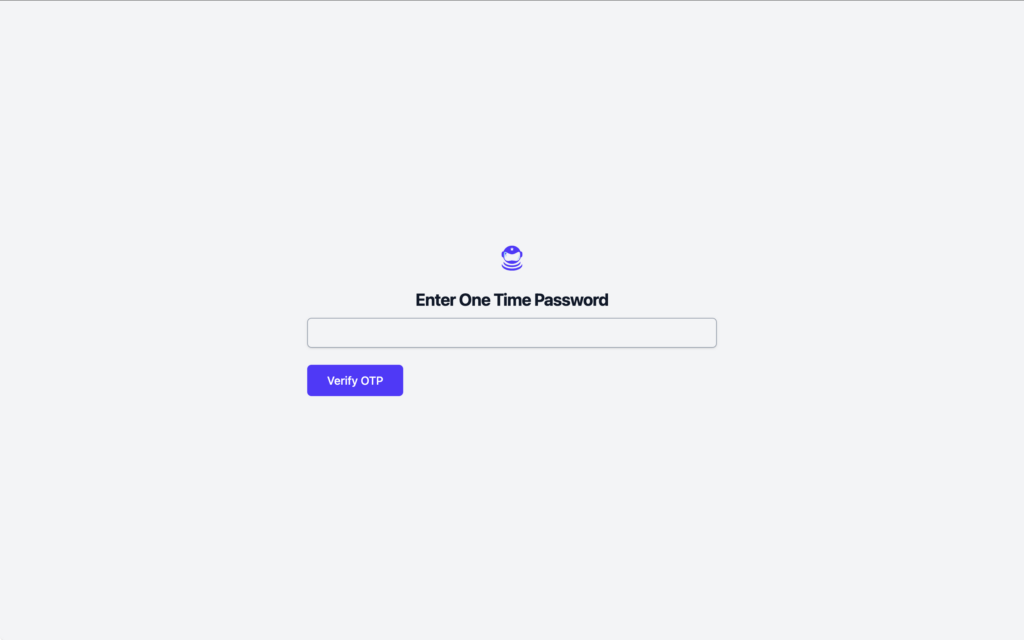
One Time Password
Landing Page
Automating The Entire Login Process
Let’s automate the process of logging in, retrieving the 2FA code, and verifying it.
Step 1: Automate the Login Process
Our first task is to navigate to the login page, enter the username and password, and submit the form.
1.1 Initialize Selenium WebDriver
const { Builder, By, until } = require('selenium-webdriver');
require('dotenv').config();
const { Mailsac } = require('@mailsac/api');

async function login(emailAddress,accountPassword) {
    let driver = await new Builder().forBrowser('chrome').build();
    try {
        await driver.get("http://localhost:3000/users/sign_in");
        await driver.findElement(By.id("email")).sendKeys(emailAddress);
        await driver.findElement(By.id("password")).sendKeys(accountPassword);
        await driver.findElement(By.id("sign-in")).click();

    } catch (error) {
        console.error("Login test failed:", error);
    }
    return driver;
}
Here we:
Open the login page.
Enter the incorrect username and password into the form fields.
Click the login button.
Enter the correct login details
Return the driver back for the 2FA check.
Step 2: Retrieve the 2FA Code via Mailsac API
Once the user is on the 2FA screen, we need to fetch the one-time code from the email inbox.
Now, we write a function to check the inbox and extract the 6-digit code from the email.
async function get2FACode(emailAddress) {
try {
console.log(`Checking inbox for: ${emailAddress}`);
// Fetch the latest messages from the inbox
const mailsac = new Mailsac({ headers: { "Mailsac-Key": process.env.MAILSAC_API_KEY } });
const results = await mailsac.messages.listMessages(emailAddress);
const messages = results.data;
if (!messages.length) {
console.log("No 2FA email received yet.");
return null;
}
// Get the latest message ID
const latestMessageId = messages[0]._id;
// Fetch email body
// const emailBody = await mailsac.messages.getMessage(latestMessageId);
const emailBody = await mailsac.messages.getBodyPlainText(emailAddress,latestMessageId,{ download : true });
// Extract 6-digit 2FA code using regex
const match = emailBody.data.match(/\b\d{6}\b/);
if (match) {
console.log(`2FA Code found: ${match[0]}`);
return match[0];
} else {
console.log("No 2FA code found in email.");
return null;
}
} catch (error) {
console.error("Error retrieving 2FA email:", error);
}
}
What This Does:
Checks the Mailsac inbox for a new email.
Extracts the latest email’s content.
Uses a regex pattern to find the 6-digit 2FA code inside the email body.
Step 3: Input the 2FA Code in the Login Form
Now that we have the 2FA code, we return to Selenium to enter it into the form.
async function enter2FACode(driver, emailAddress) {
let attempts = 0;
let otpCode = null;
// Polling for 2FA code with a maximum of 5 attempts
while (!otpCode && attempts < 5) {
otpCode = await get2FACode(emailAddress);
if (!otpCode) {
console.log("Waiting for 2FA code...");
await new Promise(resolve => setTimeout(resolve, 5000)); // Wait 5 seconds before retrying
attempts++;
}
}
if (!otpCode) {
console.error("Failed to retrieve 2FA code after multiple attempts.");
return;
}
try {
// Enter the 2FA code into the form
await driver.findElement(By.id("otp_code")).sendKeys(otpCode);
// Submit the form
await driver.findElement(By.name("commit")).click();
console.log("2FA code submitted, verifying login...");
// Wait for successful login redirect
await driver.wait(until.urlContains("/"), 10000);
console.log("Login successful!");
} catch (error) {
console.error("2FA verification failed:", error);
}
}
What This Does:
Retries up to 5 times to fetch the 2FA code from the email inbox.
If no code is found, waits 5 seconds before trying again.
Once the code is found, inputs it into the form and submits it.
Waits for the dashboard page to confirm successful login.
Step 4: Run the Full Automated Test
Now, we combine everything into a single test flow.
(async function testLogin2FA() {
const testEmail = "[email protected]";
const testCreds = "password123";
// Step 1: Log in
const driver = await login(testEmail,testCreds);
// Step 2: Retrieve and enter 2FA code
if (driver) {
await enter2FACode(driver, testEmail);
await driver.quit();
}
})();
Full main.js File
Here’s what our full file now looks like:
const { Builder, By, until } = require('selenium-webdriver');
require('dotenv').config();
const { Mailsac } = require('@mailsac/api');
async function login(emailAddress,accountPassword) {
let driver = await new Builder().forBrowser('chrome').build();
try {
await driver.get("http://localhost:3000/users/sign_in");
await driver.findElement(By.id("email")).sendKeys(emailAddress);
await driver.findElement(By.id("password")).sendKeys(accountPassword);
await driver.findElement(By.id("sign-in")).click();
} catch (error) {
console.error("Login test failed:", error);
}
return driver;
}
async function get2FACode(emailAddress) {
    try {
        console.log(`Checking inbox for: ${emailAddress}`);

        // Fetch the latest messages from the inbox
        const mailsac = new Mailsac({ headers: { "Mailsac-Key": process.env.MAILSAC_API_KEY } });
        const results = await mailsac.messages.listMessages(emailAddress);
        const messages = results.data;

        if (!messages.length) {
            console.log("No 2FA email received yet.");
            return null;
        }

        // Get the latest message ID
        const latestMessageId = messages[0]._id;

        // Fetch email body
        // const emailBody = await mailsac.messages.getMessage(latestMessageId);
        const emailBody = await mailsac.messages.getBodyPlainText(emailAddress,latestMessageId,{ download : true });
        // Extract 6-digit 2FA code using regex
        const match = emailBody.data.match(/\b\d{6}\b/);
        if (match) {
            console.log(`2FA Code found: ${match[0]}`);
            return match[0];
        } else {
            console.log("No 2FA code found in email.");
            return null;
        }
    } catch (error) {
        console.error("Error retrieving 2FA email:", error);
    }
}
async function enter2FACode(driver, emailAddress) {
    let attempts = 0;
    let otpCode = null;

    // Polling for 2FA code with a maximum of 5 attempts
    while (!otpCode && attempts < 5) {
        otpCode = await get2FACode(emailAddress);
        if (!otpCode) {
            console.log("Waiting for 2FA code...");
            await new Promise(resolve => setTimeout(resolve, 5000)); // Wait 5 seconds before retrying
            attempts++;
        }
    }

    if (!otpCode) {
        console.error("Failed to retrieve 2FA code after multiple attempts.");
        return;
    }

    try {
        // Enter the 2FA code into the form
        await driver.findElement(By.id("otp_code")).sendKeys(otpCode);

        // Submit the form
        await driver.findElement(By.name("commit")).click();
        console.log("2FA code submitted, verifying login...");

        // Wait for successful login redirect
        await driver.wait(until.urlContains("/"), 10000);
        console.log("Login successful!");
    } catch (error) {
        console.error("2FA verification failed:", error);
    }
}
// Main Test Logic
(async function testLogin2FA() {
    const testEmail = "[email protected]";
    const testCreds = "password123";

    // Step 1: Log in
    const driver = await login(testEmail,testCreds);

    // Step 2: Retrieve and enter 2FA code
    if (driver) {
        await enter2FACode(driver, testEmail);
        await driver.quit();
    }
})();
Now try running the whole login test:
node main.js
And just like that we now have an automated way to test outbound emails, logins, one time passwords and correct landing page location!
Automate Your 2FA Testing with Confidence
Login authentication is a critical part of any web application, and failing to test it properly can lead to frustrated users and costly support issues. By combining Selenium for browser automation and Mailsac for email-based 2FA verification, we’ve built a fully automated test that ensures your app’s login process works smoothly.
With this setup, your testing team can:
Programmatically retrieve real one-time passwords (OTPs) from email
Automate the entire login flow, including 2FA verification
Reduce reliance on manual testing and catch authentication issues early
This approach not only saves time but also improves the reliability of your authentication system. You can now integrate this script into your CI/CD pipeline to ensure every update maintains seamless login functionality.
Visit our forums if you have any questions. Now it’s your turn—try running the script, tweak it for your specific use case, and start automating your login tests today!
Email performance can make or break your app—especially during high-demand events like Black Friday sales, onboarding campaigns, or critical notifications. That’s why we’re excited to introduce our new Email Load Testing feature: a stress-testing tool designed to help you simulate real-world email loads quickly, efficiently, and affordably.
Now you can confidently validate your email systems without impacting production environments or breaking the bank. We’ll walk you through the essentials of email load testing and show you how to use a simple script to make the most of our new feature.
Why Use Mailsac’s Email Load Testing?
Traditional load testing often comes with challenges:
Expensive email credits for large-scale tests.
Limited metrics that fail to offer actionable insights.
Risk of production impact during testing.
We specifically focused on solving these problems. By isolating your tests with unique, disposable subdomains, it makes sure that you have:
Accurate, real-time metrics without interference in production.
No email storage concerns—Mailsac only counts and measures emails, we don’t store them.
Easy-to-use functionality that requires no prior experience with complex testing frameworks.
Getting Started with Email Load Testing
Setting up your first load test is quick and easy:
Log in to your Mailsac account and navigate to the Load Testing section.
Create a new load test. Assign it a name like “holiday-promo-test.”
Mailsac generates a unique subdomain for your test, e.g., test-load.loadtester.msdc.co. Any email sent to this subdomain will be tracked in real time.
This subdomain lets you simulate thousands of email deliveries without polluting your production environment.
A Sample Script for Load Testing
Let’s walk through a load test. Here’s an example of how a customer might simulate email traffic using our load testing feature. This script, written in node with nodemailer, helps you generate and send thousands of emails to your test subdomain.
const nodemailer = require('nodemailer');

// SMTP Configuration
const transporter = nodemailer.createTransport({
  host: process.env.SMTP_HOST,
  port: process.env.SMTP_PORT,
  auth: {
    user: process.env.SMTP_USER,
    pass: process.env.SMTP_PASSWORD,
  },
});

// Generate Random Emails
const generateRandomEmail = () => {
  const randomString = Math.random().toString(36).substring(2, 15);
  return `test-${randomString}@test-load.loadtester.msdc.co`;
};

// Send Email Function
const sendEmail = async (index) => {
  try {
    const mailOptions = {
      from: process.env.FROM_EMAIL,
      to: generateRandomEmail(),
      subject: `Test Email #${index}`,
      text: `This is email number ${index}`,
    };

    await transporter.sendMail(mailOptions);
    console.log(`Successfully sent email #${index}`);
  } catch (error) {
    console.error(`Failed to send email #${index}:`, error.message);
  }
};

// Run Load Test
const runLoadTest = async () => {
  const totalEmails = 500; // Number of emails to send
  for (let i = 0; i < totalEmails; i++) {
    await sendEmail(i);
  }
};

runLoadTest();
How This Script Works
Generate Random Addresses: Emails are dynamically created using your test subdomain (e.g., test-load.loadtester.msdc.co).
Send in Batches: The script sends emails sequentially, allowing you to control the pace of your test.
Real-Time Metrics: As emails arrive, Mailsac tracks delivery rates.
Get Insights from Mailsac’s Dashboard
Once your test is running, log into the Mailsac dashboard to monitor:
Total emails received.
Delivery success rates.
Any failures.
Time-based performance analytics.
These insights help you pinpoint weaknesses in your email infrastructure, allowing you to make improvements before scaling up.
What’s Next for Your Email Testing?
Our Email Load Testing is designed to help you stress-test your email systems with ease, but it’s only the beginning. Here are some ways to take your testing further:
Simulate peak loads: Experiment with higher volumes to mirror real-world events like product launches.
Vary email content: Test different subject lines, body content, and attachments to ensure consistent performance.
Collaborate with your team: Use shared subdomains to make testing easier across departments.
Remember, Mailsac’s Email Load Testing is designed for manual or semi-automated testing scenarios—not for full CI/CD integration. This keeps the focus on controlled, actionable insights.
With Mailsac, you can confidently validate your email systems without unnecessary complexity or expense. Ready to see it in action? Sign up today and let’s make email testing smarter, faster, and more reliable.
We are excited to announce upgrades to the Mailsac Platform, recently deployed in November 2024.
Load Testing Feature
Mailsac is the first QA Disposable Email Platform which allows Load Testing or Burn Testing of SMTP sender servers. You can safely send enormous amounts of test email to Mailsac after creating a Load Test Subdomain in the Mailsac Dashboard. When we receive these emails to a special subdomain, they are not subject to the (already high) throttling limits of the main platform. Note that emails are not saved/indexed as normal, so this is a feature specifically for testing your capacity to send high volume email campaigns.
More tutorials for Load Testing email will be coming soon.
Improved Account Analytics Performance
We overhauled the backend systems for usage and analytics. You may have noticed sluggishness in the past on these features, but that should be gone for good. There’s also an updated user interface for debugging inbound mail and webhooks.
Today, we’re tackling a big question: With the rise of code generators and AI that can make UI elements based on a single drawing, will AI take your software testing job?
The short answer is no. Today we can safely tell you that no, AI won’t take your job. Instead, we think it will enhance the way you work. Let’s see how we can make AI a powerful ally for software testers.
Role of AI in Software Testing
We like to think of AI in the testing world’s context as a controlled chaos maker. We can simulate some parts of being human to introduce some unpredictability in our tests and see if our app mitigates against the chaos.
Instead of fighting AI, let’s embrace it. One of the ways we can do that is if we can have it write test cases for us, execute it, then tell us if it passed or not.
We can then easily move those generated tests to a framework like cypress or to a continuous integration environment like GitHub Actions.
So for the rest of the article, we’ll show you how you can have ai make a test case that:
Generates and sends an email.
Reads the contents of said email from the user’s inbox.
Ensures that contents of 1 and 2 are the same.
To be safe and not risk sending any emails out to customers, we’ll use Mailsac and its API.
Making the Assistant
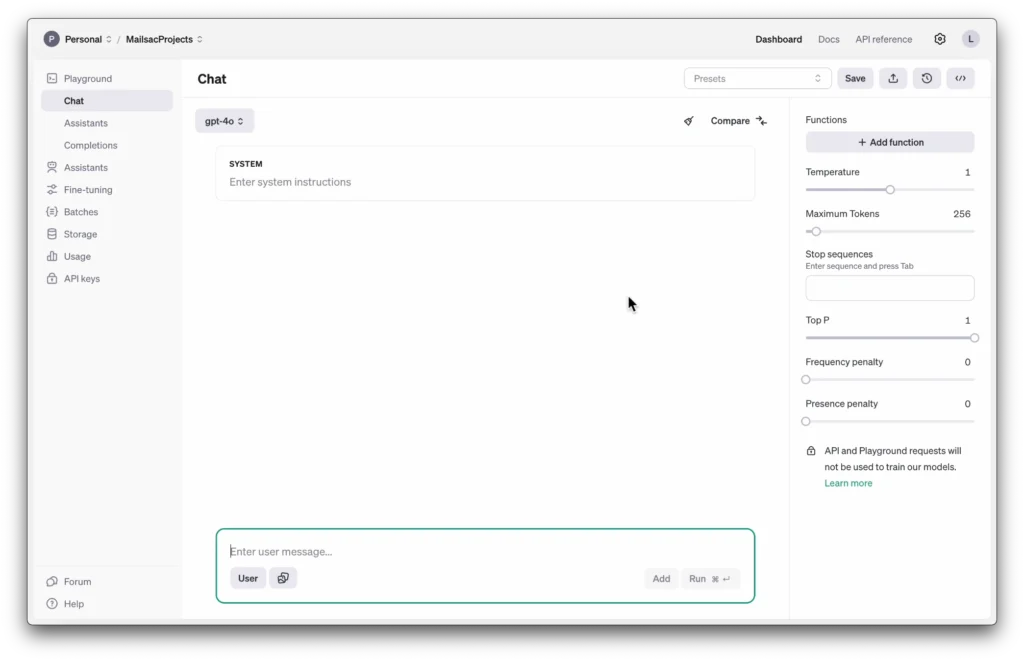
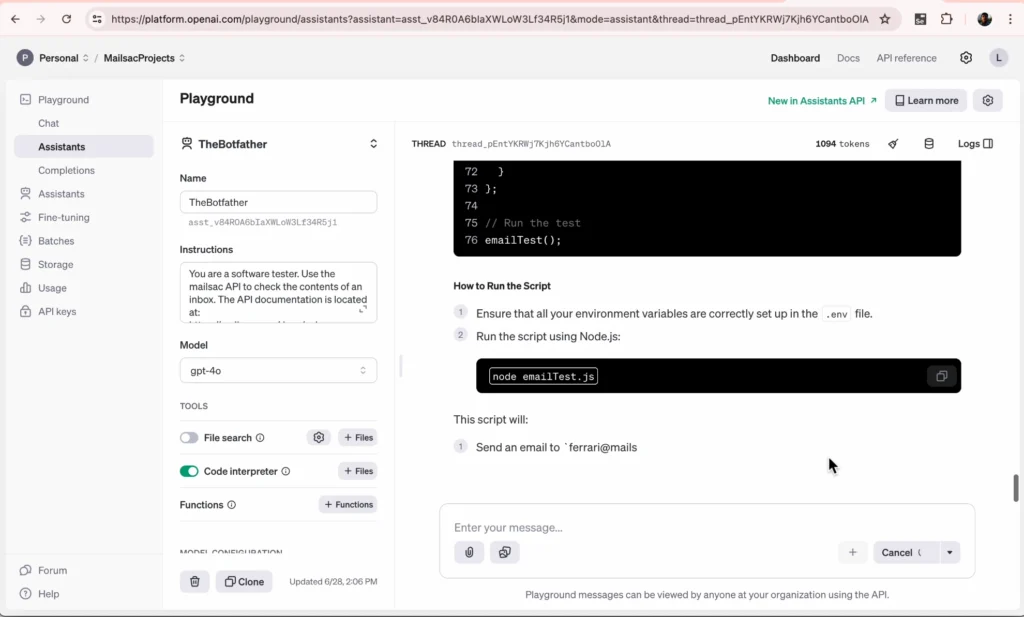
So for this walkthough we’re going to be using OpenAI’s “Assistant” feature. Assistants are a little bit more of a halfway point between the chat AI we all know, and an AI agent that is more autonomous.
We want to give this AI the ability to generate and run some code and read files, but not necessarily make any autonomous decisions.
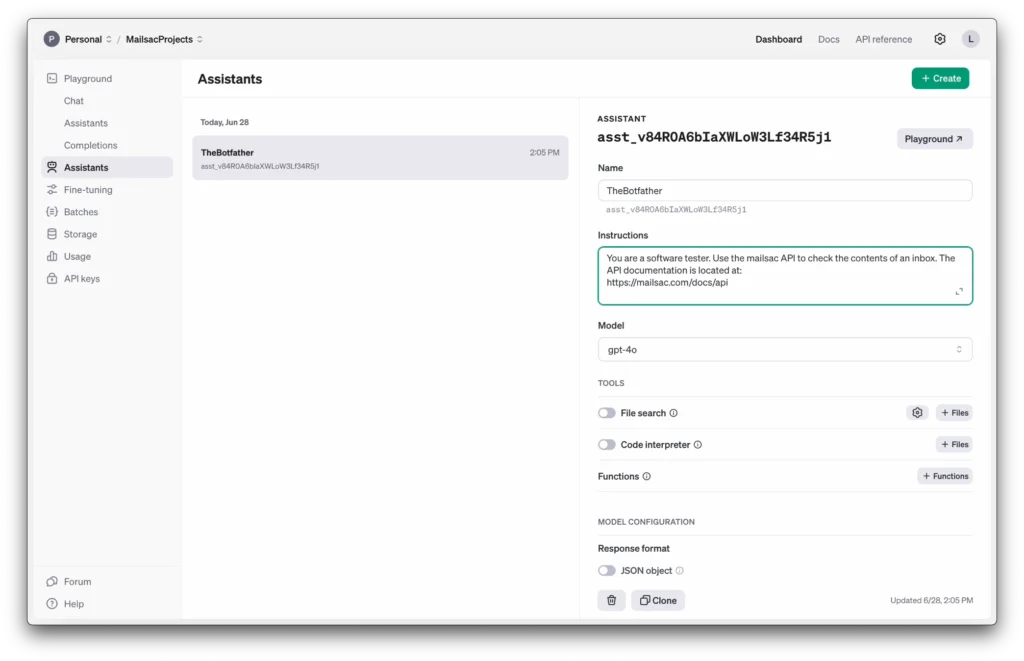
For the instructions we’ll give it some system prompts to let it know under what context it should be operating under.
We’ll use the latest gpt-4o model and enable the code interpreter tools. That should allow it to read, run and execute some code for us.
Now let’s go ahead and start generating our test cases.
We’ll use the prompt
You are creating a code test that will return true of false if a certain criteria passes. The language for > all tests should be in javascript. Use dotenv for your API keys.
The criteria is:
Generate an email message and send it via nodemailer using google’s SMTP servers. Send it to [email protected].
Wait 2 seconds for the email to send from Google then use the mailsac API to check the subject and content of the email.
Make the test pass if it matches what was sent in 1 and fail if it doesn’t match.
Keep in mind that you can easily tweak the SMTP to use your own service. We’ll stick with Google’s as its the most accessible for this walkthrough.
Generating the Test Case
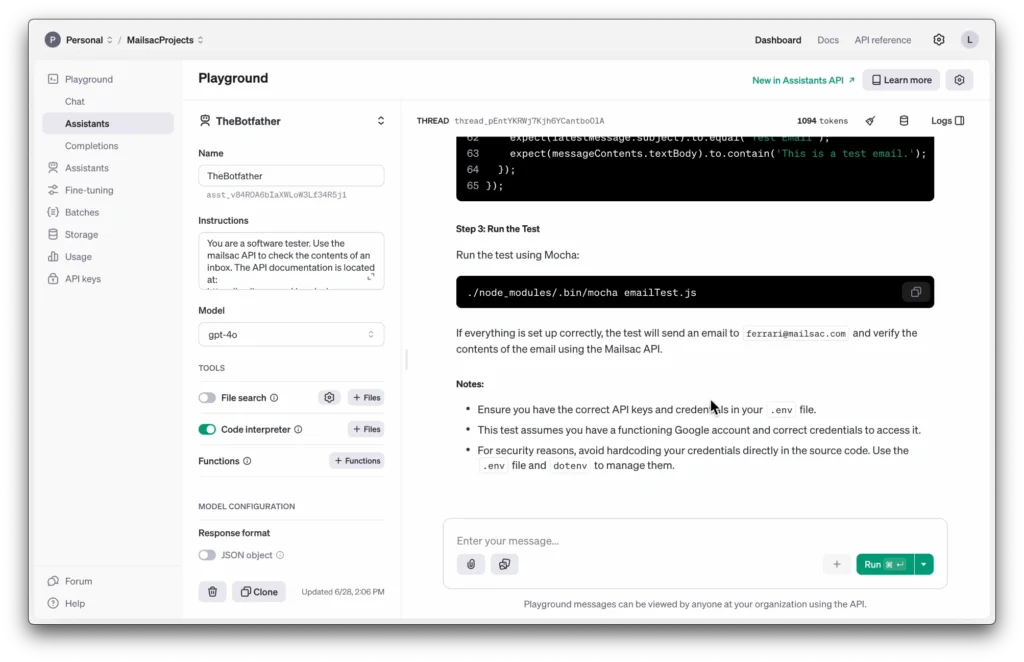
Fire it off to the AI Assistant and let it generate the test case. In this run it generated a mocha test for me. In previous iterations it didn’t generate a whole mocha test so I’ll ask it to just use node.
Generated the results with mocha.Removing Mocha and just using default node.
As you can see it pretty much walks you through the whole project creation process. Let’s go ahead and do our setup and install.
Now copy all of your keys and email onto the .env file.
Let’s start working through the code itself
Code
Looking through the code it looks fine, with 2 exceptions: It needs to be guided on the API endpoint (to use /api/text instead of /api/messages) and it the object retrived is the text itself, so we can remove the nonexistant child textBody
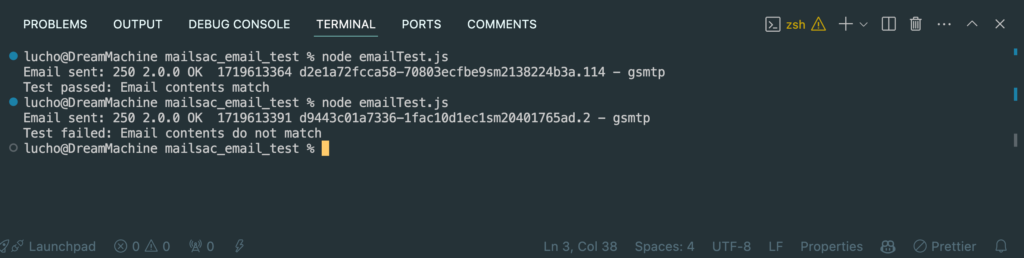
Now let’s go ahead and run the test.
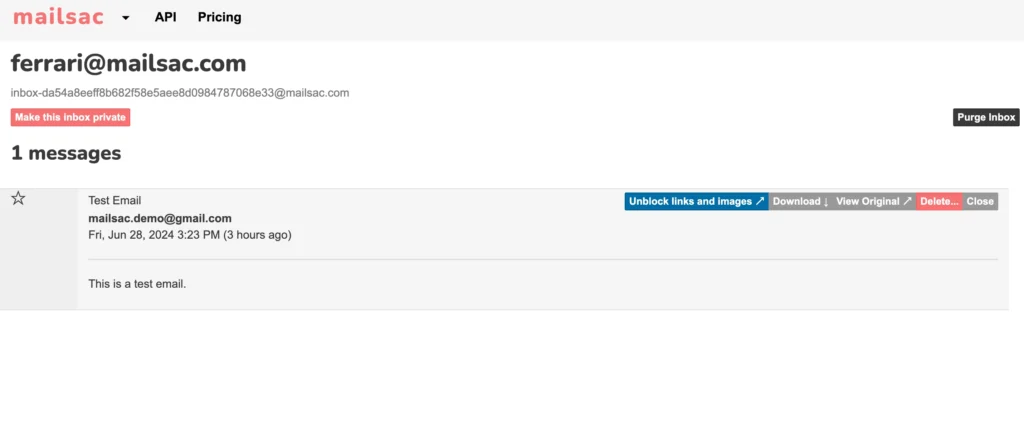
Check on mailsac to visually make sure an email was sent.
You can even make the test fail on purpose to ensure it’s working as intended.
It works!
Extending AI
From here it’s easy to incorporate these kinds of tests into specific continuous integration frameworks of your choice.
You could use cypress and work with existing libraries or an existing framework to run your tests.
Or you could use GitHub actions to fully run your now AI generated tests in the cloud. We have a guide showing you how to do just that.
Conclusion
As you can see it still took a human element to know what to want to test, frame it, and even tweak the AI’s output a bit to make sure that what it was generating made sense.
Tester’s aren’t going anywhere anytime soon, especially if you leverage AI to do the work for you while you focus on whats important to test and why.
Developing and testing an application is difficult enough without the stress of GDPR, CAN-SPAM, accidental information leak, etc. But it doesn’t have to be.
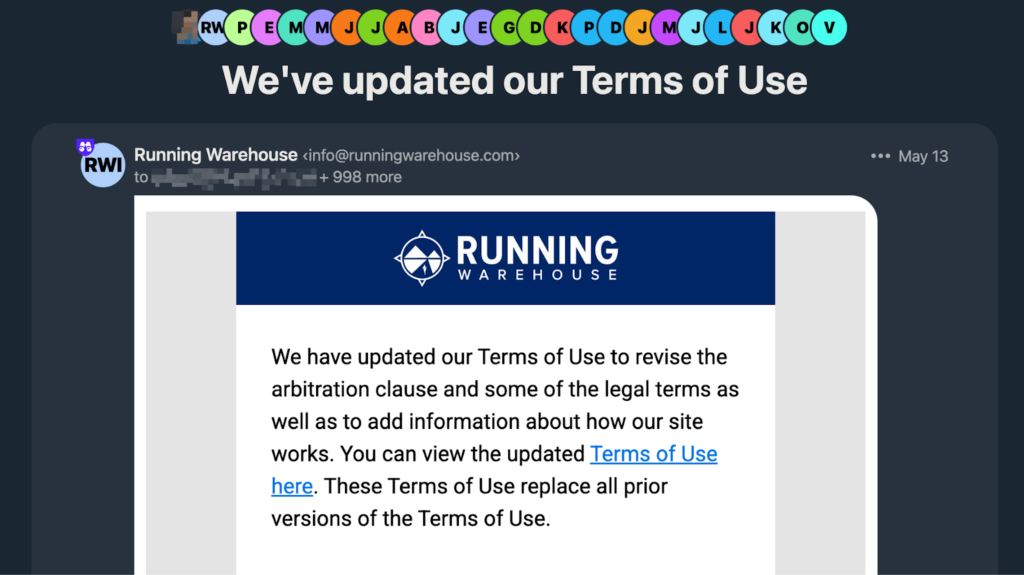
In this article I’ll walk you through how our email platform could’ve helped prevent Running Warehouse from exposing thousands of their customer’s emails.
Background on the Running Warehouse Incident
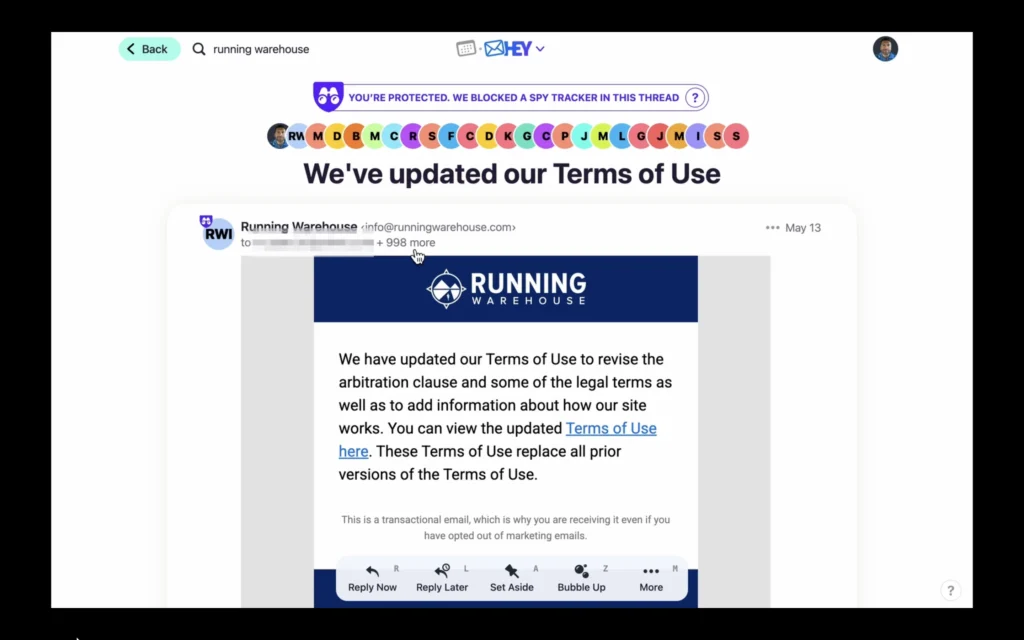
Now, this isn’t meant to poke fun at a company’s mistake but really to highlight just how easy these mistakes are to miss. Last month, I received two emails from “Running Warehouse” about an update to their terms of service. Nothing really unusual at first glance… Until you notice that about 1000 other customer’s email addresses had been sent along in the CC field. And to add even more insult to injury, they did this TWICE. So now I have a list of about 2000 of Running Warehouse’s customers that I’m sure the customers themselves are not happy about.
Really not a good look for a company who could be facing a class action lawsuit for a previous data breach back in 2021.
So let’s look at the implications of this easy to do mistake:
Company reputation lost via social media, youtube videos about you, forums, etc.
Prevent these errors with Mailsac
Obviously no company wants that! This is where mailsac steps in. We help prevent these kinds of easy mistakes, but at the application level. We have a set of features where you can hook up your continuous integration with our API to ensure the email you want to send is the one the recipient actually received.
So let’s walk through how we’d prevent this if this email was coming from our application.
Technical Deep-Dive
Here’s what we’ll do:
Setup a sample application that is meant to simulate sending emails.
Setup our Mailsac API Key.
Send a sample email.
Use the API to ensure our cc and email fields match what we sent.
Let’s get started.
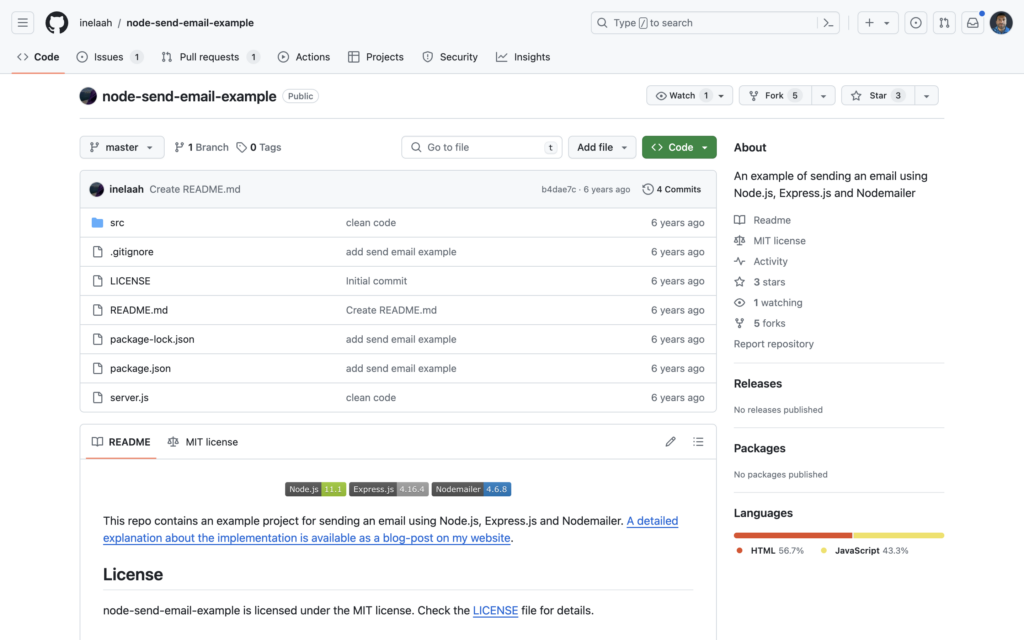
Sample Application
To stand in place of your application, we’ll use this dead simple node app whose sole purpose is to just send an email based on what you place in a form.
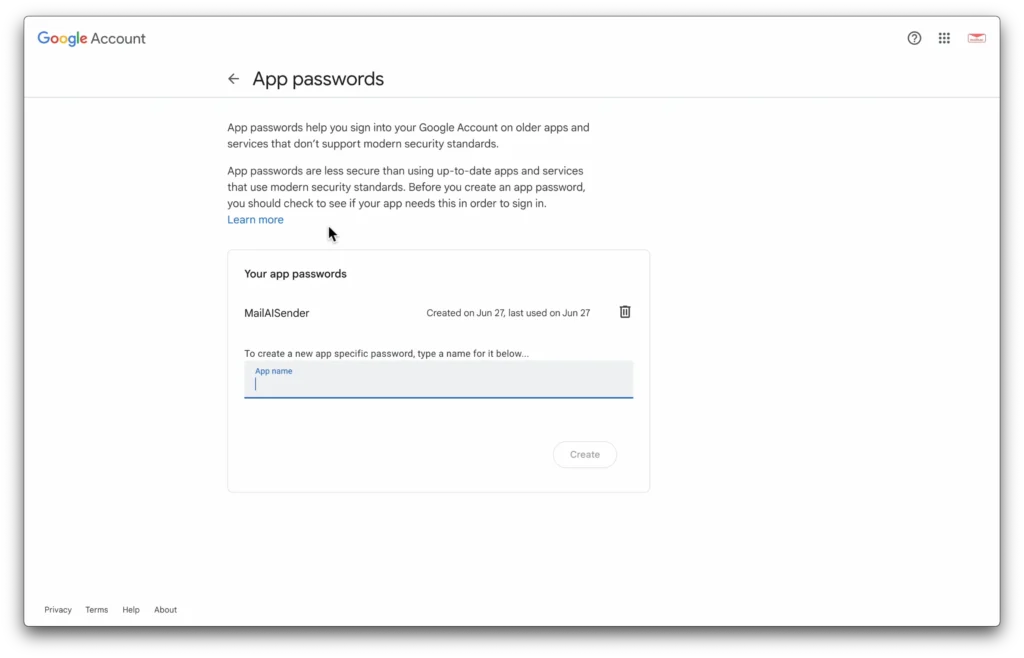
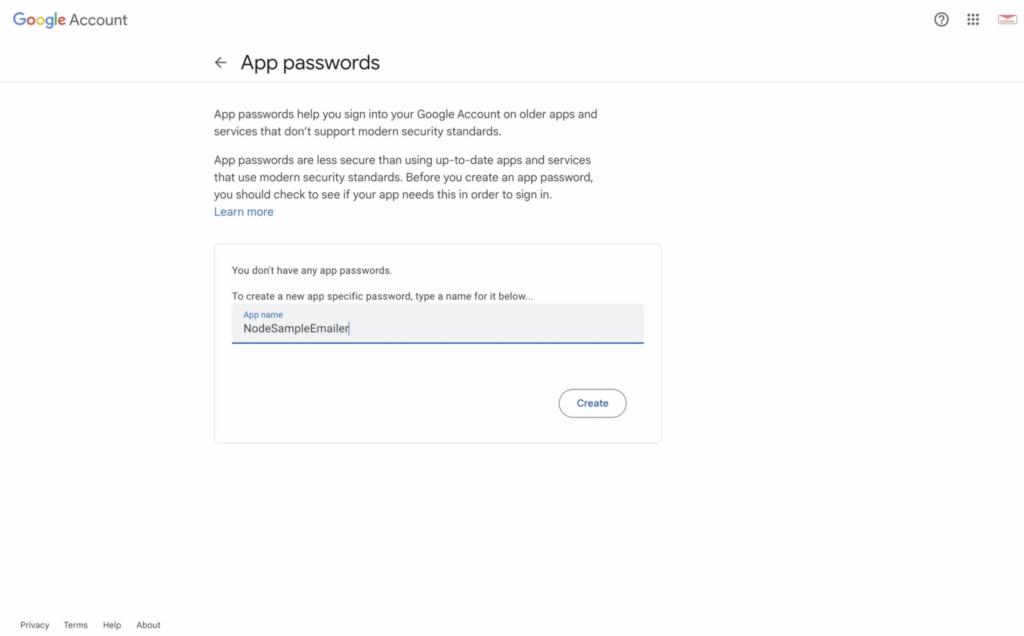
To simulate our email service API key, we’ll use our Application Key we generated for our gmail account. You can do this too if you want to step through this part. You can find it under your Google account -> security -> 2 FA -> App Password or just search for app passwords.
Add your credentials in the config.js file directly.
Again, while we embed the code here, you should really use a dot-env library.
Most importantly, for our example here, let’s use a mailsac temporary address. We have ad hoc inbox creation abilities so for now, let’s say we’ll send it to [email protected]
Fire up the app
The App Password Page
Setup our Mailsac API Key
Before we fire off an email, let’s add some quick code to check whether what we send is the same or not once it’s received.
  await setTimeout( async () => {
        const mailsac = new Mailsac({ headers: { "Mailsac-Key":  process.env.MAILSAC_API } })
        const results = await mailsac.messages.listMessages("[email protected]")
        const messages = results.data;
        if (messages[0].cc.length <= 0){
            console.error("This email has no CC. That's Good!")
        }
        if (messages[0].subject === req.body.subject){
            console.error("This has the correct subject. That's Good!")
        }
      }, 1000);
Normally we’d place it in an .env file, but for our purposes here, we’ll just place it directly in the headers.
Send Sample Email
Alright now let’s fire this up and fire off an email
Let’s make the content and subject something specific like:
Subject: This email is intended only for emailcontentcheck
Content: Hey, this email is strictly for [email protected]. No others on cc field.
Fire it off
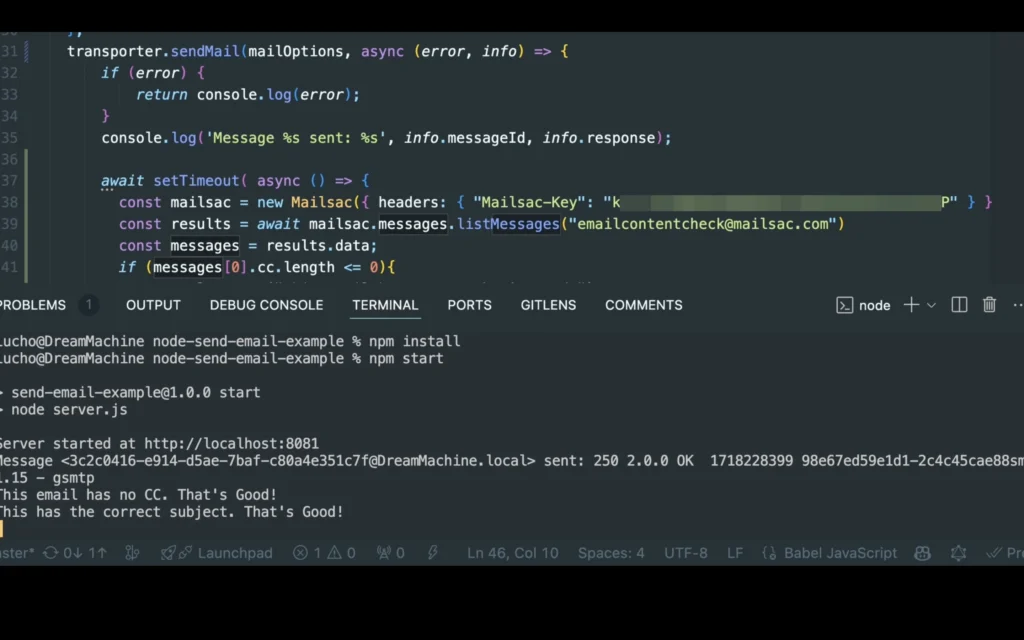
Wait for the check to fire off and print out comparison / success
Showing a successful email cc check.
Use the API to ensure our cc and email fields match what we sent
Right after our code fires off, it should print out the message comparison result. But now, let’s make sure our CC fields are also empty
      await setTimeout( async () => {
        const mailsac = new Mailsac({ headers: { "Mailsac-Key": process.env.MAILSAC_KEY } })
        const results = await mailsac.messages.listMessages("[email protected]")
        const messages = results.data;
        if (messages[0].cc.length <= 0){
            console.error("This email has no CC. That's Good!")
        }
        if (messages[0].subject === req.body.subject){
            console.error("This has the correct subject. That's Good!")
        }
      }, 1000);
We’re even throwing in a subject line check. You can check out the full API documentation to see how you can check for empty BCCs, content checks, and more.
Fire it off again and enjoy having an automated way test your email content, cc fields, and more!
Wrap Up
Finding the right words to use in an email is already hard enough, don’t complicate it by worrying about whether the email went through, if it works right, if it accidentally cc’s people, etc.
Just let mailsac handle the double checking for you.
Email is a crucial communication tool for businesses, even in 2024. It’s simple and effective. But in its simplicity we can find ourselves complacent in how we use it. Or even who we send our emails to.
In this article, we’ll examine five real-life case studies where emails went wrong and caused significant problems for the organization that sent it. From exposing private information to damaging a company’s reputation, these examples highlight the potential risks of email errors. By understanding these incidents, businesses can learn the importance of proper email management and take steps to prevent similar mistakes. These case studies serve as a reminder that attention to detail is essential in all aspects of communication.
Case Study #1 – HBO Max’s “Integration Test Email” Incident
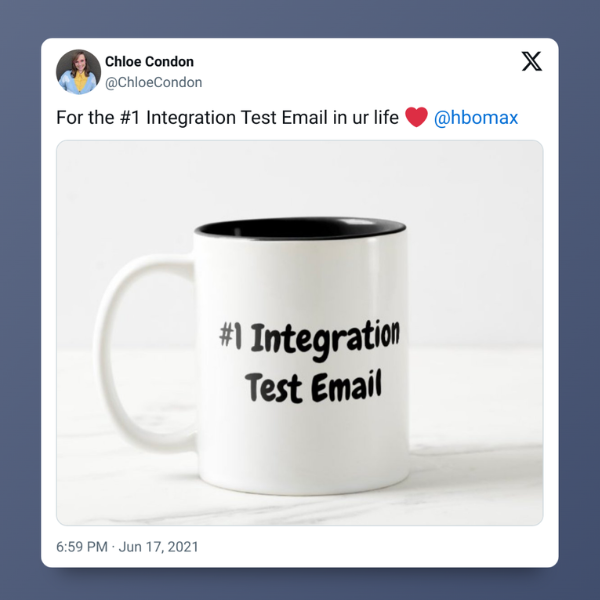
In June 2021, HBO Max accidentally sent an “Integration Test Email #1” to a large number of its subscribers. As you can guess, the email was meant for internal testing but mistakenly went out to real customers. The incident caused widespread confusion and snark on social media. Some people pointed out the optics of mistakenly sending out an email to your entire client base, but most took the email fail in jest:
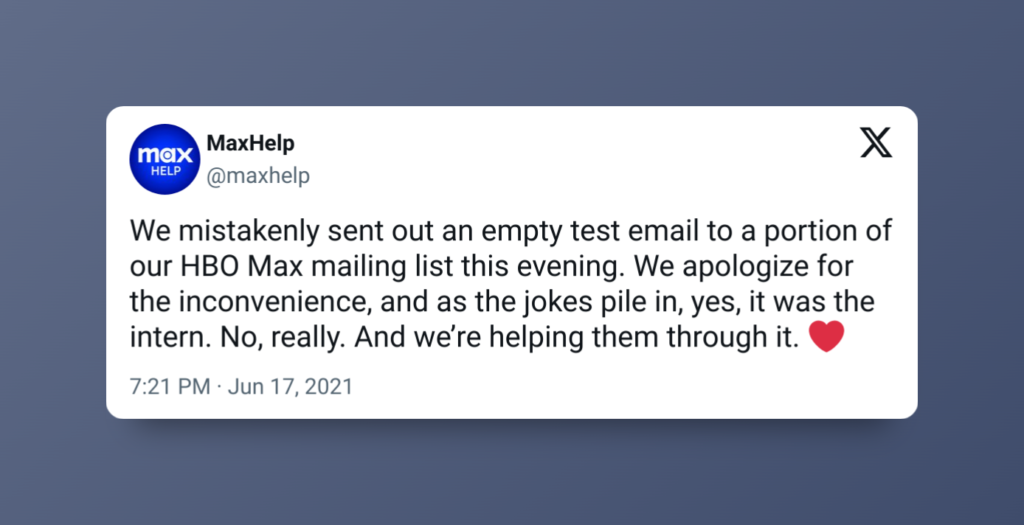
Hilariously, the official HBO Max twitter account had this explanation:
We don’t blame the intern, but we do cast some judgment on their complete lack of email service testing! Using disposable email addresses for internal testing could have prevented this. But hey, we did at least get some genuine entertainment.
Case Study 2 – Running Warehouse CC vs BCC
Sadly this case is not as harmless. On May 2024 RunningWarehouse, a discount shoe seller, sent out what should have been a routine email about updating their terms of service.
As you can see, this wasn’t just sent to a single customer. While not the entire customer list, approximately 999 customers is pretty indicative of an email testing batching failure. And it didn’t go unnoticed either, as there was at least one 30 post thread on arguably the internet’s largest running forum.
The issue is still relatively fresh as of this writing, but it’s safe to assume that Running Warehouse did not intend to leak 1000 of its customer’s email addresses to each other due to someone mistaking CC vs BCC. And even more seriously, it could even be a violation of GDPR under “Sharing Email Addresses Without Consent” according to GDPR’s Data Breach Guidelines.
Case Study 3 – University Backtracks Acceptance Letters
In January 2019, the University of South Florida St. Petersburg mistakenly sent acceptance emails to nearly 680 applicants, although only 250 had been accepted. As you can imagine this caused confusion, disappointment, and reputational damage to the university. The affected students and their families were left feeling misled, and the university had to invest considerable time and resources to address the fallout from the erroneous communication.
You may not be shocked to hear that this isn’t the first time this has happened, as Columbia University also accidentally sent 270 emails to students who had not been officially accepted.
These cases are a clear cut impact of email errors on institutional credibility and the importance of systematic verification before sending mass emails. Systems sending out emails absolutely need to ensure that the emails they intend to send are 100% accurate.
Case Study 4 – Australian Leaks Citizen Emails
In September 2020, an employee at Australia’s Department of Foreign Affairs and Trade (DFAT) accidentally exposed the personal details of almost 3,000 citizens by not using the BCC field in an email. This revealed the email addresses of Australians stranded abroad due to COVID-19 travel restrictions. The mishandling of this sensitive information led to major privacy concerns and required immediate action, such as attempting to recall the email and asking recipients to delete it.
While not directly tied to a system, temporary email accounts could be used in place to ensure the intended audience and message gets to its audience intact.
Case Study 5 – Serco Accidentally Shares Contract Tracers
In May 2020, Serco, a business services and outsourcing company, accidentally exposed the email addresses of nearly 300 newly recruited COVID-19 contact tracers by using the CC field instead of BCC. This breach of privacy led to concerns about the security of personal data and put the company’s data protection practices under scrutiny. Serco apologized and announced that they would review and update their procedures to prevent similar incidents in the future.
Yet another case of manual implementations of email lists without temporary email addresses, email outbound trapping services, or message integrity verification (ie, only 1 person in the to field, nothing in the cc field).
Stop Customer Data Leaks & Company Reputation Hits With Mailsac
We offer several benefits that can help prevent incidents like the ones described above:
Enhanced Security: Temporary emails protect more than just attacks and spam. By using a disposable email address, you can send test emails either manually or via your system to ensure the message arrives exactly as intended.
Privacy Protection: Mailsac helps keep personal and sensitive email addresses private. This is especially useful for companies conducting internal tests or handling sensitive information.
Minimized Clutter: Using temporary emails for one-time use reduces inbox clutter around testing. It’s beneficial for both individuals and teams, as it keeps testing cycles organized. You can even split your testing into campaigns by using unique email addresses you control with every testing cycle with our Zero-Setup subdomains feature.
Testing and Development: Mailsac is ideal for testing campaigns, systems, and internal communications. Temporary emails can be used during development phases to catch errors and ensure that only verified emails are sent to real users. We have fully featured APIs to integrate between any systems.
Disposable email services are an essential tool for modern communication. They can help prevent costly mistakes and ensure that PR issues around email remain in the past. For those looking to enhance their email security and efficiency, we’re an excellent choice. Give Mailsac a try today and see how it can benefit your email needs.
In healthcare, email communication intersects with patient care and data security. The margin for error is virtually nonexistent. Mailsac’s SaaS platform offers a robust email delivery suite, tailored to meet the rigorous demands of healthcare IT security, compliance, and operational efficiency. Mailsac has been integrated into systems at many enterprises in the healthcare industry, and has been relied on 24/7 for email testing for over a decade.
Enhanced Security and Compliance
Security Audits: Mailsac is built to pass IT department security audits, aligning with healthcare standards like HIPAA. Its infrastructure ensures patient data is safeguarded during email testing.
Data Privacy: With disposable email addresses, Mailsac supports testing that avoids exposing real patient information, maintaining privacy and compliance.
Collaborative Testing Environment
Unified Inbox: Devs and QAs can collaborate effectively using Mailsac’s unified inbox feature, which consolidates test emails from both persistent and temporary email accounts into a single view.
SSO Integration: Simplify access while enhancing security with Single Sign-On (SSO), allowing seamless integration into existing healthcare IT ecosystems.
Automated and Efficient Testing
CI/CD Integration: Mailsac’s API automates email tests within CI/CD pipelines, reducing manual effort and accelerating development cycles in fast-paced healthcare settings.
Scalable Solutions: Whether scaling up operations or integrating new services, Mailsac’s scalable platform adapts to the evolving needs of healthcare enterprises, ensuring email testing is never a bottleneck. There’s no need to manage server resources, deployments or upgrades.
Comprehensive Compatibility Testing
Device and Platform Coverage: Guarantee that critical communications are accessible across all devices and platforms used by healthcare professionals and patients alike.
Deliverability Assurance
Inbox Placement: Rigorous testing with Mailsac ensures healthcare emails achieve high deliverability, crucial for appointment reminders, test results, and other sensitive communications.
Optimizing Patient Communication
Email Optimization: Test and refine email content for clarity and engagement, ensuring messages to patients are both accessible and actionable.
Conclusion
For healthcare organizations, Mailsac offers a precision toolset for email testing — ensuring security, efficiency, and compliance while enhancing collaborative efforts between QA and development teams. Since 2012, Mailsac has practiced technical excellence and has helped hundreds of customers in healthcare manage their unique challenges.