Running Selenium Tests in GitHub actions email test cover image

Run Selenium Tests in GitHub Actions – Email Testing

Welcome to the second part of the two-part series on running selenium tests with GitHub Actions. In the first article, we outlined how to get started and how to set up your repo for Actions. In this guide, we’ll outline how to run email integration tests and pass secrets to GitHub Actions.

To start… Why would you want to test emails with live email services in the first place? Can’t you simply write to a log file or standard out? Yes… and no. Writing to log files or standard out is ok at the beginning of the application lifecycle. Building out the email send feature takes a back seat to ensure the application actually works.

But let’s say your application is almost ready for its initial release. You want to test that you can even connect to an SMTP server. Or test to ensure the right message can go to the right inbox. Testing via log files or standard out starts to get a bit limiting in that regard. Additionally, say you want to be really sure that the contents of an email you send are what you expect them to be. At this point, you’d like to simulate as much of the email delivery as possible.

You can accomplish this with a disposable email service like Mailsac.

Allow us to plug our mail service

At Mailsac we focus on the developer experience around email automation and testing. That’s why we’ve made it so you can test out the API mentioned in this guide with a free account. You can sign up here.

So let’s lay out our testing goal:

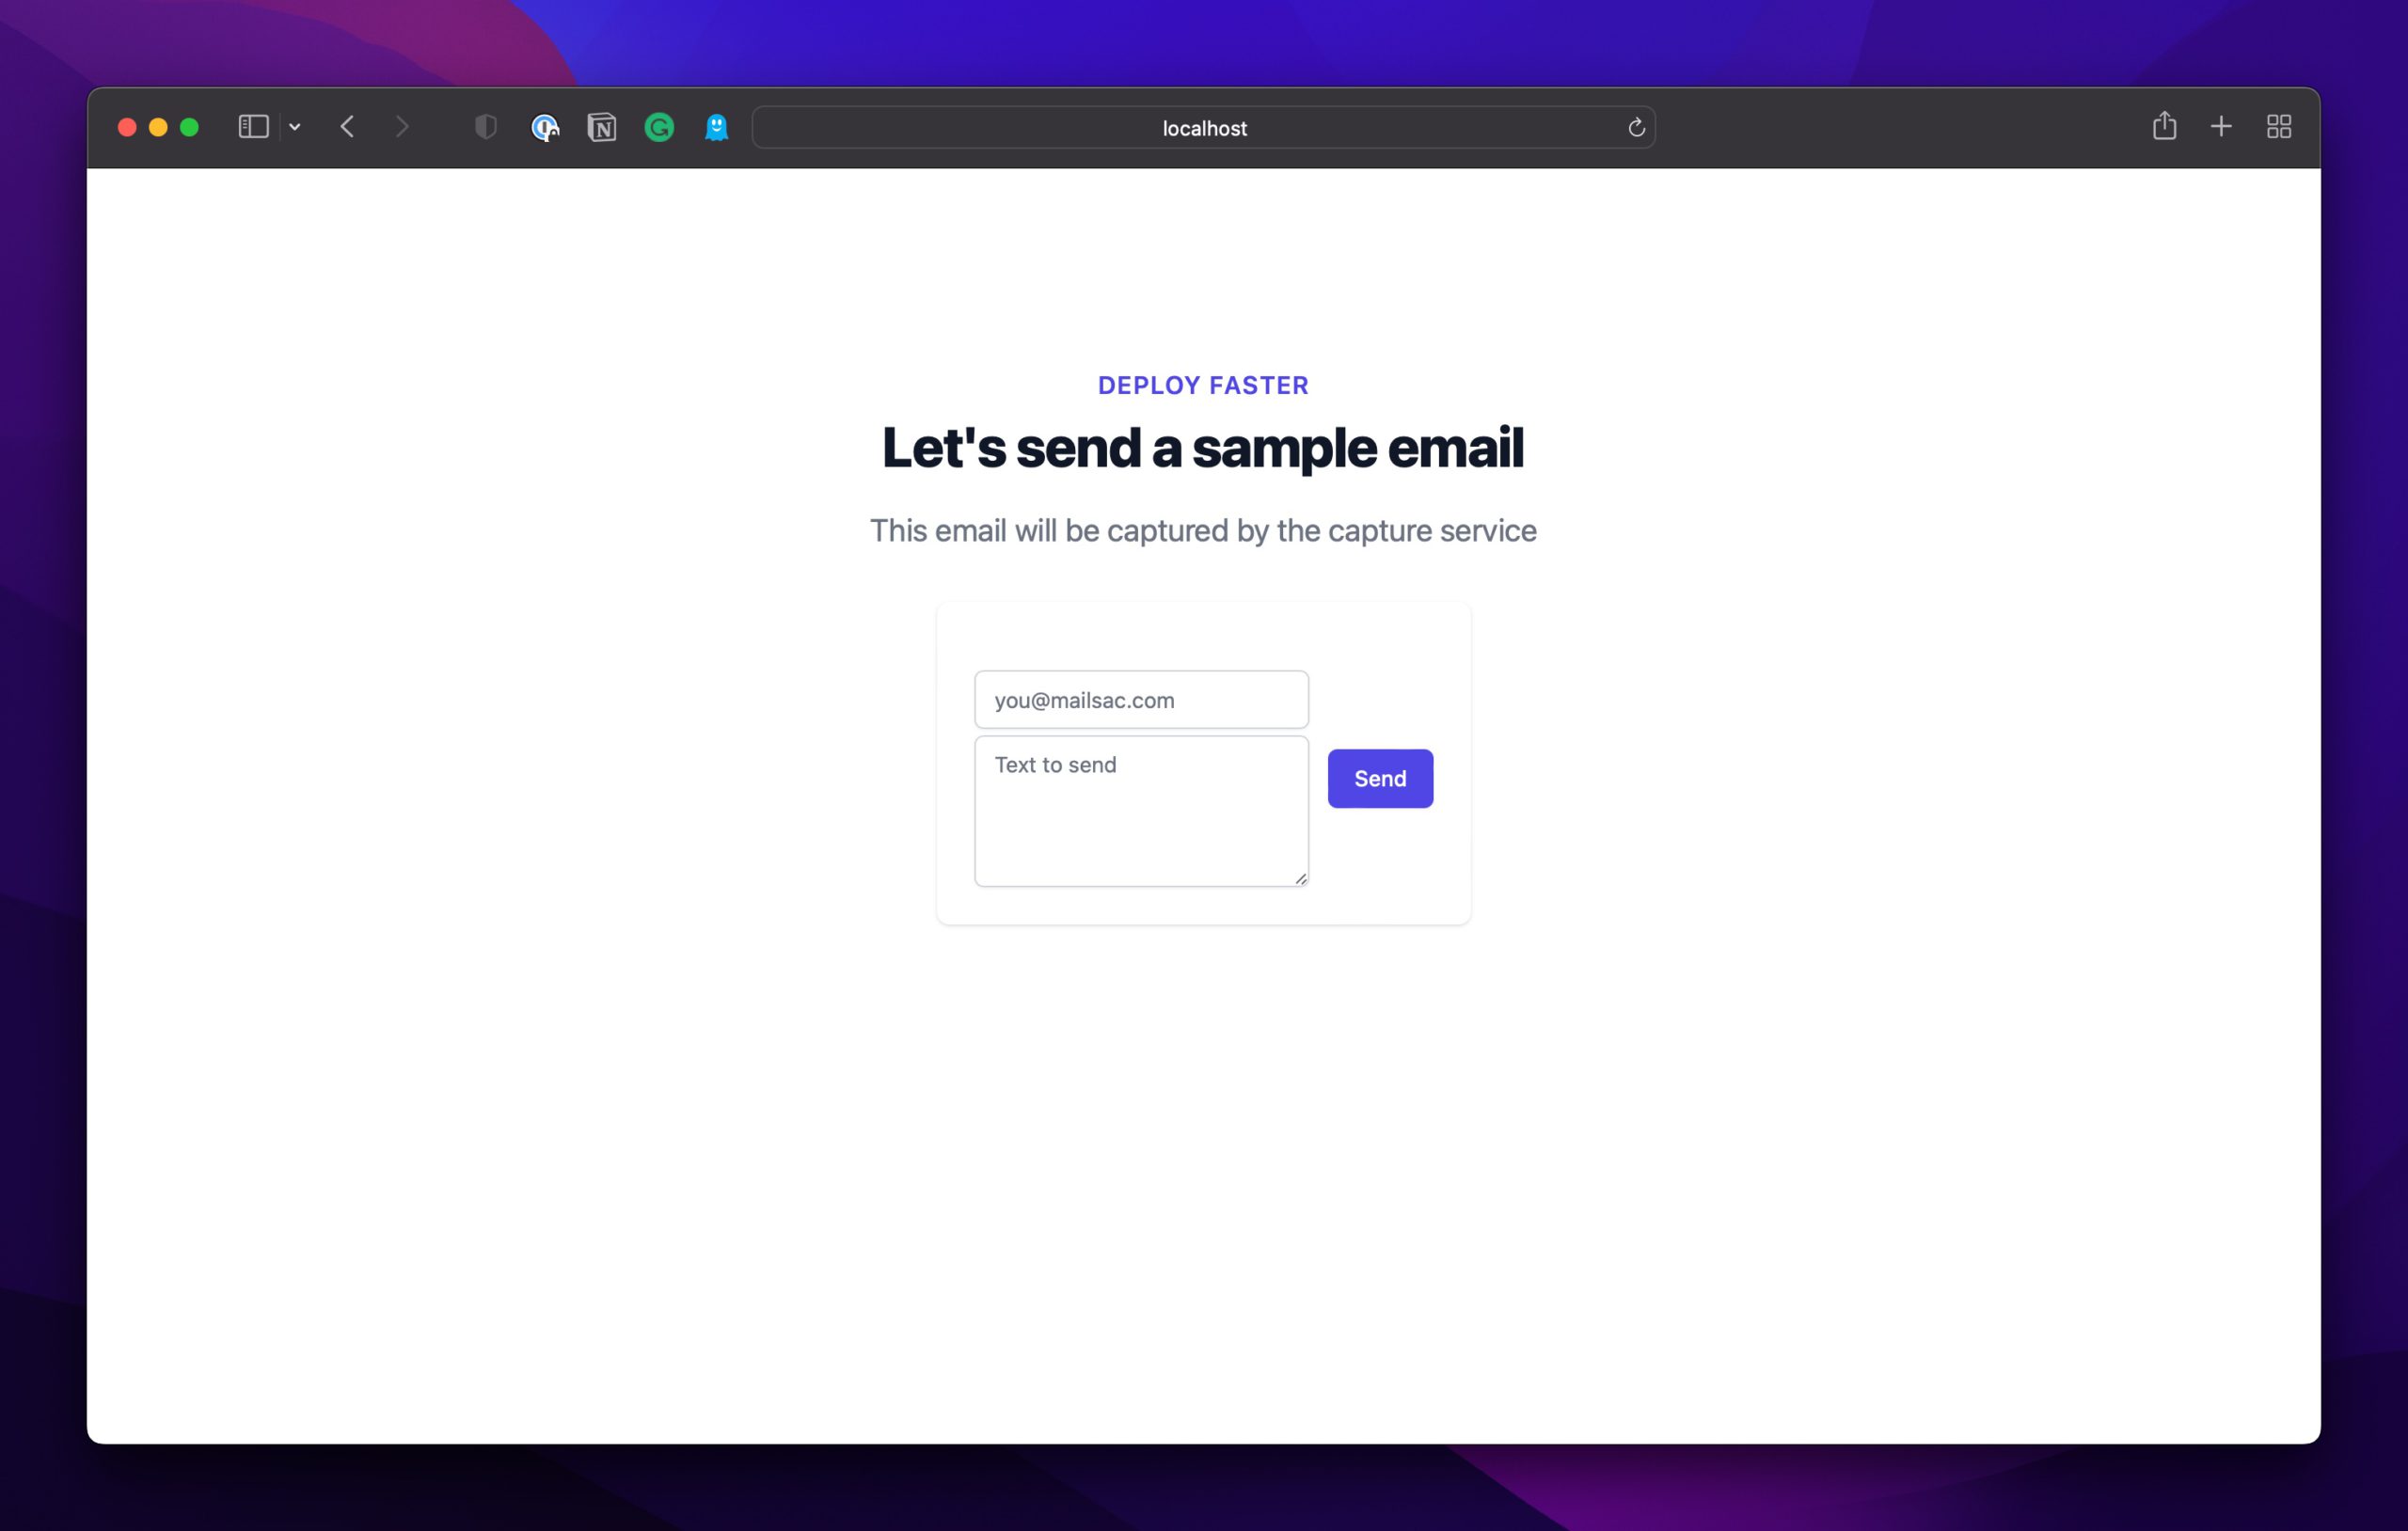
  1. Simulate an email send with our sample application.
    1. Refer to our Guide To Stress Free Email Testing with Next.js for more information on how we created this sample application
    2. Use Selenium to drive the form and hit send
  2. Use our capture service API to send the email
  3. Use Mailsac’s API to read the email from the destination inbox
  4. Verify the contents of said email
  5. Do all this on GitHub Actions

Let’s get started.

API Credentials

If you don’t already have one, go ahead and create a mailsac account and generate an API key.

Plug those API keys in a file called .env at the root of the project:

MAILSAC_USERNAME=$MAILSAC_USERNAME
MAILSAC_API_KEY=$MAILSAC_GENERATED_KEY
MAILSAC_HOST=capture.mailsac.com
MAILSAC_PORT=5587

.env

Craft the Email

Let’s craft the email by driving Selenium through the form. Start by crafting a selenium test:

const chrome = require('selenium-webdriver/chrome');
const {Builder, Browser, By } = require('selenium-webdriver');

const screen = {
  width: 1920,
  height: 1080
};

(async function emailSendTest() {
    
  let driver = await new Builder()
    .forBrowser(Browser.CHROME)
    // .setChromeOptions(new chrome.Options().headless().windowSize(screen))
    .build();

  try {
    await driver.get('<http://localhost:3000>');
    let didSendButtonRender = await driver.findElement(By.id('sendbutton')).isDisplayed()
    
    if (!didSendButtonRender){
      throw new Error(`Send button was not rendered properly.`);
    }
 
    await driver.findElement(By.id('email')).sendKeys("[email protected]");
    await driver.findElement(By.id('comment')).sendKeys("This is some text from our Selenium test.");
    await driver.findElement(By.id('sendbutton')).click();

  } finally {
    await driver.quit();
  }
})();

tests/email-send.js

Note: I left the headless option off for this first test. You’ll want to turn the headless option back on for the test run via our continuous integration environment.

You can do a local test by running

node tests/email-send.js

And checking the inbox we tested ([email protected]) manually:

Success! Though that’s part of the way there. Let’s assert that the email contents match via the API.

Read the Email via Mailsac’s API

Thankfully, Mailsac has not only a robust API but also lots of sample code inside the docs. We’ll lift the sample email read from here:

https://docs.mailsac.com/en/latest/services/reading_mail/reading_mail.html

Note that you’ll need to install a couple of dev packages to get this to work: dotenv and superagent. dotenv is needed in this instance since our tests don’t load the entire next framework and as such, we need a method to read your .env file. superagent is a small client-side HTTP request library for doing quick HTTP calls like the one we’re about to do.

So go ahead and add them to your developer dependencies:

npm install --save-dev dotenv superagent

And add our own text comparison to Mailsac’s sample code:

require('dotenv').config()

const superagent = require('superagent')
const mailsac_api_key = process.env.MAILSAC_API_KEY
const expected_message = 'This is some text from our Selenium test.'

superagent
  .get('<https://mailsac.com/api/addresses/[email protected]/messages>')
  .set('Mailsac-Key', mailsac_api_key)
  .then((messages) => {
      const messageId = messages.body[0]._id
      superagent
          .get('<https://mailsac.com/api/text/[email protected]/>' + messageId)
          .set('Mailsac-Key', mailsac_api_key)
              .then((messageText) => {
                  if (messageText.text !== expected_message)  {
                    throw new Error(`Message '${messageText.text}' does not match expected text '${expected_message}'`)
                  }
                  else{
                    console.log("Message comparison passed");
                  }
              })
  })
  .catch(err => {
      console.log(err.message)
			process.exit(-1)
  })

tests/email-read.js

Running the test locally should result in a passing test:

$ node tests/email-read.js
Message comparison passed

Of course, if we’ll run these tests many times we’ll also want to ensure that we delete the email contents after our successful read. Let’s add a cleanup step to our read test:

require('dotenv').config()

const superagent = require('superagent')
const mailsac_api_key = process.env.MAILSAC_API_KEY;
const expected_message = 'This is some text from our Selenium test.';
const testInbox = '[email protected]';

superagent
.get(`https://mailsac.com/api/addresses/${testInbox}/messages`)
  .set('Mailsac-Key', mailsac_api_key)
  .then((messages) => {
      const messageId = messages.body[0]._id
      superagent
          .get(`https://mailsac.com/api/text/${testInbox}/` + messageId)
          .set('Mailsac-Key', mailsac_api_key)
              .then((messageText) => {
                  if (messageText.text !== expected_message)  {
                    throw new Error(`Message to delete '${messageText.text}' does not match expected text '${expected_message}'`)
                  }
                  else{
                    console.log("API Read Op: Message comparison passed");
                    superagent
                    .delete(`https://mailsac.com/api/addresses/${testInbox}/messages/${messageId}`)
                    .set('Mailsac-Key', mailsac_api_key)
                    .then((messageResponse) => {
                        console.log(`API Deletion Op: ${messageResponse.body.message}`)
                    })
                  }
              })
  })
  .catch(err => {
      console.log(err.message)
      process.exit(-1)
  })

tests/email-read.js

Let’s add it to a test script and our workflow YAML file:

"scripts": {
    "dev": "next dev",
    "build": "next build",
    "start": "next start",
    "lint": "next lint",
    "external-tests": "node tests/external-login.js",
    "test": "node tests/button-render.js && npm run mail-tests",
    "mail-tests": "node tests/email-send.js && node tests/email-read.js",
    "e2e-test": "start-server-and-test dev <http://localhost:3000> test"
  },

package.json

Note that we added a run mail-tests script to our end-to-end testing.

Try your end-to-end script locally to ensure it works:

End to end sample test

GitHub Action Test

Now that you have a working test on your local workstation, it’s time to push it up so GitHub Actions can start running your tests. If you haven’t already, read through the first article to catch up on GitHub Actions configuration and initialization.

As a reminder, this is our main.yml workflow file:

on: [push]

jobs:
  tests:
    runs-on: ubuntu-latest
    name: Run Selenium Tests
    steps:
    - name: Start selenoid
      uses: Xotabu4/selenoid-github-action@v2

    - uses: actions/checkout@v1
    - run: npm ci  

    - name: Run end to end tests
      run: npm run e2e-test

    - name: Run external login test
      run: npm run external-tests

.github/workflows/main.yml

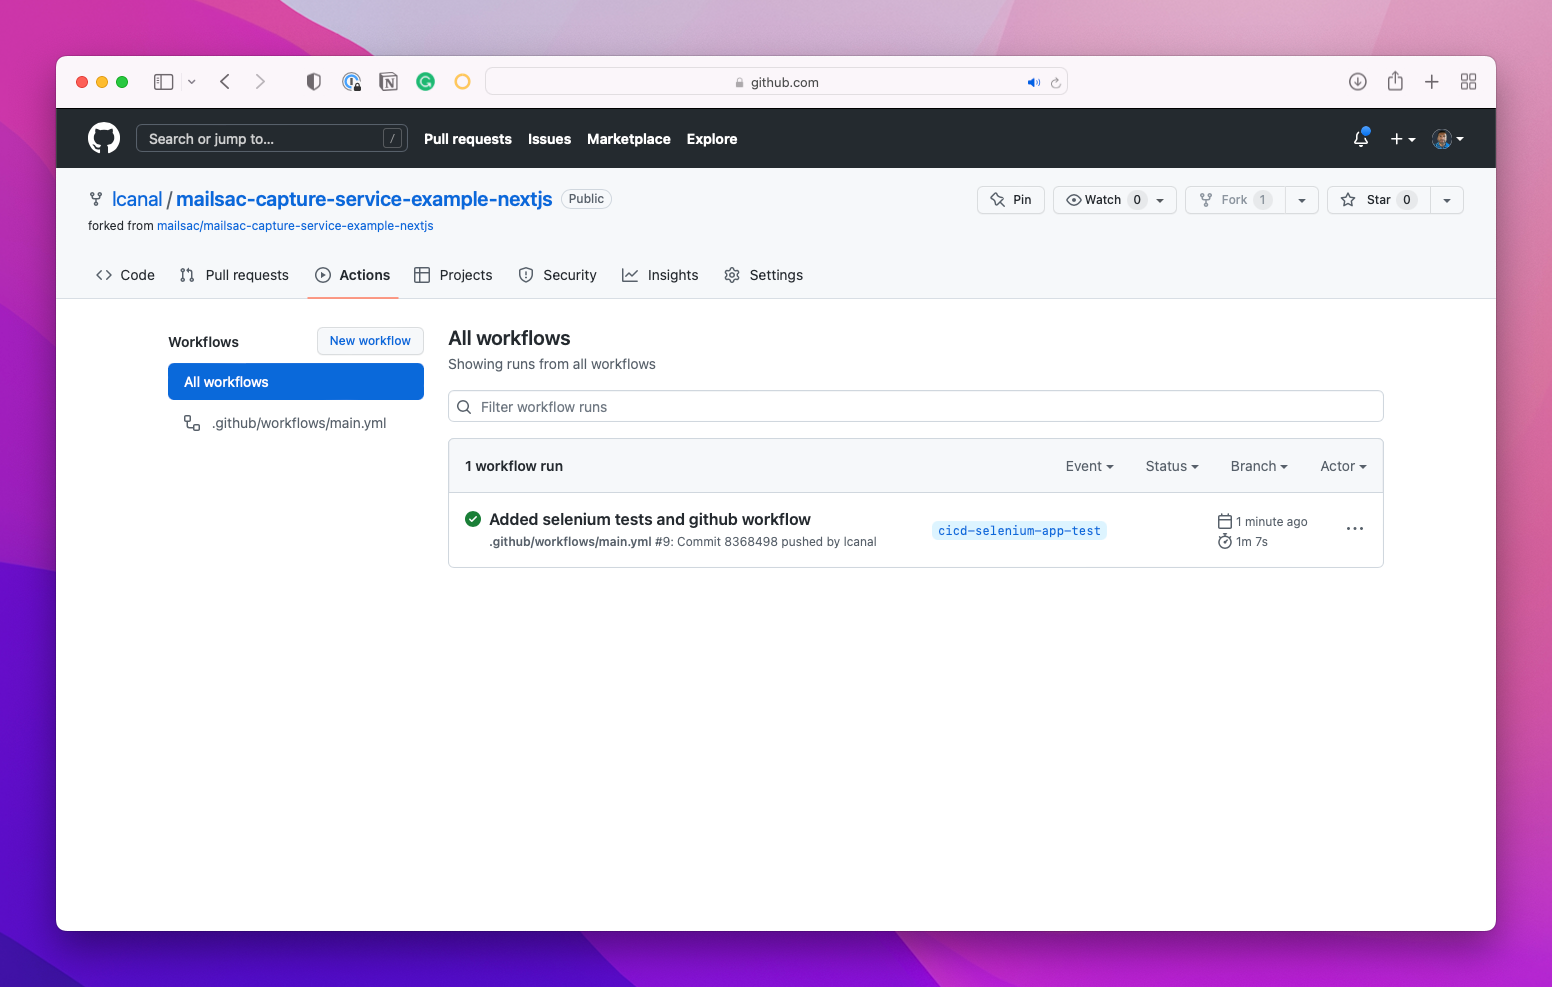
With all that said, let’s try and see if this email test sends an email on GitHub.

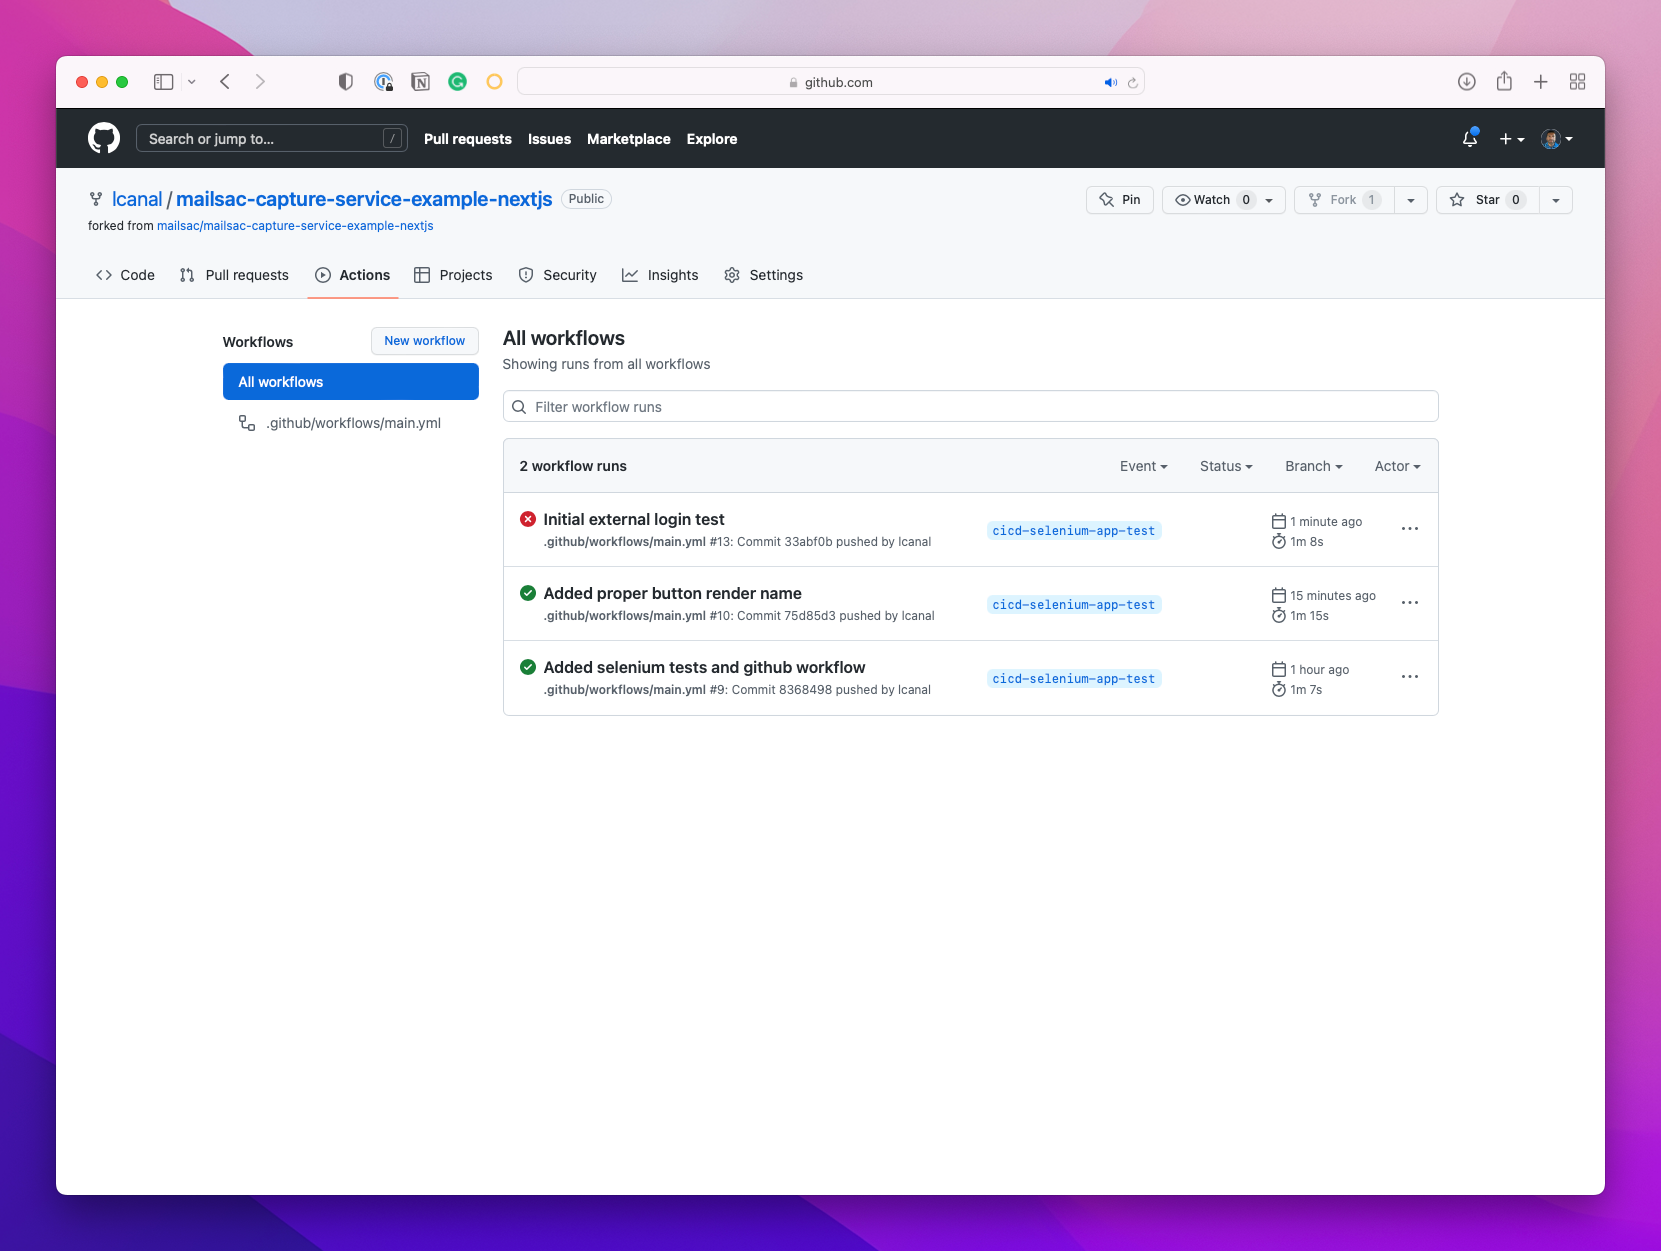
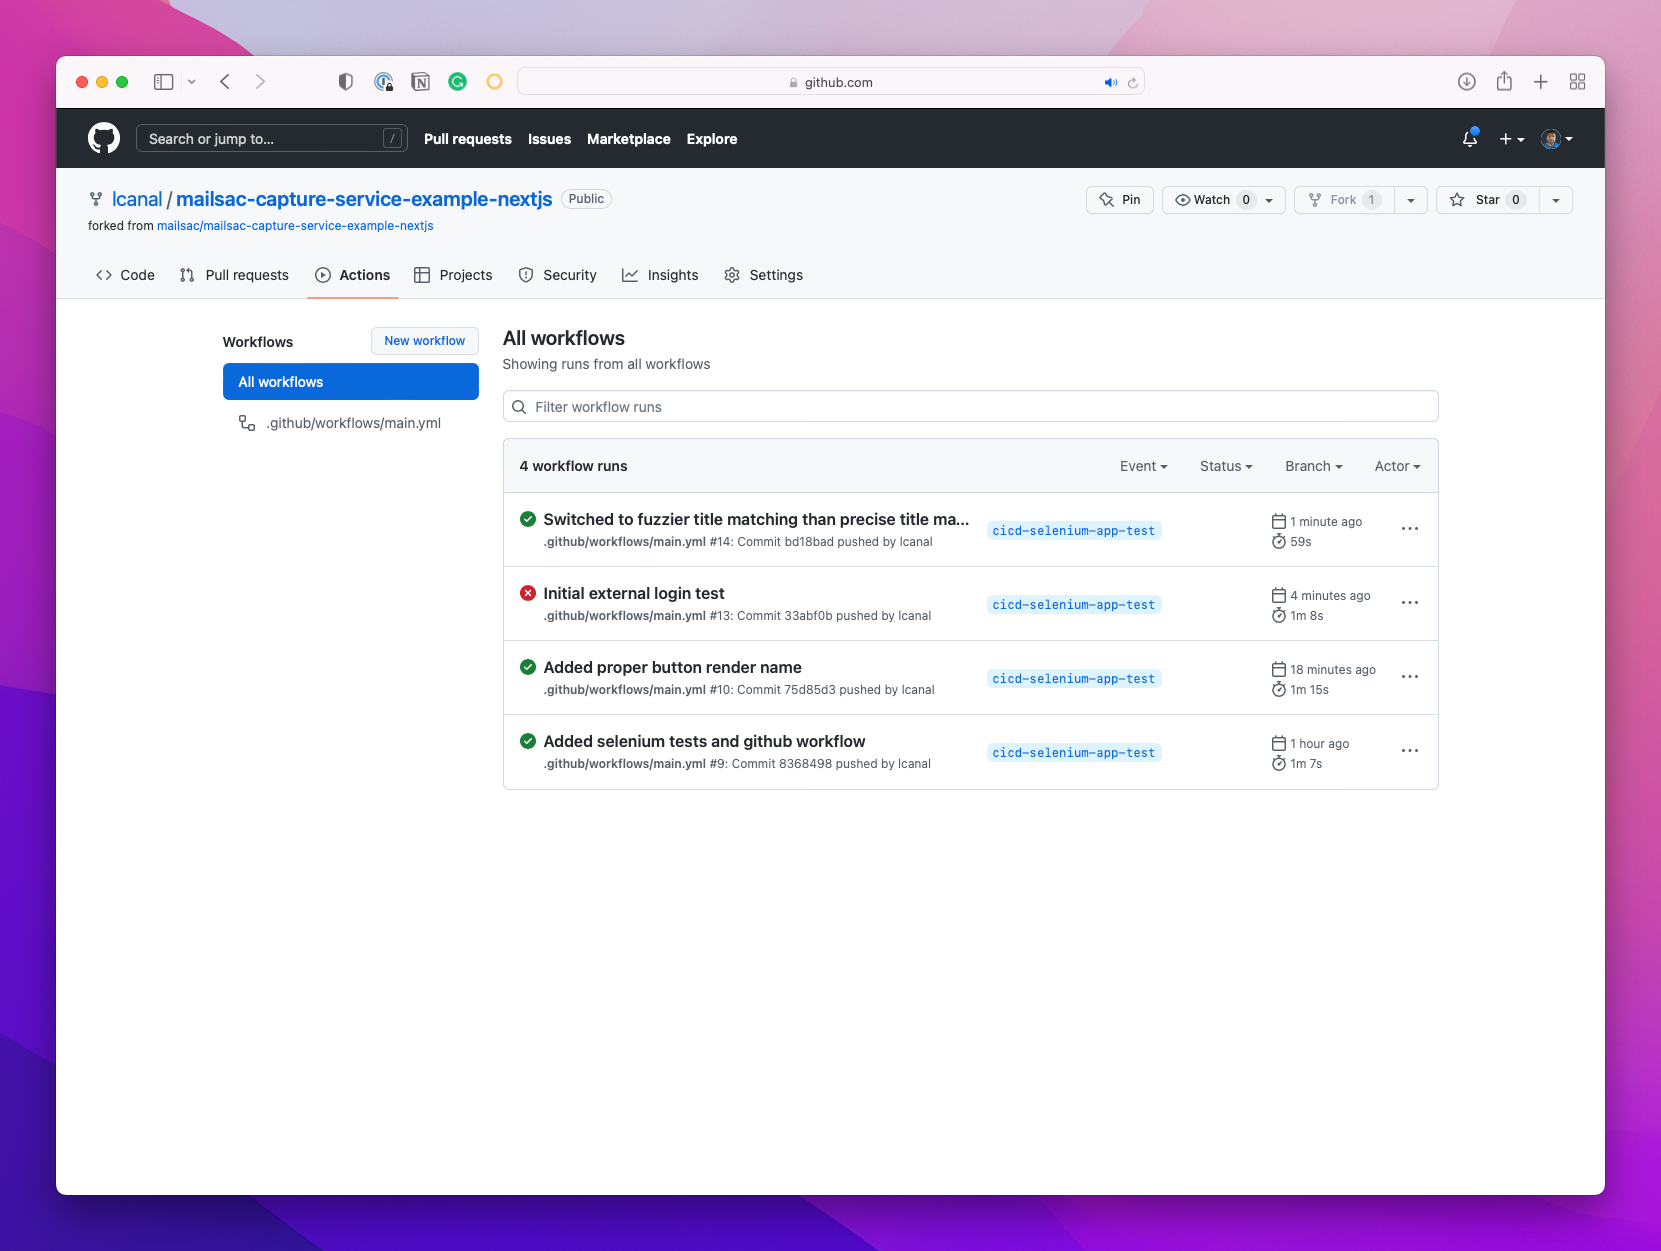
Do a git push and check your results on GitHub:

A gitHub test failure

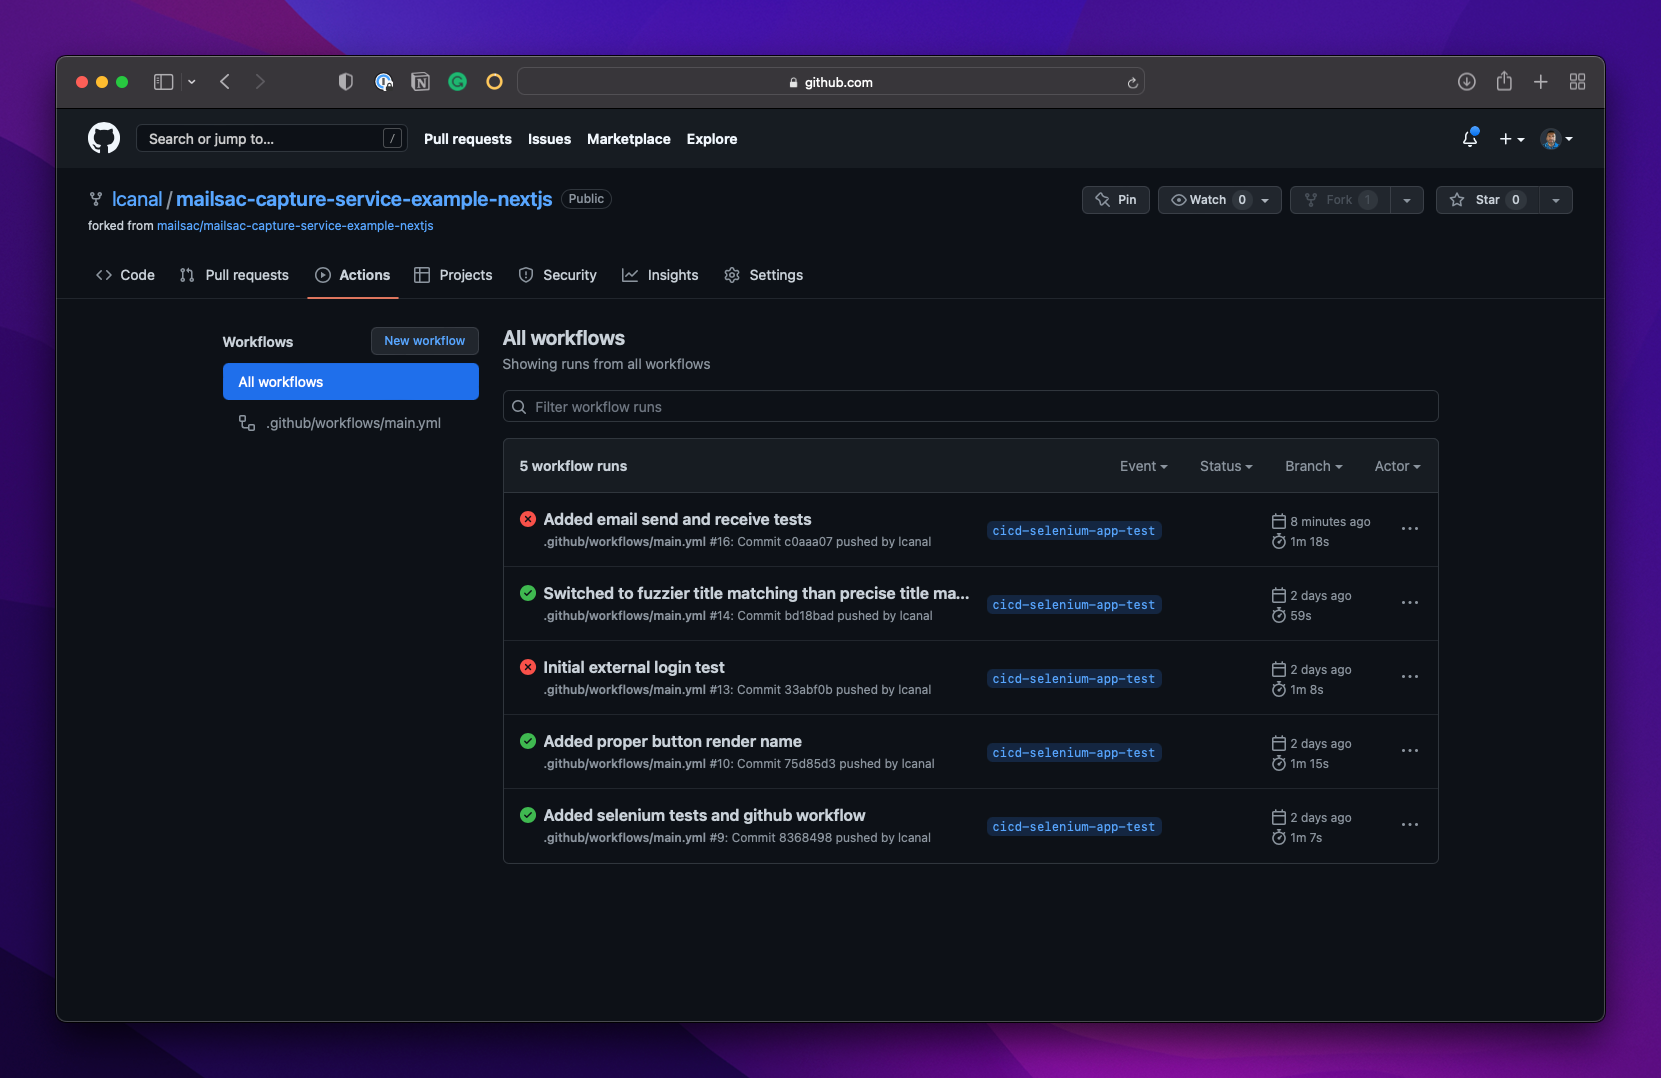
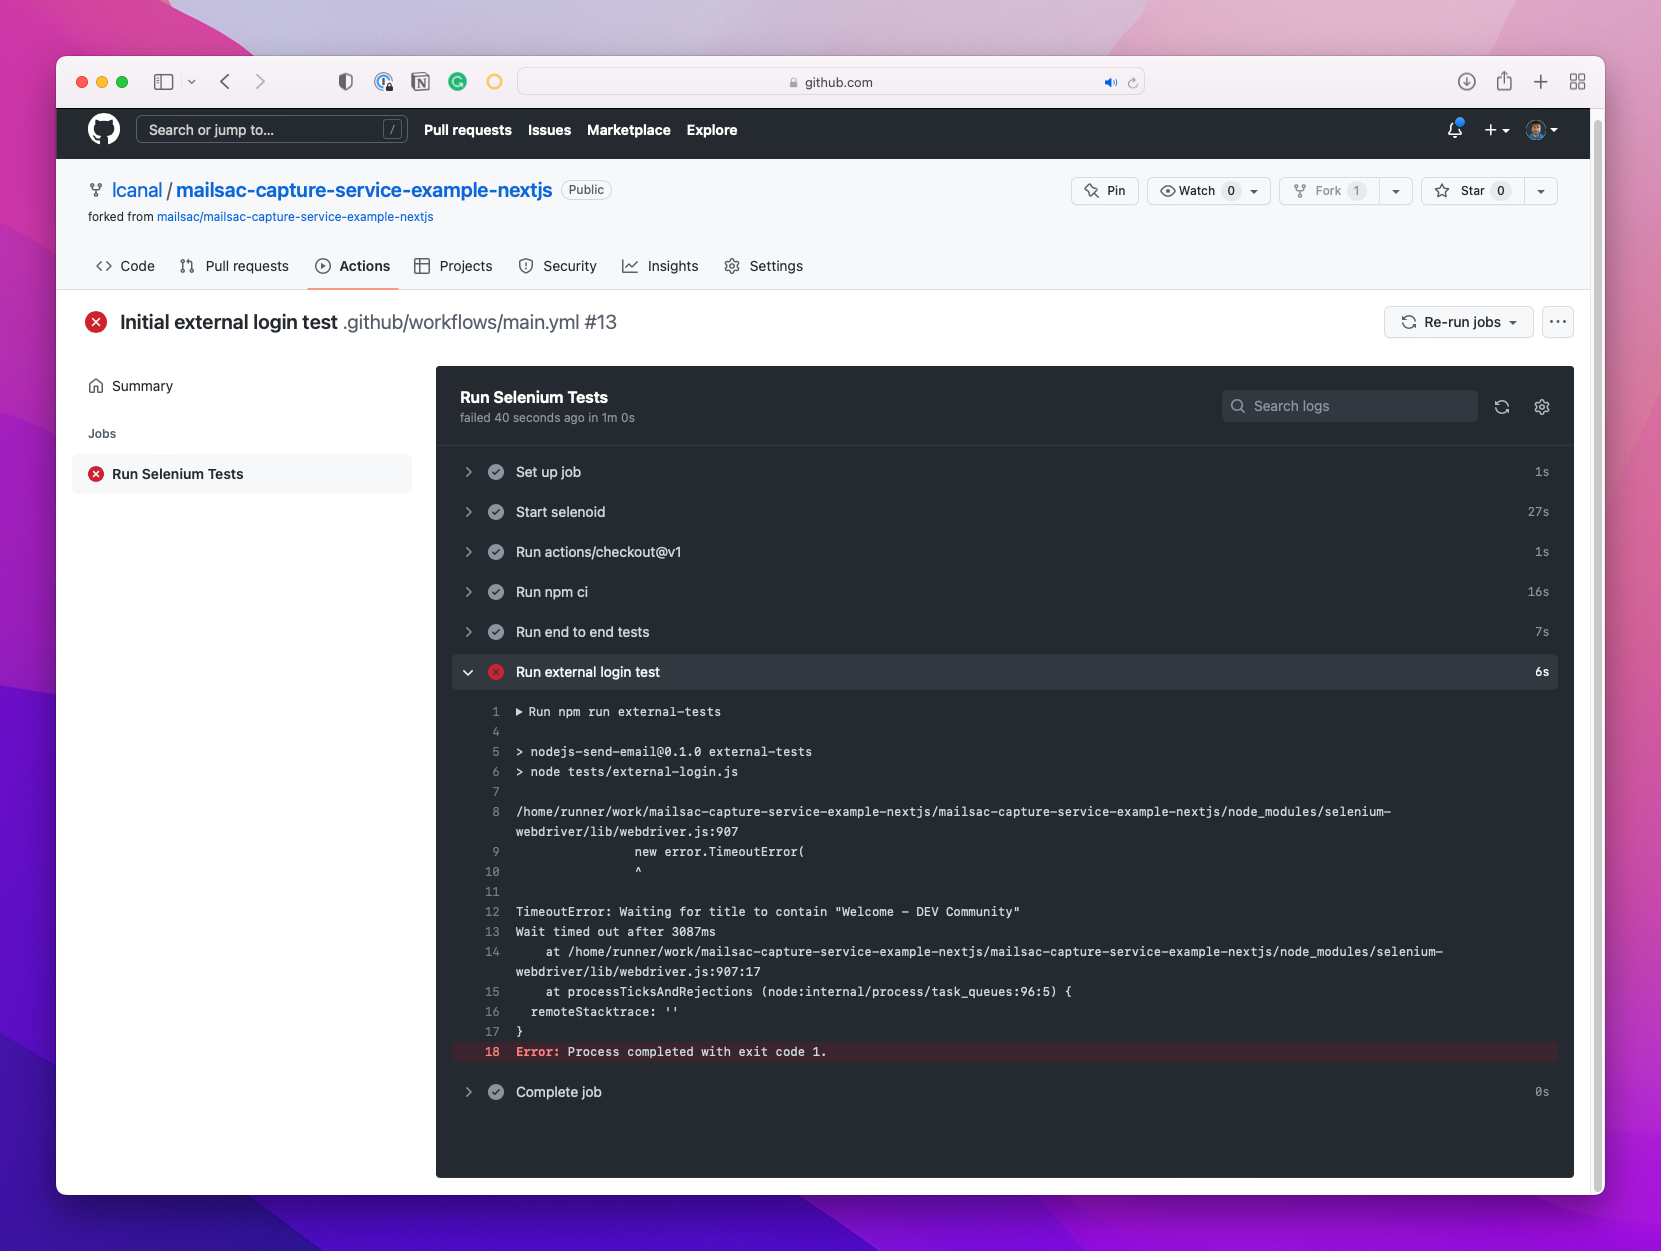
Looks like a failure. On closer inspection:

GitHub specific failure with details

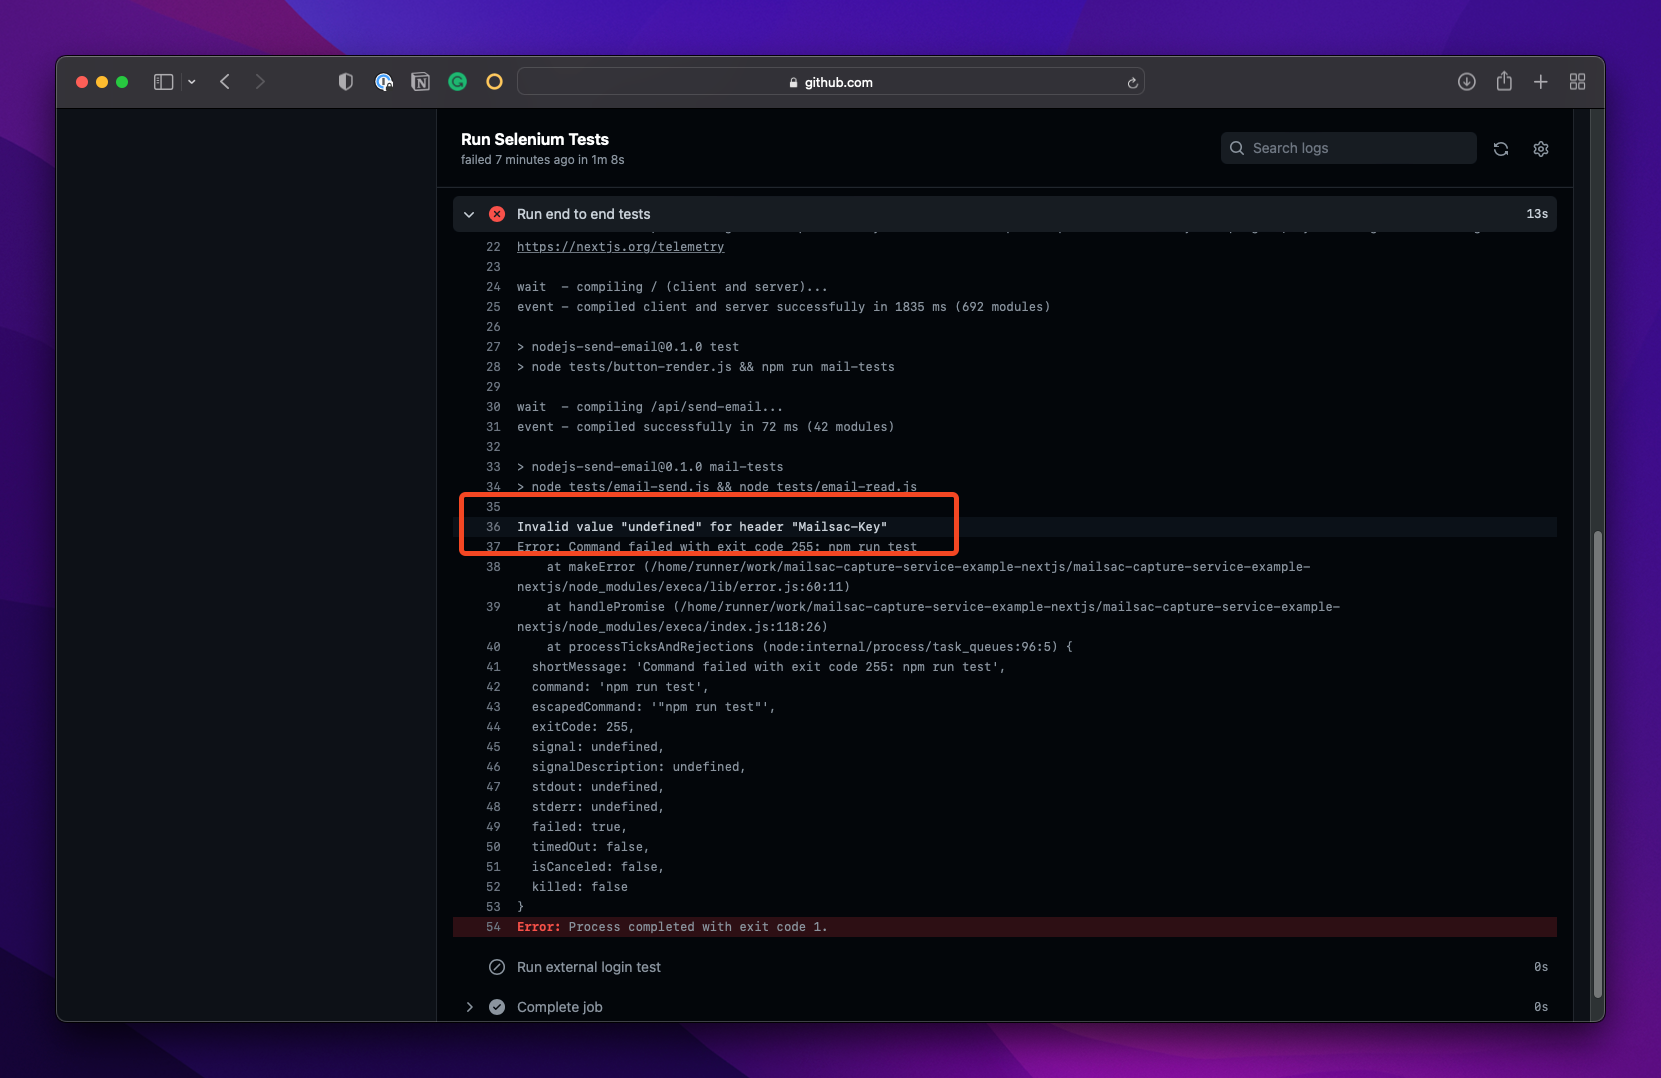
Ah, that’s right! We forgot to set our API keys at the GitHub level. Let’s go ahead and do that.

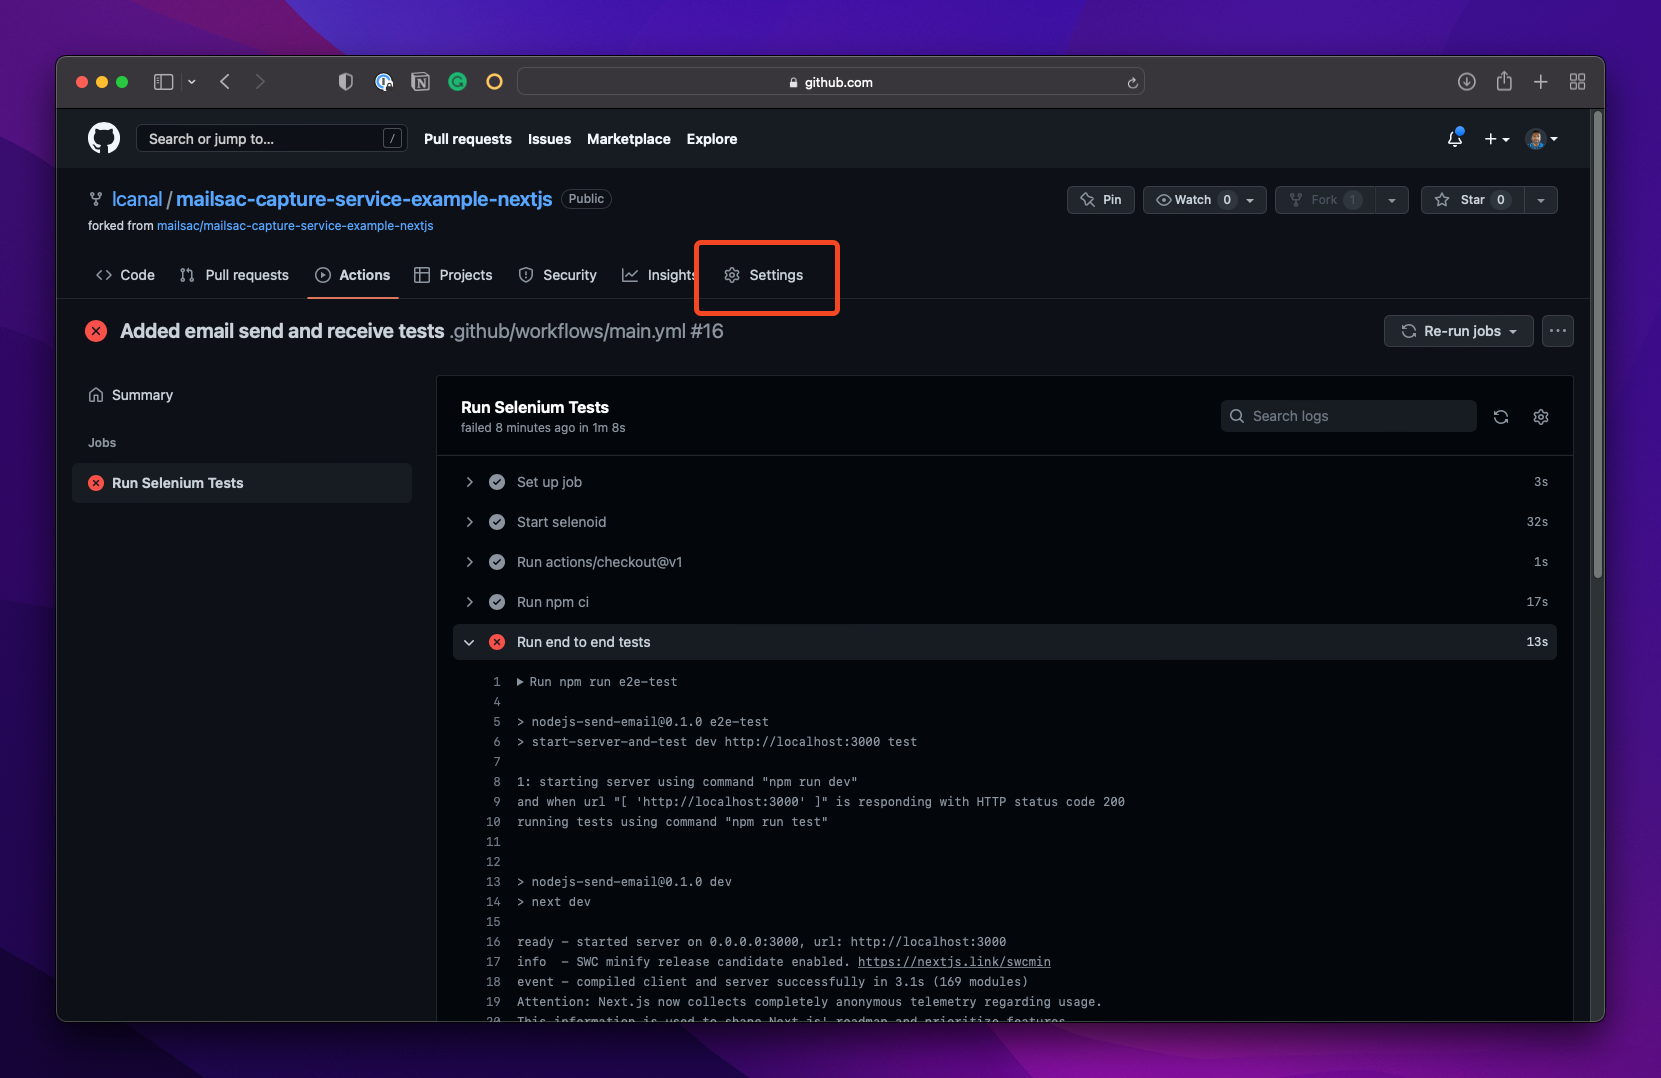
GitHub Actions Secrets

You can find it under Settings in your repo:

Github walkthrough image : Click settings

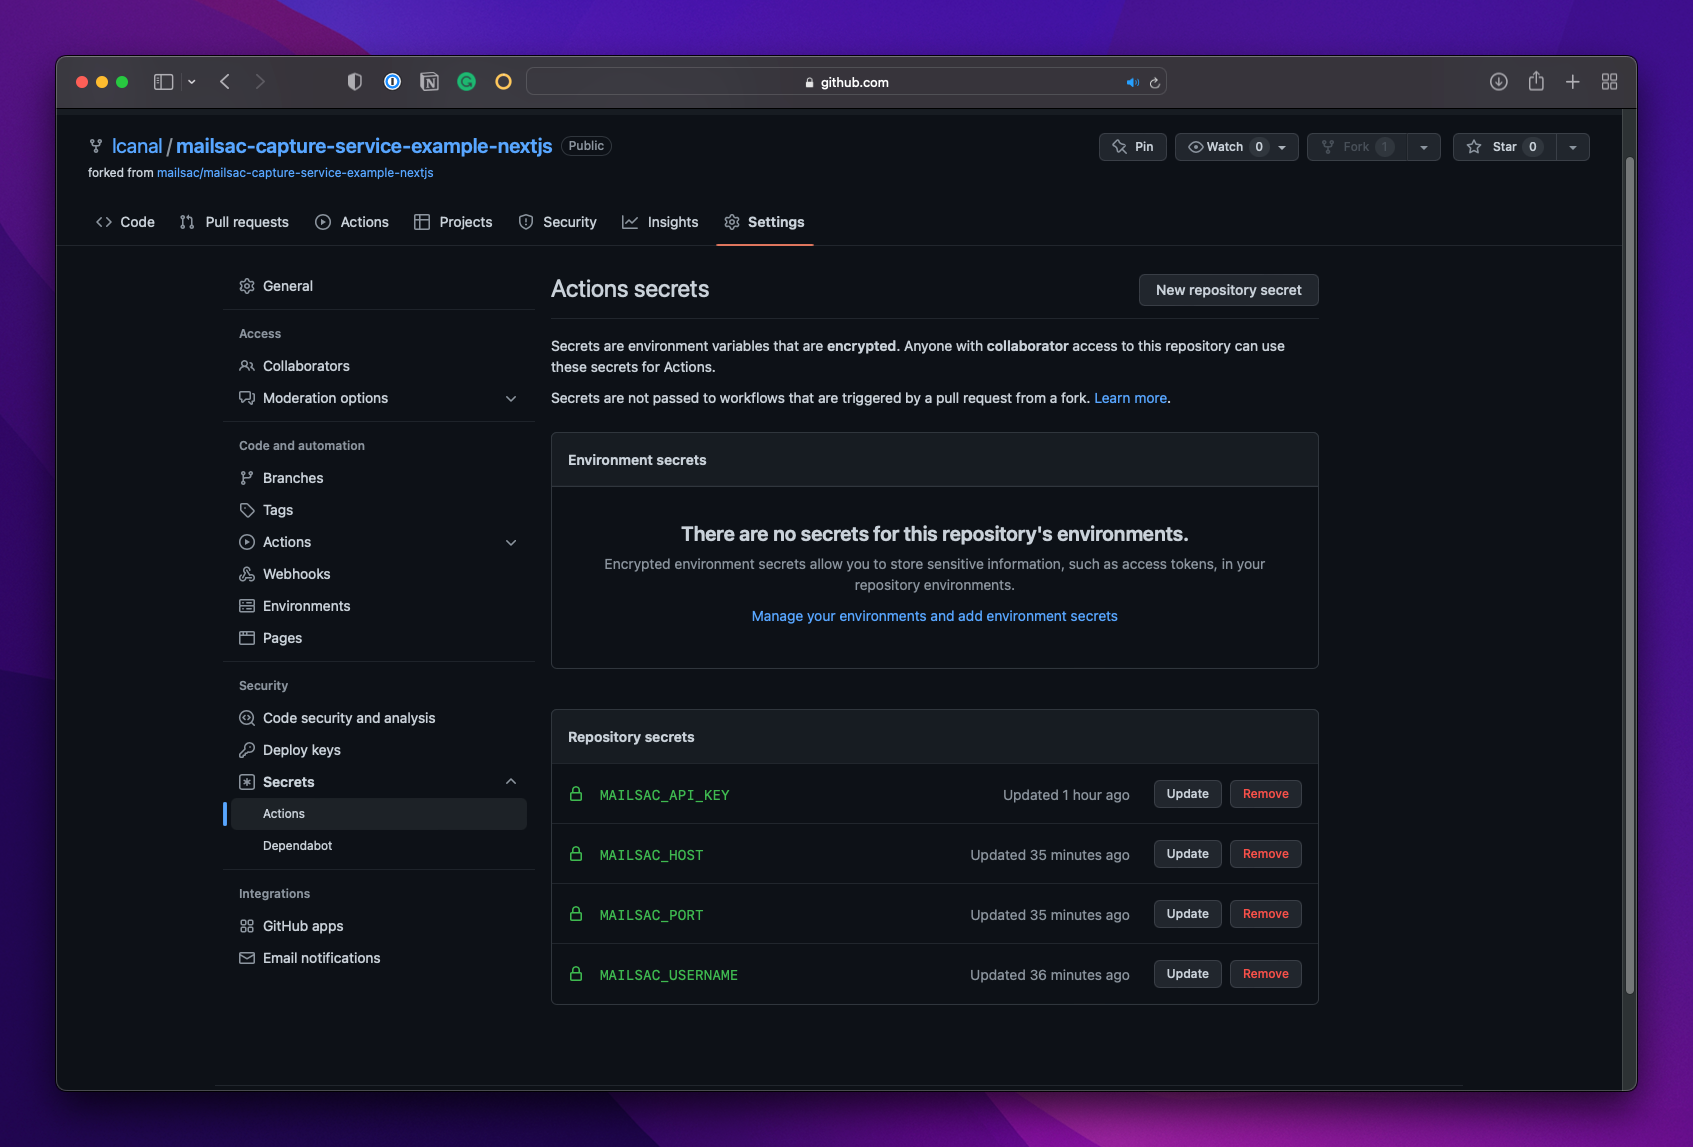
Then under Secrets → Actions click New repository secret

Add each secret that will be needed:

GitHub Secrets listing for your Actions.

Finally, ensure you add it to the workflow file:

- name: Run end to end tests
      run: npm run e2e-test
      env:
        MAILSAC_API_KEY:  ${{secrets.MAILSAC_API_KEY}}
        MAILSAC_USERNAME: ${{ secrets.MAILSAC_USERNAME }}
        MAILSAC_HOST:     ${{ secrets.MAILSAC_HOST }}
        MAILSAC_PORT:     ${{ secrets.MAILSAC_PORT }}

.github/workflows/main.yml

Do a git commit and git push and see the results on GitHub:

Successful email test with GitHub actions.

Success! You can check the details to ensure the API read and write options fire fired off:

Github actions success detailed view.

Conclusion

GitHub Actions is a powerful CI/CD tool and we have only scratched the surface of its capabilities with Selenium. We’ve also shown the power of email testing and how you can ensure the contents of every email are intentional.

We hope you enjoyed the guide, and hope to hear from you on our forums or follow our other content on LinkedIn.

Running Selenium Tests in GitHub actions Cover image

Run Selenium Tests in GitHub Actions

Browser automation is an invaluable tool. At a personal level, you can use it to automate repetitive tasks online. But browser automation can deliver so much more. At its best, it can run tasks with consistent results. Tasks that need lots of manual execution and complexity. Tasks like checking button placement, evaluating user login, and registration workflows. And in our modern era, we have our pick of browser automation frameworks.

We’ve covered browser automation before, but in this guide, we’ll do a deep dive into one of those frameworks. Additionally, we’ll cover using those testing frameworks alongside a specific continuous integration application.

In this guide we’ll walk through three testing scenarios using Selenium and GitHub Actions:

  • Check if a button rendered
  • Test a login workflow
  • Ensure the contents of a sent email

We’ll use our sample application to make our examples concrete, informative, and useful.

Repo URL: https://github.com/mailsac/mailsac-capture-service-example-nextjs

With all that said, let’s get started!

First, let’s talk about what you need to enable GitHub Actions.

Getting started with GitHub Actions

First, if you’d like a primer on GitHub Actions their page is a great resource. To summarize, it’s an easy way to run tasks when someone takes an “action” against your repo.

Actions can be:

  • Pull request merges
  • Commits
  • Repo pushes

GitHub takes your action and runs a task like integration tests, unit tests, etc. All you need to do is create a .github/workflows/main.yml file. Note: Running tasks is just one of the many possibilities for GitHub Actions. You can encompass entire workflows and even produce packages.

We’ll introduce more details further along the guide. For now, you can start by adding an empty file at:

.github/workflows/main.yml

The Sample Application We’ll Use

We’ll fork our sample application at the URL:

https://github.com/mailsac/mailsac-capture-service-example-nextjs

We’ll use this repo to walk through the examples mentioned in the intro. These sample scenarios are not meant to be comprehensive, of course. They’re meant to kick-start your journey with GitHub Actions.

To start, you’ll need to run the standard node installation and run the command:

npm install
npm run dev

Navigate to http://localhost:3000 and see our application in action:

Our initial application

With the preliminary steps done, on to the tests.

First Selenium Test: Check if the button rendered

Let’s start with the simplest test, a button render assertion test.

For this first section, we will:

  1. Add the node packages required to test
  2. Add our selenium test
  3. Add testing scripts to our package.json so that GitHub Actions can call our tests
  4. Add a simple Github Actions workflow file

Let’s start by adding a new branch (or you can fork the repo if you’d like):

git checkout -B cicd-selenium-app-test

Now let’s move on to our sample packages.

Packages: Selenium WebDriver & Start-Server-And-Test

We’ll need to add selenium and a start-server-and-test package. start-server-and-test starts our application. Then it calls our selenium tests so they can run against our running application.

npm install --save-dev start-server-and-test selenium-webdriver

start-server-and-test is one of our most straightforward ways to add live server testing capabilities. If you need more flexible frameworks, you may want to investigate mocha or cypress.

We’ll just focus on the core GitHub actions and selenium testing in this guide.

Selenium Test: Button Render

On to the test itself.

Let’s create a test under tests/button-render.js using selenium and headless chrome:

const chrome = require('selenium-webdriver/chrome');
const {Builder, Browser, By } = require('selenium-webdriver');

const screen = {
  width: 1920,
  height: 1080
};

(async function buttonRender() {
  let driver = await new Builder()
    .forBrowser(Browser.CHROME)
    .setChromeOptions(new chrome.Options().headless().windowSize(screen))
    .build();

  try {
    await driver.get('<http://localhost:3000>');
    let didSendButtonRender = await driver.findElement(By.id('sendbutton')).isDisplayed()
    if (!didSendButtonRender){
      throw new Error(`Send button was not rendered properly.`);
    }
 
  } finally {
    await driver.quit();
  }
})();

tests/button-render.js

You can find the full usage guide on selenium’s documentation page.

To help the test out, we’ll add an ID attribute to the Send button:

...
<button
    onClick={sendEmail}
    id="sendbutton"
    className="mt-3 w-full inline-flex items-center justify-center px-4 py-2 border border-transparent shadow-sm font-medium rounded-md text-white bg-indigo-600 hover:bg-indigo-700 focus:outline-none focus:ring-2 focus:ring-offset-2 focus:ring-indigo-500 sm:mt-0 sm:ml-3 sm:w-auto sm:text-sm"
  >
    Send
</button>
...

pages/index.js

Telling GitHub Actions How to Run Our Tests

We’ll need to add a couple of testing scripts to package.json:

...
"scripts": {
    "dev": "next dev",
    "build": "next build",
    "start": "next start",
    "lint": "next lint",
    "test": "node tests/button-render.js",
    "e2e-test": "start-server-and-test dev <http://localhost:3000> test"
  },
...

package.json

Now let’s add the workflow main.yml file to the repo. This is the main file that kicks off a GitHub Action workflow. To keep things simple, we’ll execute our actions based on when a comitter pushes code. You can find the full list over at GitHub’s documentation pages.

on: [push]

jobs:
  tests:
    runs-on: ubuntu-latest
    name: Run Selenium Tests
    steps:
    - name: Start selenoid
      uses: Xotabu4/selenoid-github-action@v2

    - uses: actions/checkout@v1
    - run: npm ci  

    - name: Run end to end tests
      run: npm run e2e-test

.github/workflows/main.yml

For our project, we’ll use solenoid-github-action, a GitHub Action that starts a selenium grid instance in a docker container. Solenoid is a golang reimplementation of Selenium. It makes it very easy to integrate with any continuous integration/deployment environment.

In the last portion of the file, the npm run e2e-test section kicks off the end-to-end test that starts our server and runs the selenium tests.

That’s it! Before you commit and push your code, try running it locally:

npm run e2e-test

The test should pass in your local environment. If it fails due to chrome driver issues you can find a full guide on browser driver installations here.

Send it over to GitHub via git push.

git push --set-upstream origin cicd-selenium-app-test

Head over to your repo on GitHub and under the Actions tab you should now see a selenium test run

A GitHub Actions workflow results page

You can drill down and see where our specific tests ran

Congrats! That completes our first successful test using selenium and GitHub actions. Let’s move on to something a bit more useful.

Second Selenium Test: Open and login into a web app

Let’s expand on our tests a bit. Since we’re aiming for simplicity in this guide, I won’t add a whole authentication workflow to our application. Instead, let’s focus on an existing website and attempt (and fail) to log in.

We’ll start by adding a new test to our repo.

Selenium Test: Login to Dev.to

Let’s bring in our external login Selenium test, but slightly modified:

const chrome = require('selenium-webdriver/chrome');
const {Builder, Browser, By, until } = require('selenium-webdriver');

const screen = {
    width: 1920,
    height: 1080
  };

(async function externalLogin() {
  let driver = await new Builder()
  .forBrowser(Browser.CHROME)
  .setChromeOptions(new chrome.Options().headless().windowSize(screen))
  .build();

  try {
    await driver.get('<https://dev.to>');
    await driver.findElement(By.linkText('Log in')).click();
    await driver.wait(until.titleContains('Welcome - DEV Community'), 3000);
    await driver.findElement(By.name('commit')).click();
    await driver.wait(until.titleIs(''), 3000);
    let errorBox = await driver.findElement(By.className('registration__error-notice'));
    await driver.wait(until.elementIsVisible(errorBox));
    let errorText = await errorBox.getText();

    if (!errorText.includes('Unable to login')){
      throw new Error(`Error text does not contain expected value "${errorText}"`);
    }

  }
  finally {
    await driver.quit();
  }
})();

tests/external-login.js

Only real changes are that we added a headless option for chrome.

Modifying Our Tests

Keeping things simple, let’s just add a new test script:

....
"test": "node tests/button-render.js",
"external-tests": "node tests/external-login.js",
...

package.json

And add a separate testing task to our workflow:

...
- name: Run external login test
      run: npm run external-tests
...

.github/workflows/main.yml

Let’s check our result on GitHub:

GitHub Action Failure example

Looks like a failure due to an incorrect title.

Let’s make the match less precise and rerun the test:

...
await driver.findElement(By.linkText('Log in')).click();
await driver.wait(until.titleContains('Welcome! - DEV Community'), 3000);
await driver.findElement(By.name('commit')).click();
...

tests/external-login.js

Let’s try another git push and..

A full successful external login test screen/

Success!

Conclusion

This was the first part of a two-part series about diving into GitHub Actions and Selenium tests. In the second part, we’ll run through:

  1. running our application in GitHub actions
  2. sending emails via our web form
  3. reading and comparing the email contents
  4. deleting the email contents afterward

All are driven by our selenium tests.

We hope you enjoyed the guide, and hope to hear from you on our forums or follow our other content on LinkedIn.

Blog Cover

Guide To Stress Free Email Testing with Next.js

Developing an application that sends emails is straightforward but not without its risks. Ensuring deliverability but not actually having any of those emails land inside real inboxes is a top concern for any developer. Which leads to questions like: “How do you test your application’s outbound email capabilities?” or “How do I manage email testing for free?”

Enter email capture services. While the term “email capture service” tends to focus on the marketing aspects (capturing information from your calls to action, ensuring emails don’t get caught in spam, etc) they also include SMTP deliverability. Mailsac offers an email capture service that addresses the deliverability aspect, specifically not delivering any email to its intended recipient. Effectively a “black hole” where no email should escape to the outside world.

In this post, we’ll walk through a sample application in Next.js that will generate emails and have those emails captured by Mailsac’s email sandboxing service.

Do I Really Need To Do Email Testing?

Some frameworks do come with email previewing capabilities like Rails’ ActionMailer. Said frameworks don’t actually attempt to send anything but instead preview the email on your machine. We recommend real testing during the development and quality assurance phase by using an external SMTP server to mimic the application’s behavior in production.

Testing that capability has to be done safely unless you want to land on Twitter’s trending page for accidentally sending customers an integration test email.

Test Email Sending With A Next.js Application

For the rest of this guide, we’ll focus on wiring up a simple application that will allow users to send an email when a button is pushed from a UI. We’ll then demonstrate the capture of those emails in our development environment.

The components we’ll use are:

Application Creation

While the focus of this guide isn’t a line-by-line walkthrough of the sample code, we’ll focus on the key aspects of the application that mainly involve emailing capabilities.

The application source can be found in our git repository.

1. Application setup

Let’s start by creating a quick next app with tailwind support:

mailsac % npx create-next-app
…
Success! Created nodejs-send-email at /Users/mailsac/code/nodejs-send-email

cd nodejs-send-email
npm install -D tailwindcss postcss autoprefixer @tailwindcss/forms
npm install @headlessui/react@latest @heroicons/react
npx tailwindcss init -p

The above is the recommended way to install tailwind on Next.js according to their guide.

Configure tailwind.config.js by adding the highlighted lines:

module.exports = {
  content: [
	"./pages/**/*.{js,ts,jsx,tsx}",
	"./components/**/*.{js,ts,jsx,tsx}",
  ],
  theme: {
	extend: {},
  },
  plugins: [
    require('@tailwindcss/forms'),
  ],
}

and then add tailwind itself to the global CSS file inside styles/global.css and comment out some default CSS created by npx:

/* @media (prefers-color-scheme: dark) {
  html {
    color-scheme: dark;
  }
  body {
    color: white;
    background: black;
  }
}
*/

@tailwind base;
@tailwind components;
@tailwind utilities;

Tailwind is strictly optional but recommended for easy styling of the frontend.

2. Add the front page UI

Feel free to add your custom frontend code or use the index.js and components/notifications.js react component samples inside our repo.

index.js

import { useEffect, useState } from "react";
import Notification from "../components/notifications";

export default function Index() {
  const [sentEmail, setSentEmail] = useState(false);
  const [emailTo, setEmailTo] = useState("");
  const [emailBody,setEmailBody] = useState("");
  const [resultMessage, setResultMessage] = useState("");

  const sendEmail = () => {
    setSentEmail(true);
  }

  useEffect( () => {
    fetch('/api/send-email',{
      method: 'POST',
      body: JSON.stringify({ to: emailTo, body: emailBody})
    })
    .then( res => res.json())
    .then(response => {
      setResultMessage(response.message)
    })
    .catch(error => console.log(error));    

  },[sentEmail]);

  const SentEmailBanner = sentEmail === true? <Notification message={resultMessage} /> : null;

The second line brings in a component that takes in a message and formats it as a pop-up notification. The useEffect() method sends your email recipient and body input to the backend, which will forward that data to Mailsac’s servers.

3. Sign up for Mailsac’s Email Capture

Mailsac has a free email capture service. All you need is to sign up for an account and generate a key:

Mailsac dashboard
Mailsac Dashboard

4. Add a backend mail handler route

Once you’ve generated and saved your keys, you can place them in a .env file:

.env

MAILSAC_USERNAME=lcanal
MAILSAC_API_KEY=Key generated from above

Following our email capture documentation, we’ll create a backend API route for Next to handle the request:

pages/api/send-email.js

const nodemailer = require("nodemailer");

export default async function handler(req, res) {
  let emailEnvelope = JSON.parse(req.body)
  if (
        req.method === 'POST' 
        && typeof(emailEnvelope.to) !== 'undefined' 
        && emailEnvelope.to !== ''
  ){
    const mailsaUserName = process.env.MAILSAC_USERNAME
    const mailsacAPIKey  = process.env.MAILSAC_API_KEY
  
    const transporter = nodemailer.createTransport({
      host: 'capture.mailsac.com',
      port: 5587,
      // will use TLS by upgrading later in the connection with STARTTLS
      secure: false,
      auth: {
        user: mailsaUserName,
        pass: mailsacAPIKey
      }
    })
  
    try {
      const results = await transporter.sendMail({
        from: '"Sample App" [email protected]',
        to: emailEnvelope.to,
        subject: 'Sample App Send',
        text: emailEnvelope.body
      })
      res.status(200).json(
        { 
          message: "You should now see an email in Mailsac's capture service", 
          response: results.data 
        }
      )
    } catch (error){
      console.log(`ERROR ${error}`)
      res.status(500).json({ message: `${error.response}`, response: error })
    }
  } else {
    return res.status(200).json({message: "No data"});
  }
}

In the highlighted line, we’re ensuring the useEffect() hook gets called with input data before we allow the rest of the function to continue. useEffect() gets called a variety of times in the component lifecycle, and this check is to ensure it was initiated by an end user and not as part of the component mounting.

5. Test driving the app

Fire up the application via

npm run dev

Navigate to http://localhost:3000 and type a text message:

Walking through our sample application form.

Then navigate over to mailsac.com to view the message

Checking the inbox at mailsac.com

6. Capturing other email domains

While that works well as a contrived example, the real value comes when using any arbitrary email in the recipient field:

Full application walkthrough demo, with a free check at mailsac.

Capturing emails outside the mailsac.com domain is extremely valuable when switching between different environments. For example, in the demo application example above, the .env environment file could instead look like

MAILSAC_USERNAME=$MAILSAC_NAME
MAILSAC_API_KEY=$MAILSAC_KEY
MAILSAC_HOST=capture.mailsac.com
MAILSAC_PORT=5587

With the updated send-email.js

const nodemailer = require("nodemailer");

export default async function handler(req, res) {
  let emailEnvelope = JSON.parse(req.body)
  if (
        req.method === 'POST' 
        && typeof(emailEnvelope.to) !== 'undefined' 
        && emailEnvelope.to !== ''
  ){
    const mailsaUserName = process.env.MAILSAC_USERNAME
    const mailsacAPIKey  = process.env.MAILSAC_API_KEY
  
    const transporter = nodemailer.createTransport({
      host: process.env.MAILSAC_HOST,
      port: process.env.MAILSAC_PORT,
      // will use TLS by upgrading later in the connection with STARTTLS
      secure: false,
      auth: {
        user: mailsaUserName,
        pass: mailsacAPIKey
      }
    })
  
    try {
      const results = await transporter.sendMail({
        from: '"Sample App" [email protected]',
        to: emailEnvelope.to,
        subject: 'Sample App Send',
        text: emailEnvelope.body
      })
      res.status(200).json(
        { 
          message: "You should now see an email in Mailsac's capture service", 
          response: results.data 
        }
      )
    } catch (error){
      res.status(500).json({ message: `${error.response}`, response: error })
    }
  } else {
    return res.status(200).json({message: "No data"});
  }
}

The above edits would allow you to deploy to a testing or production environment and the only changes required would be in the .env file. Specifically, the SMTP host and authentication settings.

Conclusion

The above guide just scratches the surface of what you can do with our email services. We provide a unified inbox that allows testers to view their bulk email testing in one unified view and custom domains for those who do not have their own domains with zero setup configurations.

Additionally, we have a guide on using both custom domains and a unified inbox in your system testing. Check it out and tell us what you think on our forums!