Mailsac has a REST API that can be leveraged to validate emails are being received with the correct contents. This can be useful for web applications that send customized emails to customers.
This example will demonstrate how to send an email via an SMTP server and validate the email was received. The code used in this example is available on GitHub.
Setup Project Directory
Node version 12 or greater is required for this example due to the use of async and await.
Begin by creating a directory for the project.
mkdir mailsac-tests
cd mailsac-tests
npm init # enter project information, for test command use 'mocha'
Verify package.json looks something like this. The most important part is "scripts": { "test": "mocha" }
{
  "name": "mailsac-integration-tests",
  "version": "1.0.0",
  "description": "",
  "main": "index.js",
  "directories": {
    "test": "test"
  },
  "scripts": {
    "test": "mocha"
  },
  "author": "",
  "license": "ISC"
}
Installing a Test Framework
The test framework for this example is Mocha. It is a test framework for Javascript applications. A test framework will allow us to write tests against our code.
Setup Test Directory
These directions are inspired by the Mocha Getting Started Guide.
cd mailsac-tests
npm install --save-dev mocha
mkdir test
$EDITOR test/test.js # or open with your favorite editor
Write a Test to Test For Truth
This section is for people who are new to Mocha and test frameworks. Skip ahead if you know how to write tests.
Mocha follows a Behavior Driven Development (BDD) model of testing. This allows for human readable descriptions of software behavior. The first line of the code shows exactly what the following tests will test (ie describe("tests truth"). The following lines state the expected outcome of the test (ie it(true equals true).
This test uses Node’s built in assert. The first parameter passed to assert() is checked for true. If it is true, the assert passes. If the value is false, it throws an exception. In this example, we assert that true is true and that false is equal to false.
Create a describe block in test/test.js
describe("tests truth", () => {
    it('true equals true', function() {
        assert(true); // assert checks for truth
    });
    it('false equals false', () => {
        // assert equal checks the first and second parameter are equal
        assert.equal(false,false);
    });
})
This code can be run and the test should pass. Run the test with npm test . Confirm the test passed.
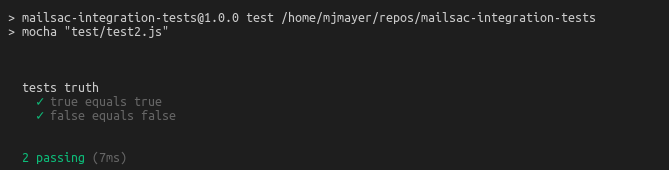
Congratulations! You have a working test.
Write an Integration Test
In this example, an email will be sent to Mailsac using the ubiquitous Javascript SMTP library NodeMailer, then the test framework will call Mailsac to validate that the email was received.
Install Dependencies
There are a few Node modules that will make sending an email and interacting with the Mailsac REST API easier. NodeMailer will be used to send the email via SMTP. SuperTest will be used to call the Mailsac API.
npm installIntegration Test Example
Back in the text editor, open / create the file test.js in the test folder. Copy and paste the following code or see GitHub for the complete example.
Import required modules
const assert = require("assert");
const nodemailer = require("nodemailer");
const request = require("supertest");
Configure SMTP settings and Mailsac Credentials
// Generated by mailsac. See https://mailsac.com/api-keys
const mailsacAPIKey = "";
// Mailsac email address where the email will be sent
const mailsacToAddress = "[email protected]";
// Username for smtp server authentication
const smtpUserName = "";
// Password for smtp server authentication
const smtpPassword = "";
// hostname of the smtp server
const smtpHost = "";
// port the smtp is listening on
const smtpPort = 587;
Create wait Function
The test will contact the Mailsac API multiple times while waiting for the email to arrive. This function will be used later in a for loop while waiting for the email to arrive.
const wait = (millis) => new Promise((resolve) => setTimeout(resolve, millis));Add a Describe block with Timeout and Test Cleanup
The describe callback describes in human readable terms what the test is going to do. The increased timeout is required because the default timeout for Mocha is 2 seconds. The test email will likely not arrive that quickly. The afterEach section is used to delete all messages after the test runs. This prevents a leaky test.
describe("send email to mailsac", function () {
  this.timeout(50000); // test can take a long time to run. This increases the default timeout for mocha

  /* delete all messages in the inbox after the test runs to prevent leaky tests.
       This requires the inbox to private, which is a paid feature of Mailsac.
       The afterEach section could be omitted if using a public address
    */
  afterEach(() =>
    request("https://mailsac.com")
      .delete(`/api/addresses/${mailsacToAddress}/messages`)
      .set("Mailsac-Key", mailsacAPIKey)
      .expect(204)
  );
});
Add it block and NodeMailer Configuration
The it interface describes what the test will do "sends email with link to example.com website“. The transport variable is used to store the configuration of the SMTP server.
result = await transport.sendMail({… Attempts to send the email and capture the result.
describe("send email to mailsac", function () {
...

  it("sends email with link to example.com website", async () => {
    // create a transporter object using the default SMTP transport
    const transport = nodemailer.createTransport({
      host: smtpHost,
      port: smtpPort,
      auth: {
        user: smtpUserName,
        pass: smtpPassword,
      },
    });
    // send mail using the defined transport object
    const result = await transport.sendMail({
      from: smtpUserName, // sender address
      to: mailsacToAddress, // recipient address
      subject: "Hello!",
      text: "Check out https://example.com",
      html: "Check out <a href https://example.com>My website</a>",
    });

    // logs the messageId of the email, confirming the
    // email was submitted to the smtp server
    console.log("Sent email with messageId: ", result.messageId);
});
Add Loop to Check Mail
This section of code uses a for loop and a http library (supertest) to check if the message has arrived at Mailsac. The test uses the Mailsac API endpoint /api/addresses/{email}/messages which lists all messages in an inbox.
describe("send email to mailsac", function () {
...

  it("sends email with link to example.com website", async () => {
...
    // Check email in the inbox 10x, waiting 5 secs in between. Once we find mail, abort the loop.
    let messages = [];
    for (let i = 0; i < 10; i++) {
      // returns the JSON array of email message objects from mailsac.
      const res = await request("https://mailsac.com")
        .get(`/api/addresses/${mailsacToAddress}/messages`)
        .set("Mailsac-Key", mailsacAPIKey);

      messages = res.body;
      if (messages.length > 0) {
        break;
      }
      await wait(4500);
    }
  });
});
Add Assertion to Check for Link in the Message
assert is used twice. First, to check to see if any messages were fetched from the Mailsac inbox. This checks the length of the messages array to see if any messages were received. The second assert is used to check for a link to http://example.com .
describe("send email to mailsac", function () {
  // ...
  it("sends email with link to example.com website", async () => {
    // ...
    let messages = [];
    for (let i = 0; i < 10; i++) {
      // ... await get messages from mailsac
    }
    assert(messages.length, "Never received messages!");

    // After a message is retrieved from mailsac, the JSON object is checked to see if the link was parsed from the email and it is the correct link
    const link = messages[0].links.find((l) => "https://example.com");
    assert(link, "Missing / Incorrect link in email");
  });
});
Run Test
At this point the test code is complete and can be run using npm test. If all went well the following output is written to the console.
npm test
Run Test Using GitHub Repository
If you are having some trouble with the tests, I recommend downloading the code from GitHub and running it.
git clone https://github.com/mailsac/mailsac-integration-test-examples.git
cd mailsac-integration-test-examples
npm install
$EDITOR test/test.js # or open with your favorite editor
Edit the test.js and fill in your SMTP settings and Mailsac API key
const mailsacAPIKey = ""; // Generated by mailsac. See https://mailsac.com/api-keys
const mailsacToAddress = "[email protected]"; // Mailsac email address where the email will be sent
const smtpUserName = ""; // Username for smtp server authentication
const smtpPassword = ""; // Password for smtp server authentication
const smtpHost = ""; // hostname of the smtp server
const smtpPort = 587; // port the smtp is listening on
Run test running the command npm test in your terminal.
Next Steps
The example above can be used as part of your team’s quality assurance process. A real world example would be validating password reset links to customers. This test could be used to validate that when a customer requests a password reset an email is sent to them containing the correct password reset link.
If you have any questions about this example or want to talk about other implementations reach out to our community at https://forum.mailsac.com .