By Mailsac Engineering. Tested on September 24, 2026 with @playwright/test 1.63 on Node.js 22, 24 and 26.
In short: Playwright can’t open an inbox by itself. Send your app’s signup or reset email to a Mailsac address, wait for it from the Playwright test runner with the Mailsac REST API, then type the emailed code or open the emailed link. The helper below is about 75 lines and needs no extra packages.
Get a free API key → The free plan includes an API key, 1 private address and 1,500 operations a month. Team plans with shared custom domains start at $89/month.
Playwright can fill in your signup and password-reset forms, but the step that proves they work happens outside the browser: an email arrives with a 6-digit code or a link. This tutorial adds that step to your Playwright tests. Your app sends mail through its usual provider, Mailsac receives it at a unique test address, and the test reads it through the Mailsac REST API before typing the code or opening the link.
You will build a small helper, two signup-verification tests (one types the emailed code, one follows the emailed link) and a password-reset test that signs in with the new password. The tests run side by side in parallel workers and in GitHub Actions. Every code block below was run with real Playwright against a local test app and a mock of the Mailsac API.
How Playwright email testing works
Each test follows three steps:
- Trigger. The test signs up, or asks for a reset, with a brand-new address such as
signup-3-1790000000000-1a2b3c4d@yourteam.msdc.co, and notes the time just before it clicks. There is no inbox to create first: any address at mailsac.com or on your custom domain can receive mail.
- Wait. The test polls
GET /api/addresses/{email}/messages, which lists the inbox newest first, until a message with the expected subject arrives after that time, or a 60-second deadline passes.
- Check. The test reads the links Mailsac found in the message from
GET /api/addresses/{email}/messages/{messageId}, or its plain text from GET /api/text/{email}/{messageId}. Then it types the code or opens the link in the browser.
Every request sends your API key in the Mailsac-Key header. The helper runs in Playwright’s Node.js test runner, so the key never reaches the page under test.
Before you start
- Node.js 22, 24 or 26, the versions Playwright currently supports.
- A Mailsac API key. Create a free account, then generate a key under API Keys & Users in the dashboard. Every plan includes API access; the free plan includes 1,500 Ops a month. A key is shown only once, so store it like a password.
- An app that sends real email, running on your machine or in a test environment. Mailsac receives and inspects test email; it doesn’t send it. To stop a staging app from emailing real people, you can point its SMTP settings at Mailsac’s Email Capture instead; your tests read captured mail by recipient address with the same API. Captured mail is public unless you turn on private capture.
- A place for the mail. Public
@mailsac.com addresses are fine for a first try with made-up accounts. For reset links and codes that would work on a real account, use a verified private custom domain, available on Indie and higher plans. See public vs private addresses below.
Set up the project
Create a project with Playwright Test and its Chromium browser. In an existing Node.js project, skip the first two lines. @types/node gives your editor types for process and node:crypto.
mkdir email-tests && cd email-tests
npm init -y
npm install --save-dev @playwright/test @types/node
npx playwright install chromium
mkdir -p tests
Already using Playwright? Keep your config, but make sure its test timeout is longer than the email wait, as below. The config that npm init playwright generates also sets workers: 1 on CI, which runs your email tests one at a time.
Save this as playwright.config.ts in the project root:
import { defineConfig } from '@playwright/test';

export default defineConfig({
  testDir: './tests',
  timeout: 90_000, // longer than the 60 s email wait, so a missing email gets a clear error
  fullyParallel: true, // every test has its own address, so tests can run side by side
  workers: process.env.CI ? 4 : undefined,
  use: { baseURL: process.env.BASE_URL ?? 'http://localhost:3000' }, // PLACEHOLDER: your app
});
timeout: 90_000 gives each test more time than the helper’s 60-second wait, so a missing email fails with the helper’s message instead of Playwright’s default 30-second test timeout.fullyParallel, and 4 workers on CI, are safe because every test gets its own address. See parallel workers below.baseURL comes from BASE_URL, so the same tests can target your laptop or a staging deployment.
Add a Mailsac helper
Save this as tests/mailsac.ts. It uses Node’s built-in fetch, so there is nothing else to install.
// tests/mailsac.ts: read test email with the Mailsac REST API and Node's built-in fetch.
// It runs in the Playwright test runner, not in the browser, so the key never reaches a page.
import { randomUUID } from 'node:crypto';
import type { TestInfo } from '@playwright/test';

const API = process.env.MAILSAC_API_URL ?? 'https://mailsac.com/api';
// @mailsac.com inboxes are public unless reserved. Set MAILSAC_DOMAIN to your private domain.
const DOMAIN = process.env.MAILSAC_DOMAIN || 'mailsac.com';

async function mailsac(path: string) {
  const key = process.env.MAILSAC_API_KEY; // a secret: keep it in the runner's environment
  if (!key) throw new Error('Set MAILSAC_API_KEY');
  const headers = { 'Mailsac-Key': key };
  const res = await fetch(API + path, { headers, signal: AbortSignal.timeout(10_000) });
  // Fail fast on errors. A 429 means the account hit its monthly Ops limit.
  if (!res.ok) throw new Error(`Mailsac API returned ${res.status} for ${path}`);
  return res;
}

// A new address for every test (and every retry), so workers never share an inbox.
export function newAddress(testInfo: TestInfo, prefix: string) {
  const id = `${testInfo.workerIndex}-${Date.now()}-${randomUUID().slice(0, 8)}`;
  return `${prefix}-${id}@${DOMAIN}`;
}

type Message = { _id: string; subject: string; received: string };
type WaitOptions = { subject: string; receivedAfter: number; timeoutMs?: number };

// Poll every 2 s until the deadline. Ignore mail received before `receivedAfter`.
export async function waitForEmail(email: string, options: WaitOptions) {
  const { subject, receivedAfter, timeoutMs = 60_000 } = options;
  const deadline = Date.now() + timeoutMs;
  while (Date.now() <= deadline) {
    const res = await mailsac(`/addresses/${email}/messages?limit=10`); // newest first
    const messages = (await res.json()) as Message[];
    const match = messages.find((m) =>
      Date.parse(m.received) >= receivedAfter && m.subject?.includes(subject));
    if (match) return match;
    await new Promise((resolve) => setTimeout(resolve, 2_000));
  }
  throw new Error(`No "${subject}" email for ${email} in ${timeoutMs / 1000} s`);
}

// The links Mailsac found in the message's text and HTML bodies.
export async function getLinks(email: string, id: string) {
  const res = await mailsac(`/addresses/${email}/messages/${id}`);
  const { links } = (await res.json()) as { links?: string[] | null };
  // Plain-text links can keep trailing punctuation, e.g. <url> or [url]; drop it.
  return [...new Set((links ?? []).map((url) => url.replace(/[>\]).,;:!?'"*]+$/, '')))];
}

// The plain-text body. Mailsac generates one when the email is HTML-only.
export async function getText(email: string, id: string) {
  const res = await mailsac(`/text/${email}/${id}`);
  return res.text();
}

// Exactly one distinct link with the same origin and path as `url`, or an error.
export function extractLink(links: string[], url: string) {
  const want = new URL(url);
  const found = new Set(links.filter((link) => {
    if (!URL.canParse(link)) return false;
    const { origin, pathname } = new URL(link);
    return origin === want.origin && pathname === want.pathname;
  }));
  if (found.size !== 1) throw new Error(`Expected 1 link to ${url}, found ${found.size}`);
  return [...found][0];
}

// Exactly one distinct standalone 6-digit code, or an error.
export function extractCode(text: string) {
  const codes = new Set(text.match(/\b\d{6}\b/g) ?? []);
  if (codes.size !== 1) throw new Error(`Expected 1 six-digit code, found ${codes.size}`);
  return [...codes][0];
}
What each part does:
- The API key comes from the environment.
MAILSAC_API_KEY is read inside the test runner process. Never put it in browser code, in a variable your frontend build embeds, or in your repository. MAILSAC_API_URL is optional; leave it unset unless you point the helper at a mock API in your own tests.
newAddress builds a new address for every test from Playwright’s testInfo.workerIndex, a timestamp and a random suffix. The worker index and timestamp make addresses easy to find in logs, and the random part keeps addresses unique even when two CI jobs start in the same millisecond. A retry runs the test body again, so it gets a new address too.waitForEmail lists the 10 newest messages every 2 seconds. It returns the first one whose subject contains your text and whose received time is at or after receivedAfter. The inbox endpoint can’t return only the mail received after a given time, so the helper filters in the test. After 60 seconds it throws an error that names the subject and the address.getLinks reads the message metadata, where Mailsac lists the HTTP(S) links it found in the text and HTML bodies. A link in plain text can keep punctuation such as a closing >, so the helper trims it and removes duplicates.getText returns the plain-text body. If the email only has HTML, Mailsac generates the text.extractLink and extractCode return exactly one match or throw. A test that picks one of two codes can pass for the wrong reason; a test that fails loudly tells you the email changed.- Errors stop the test at once. A 401 means Mailsac didn’t accept the key. A 429 means the account has used its monthly Ops, so retrying won’t help.
Test signup verification with a code or a link
Save this as tests/signup.spec.ts. Both tests sign up with a new address. The first reads the 6-digit code from the email and types it in; the second opens the verification link instead. Keep whichever matches your app, or both if your email offers both.
import { test, expect, type Page } from '@playwright/test';
import {
  newAddress, waitForEmail, getText, getLinks, extractCode, extractLink,
} from './mailsac';

// PLACEHOLDER: your signup page's labels, button and heading.
async function signUp(page: Page, email: string) {
  await page.goto('/signup');
  await page.getByLabel('Email').fill(email);
  await page.getByLabel('Password').fill('a-test-password-123');
  const receivedAfter = Date.now(); // just before the app sends the email
  await page.getByRole('button', { name: 'Create account' }).click();
  await expect(page.getByRole('heading', { name: 'Check your email' })).toBeVisible();
  return receivedAfter;
}

test('signup: the emailed 6-digit code verifies the account', async ({ page }, testInfo) => {
  const email = newAddress(testInfo, 'signup');
  const receivedAfter = await signUp(page, email);

  const message = await waitForEmail(email, { subject: 'Verify your email', receivedAfter });
  const code = extractCode(await getText(email, message._id));

  await page.getByLabel('Verification code').fill(code);
  await page.getByRole('button', { name: 'Verify' }).click();
  await expect(page.getByRole('heading', { name: 'Email verified' })).toBeVisible();
});

test('signup: the emailed link verifies the account', async ({ page, baseURL }, testInfo) => {
  const email = newAddress(testInfo, 'signup');
  const receivedAfter = await signUp(page, email);

  const message = await waitForEmail(email, { subject: 'Verify your email', receivedAfter });
  const links = await getLinks(email, message._id);

  await page.goto(extractLink(links, new URL('/verify', baseURL).href));
  await expect(page.getByRole('heading', { name: 'Email verified' })).toBeVisible();
});
Change the paths, labels, button names, headings and email subject to match your app. Two details matter more than they look:
- Take
receivedAfter just before the click that makes your app send the email. Taken after the click, it could skip an email that arrives quickly.
extractLink compares origin and path. It keeps only links whose origin and path match new URL('/verify', baseURL), so footer links, help pages and links to other sites are ignored.
Test the full password-reset flow
Save this as tests/password-reset.spec.ts. It creates an account, requests a reset, opens the emailed link, sets a new password and signs in with it.
import { test, expect } from '@playwright/test';
import { newAddress, waitForEmail, getLinks, extractLink } from './mailsac';

test('password reset: the emailed link works', async ({ page, baseURL }, testInfo) => {
  const email = newAddress(testInfo, 'reset');

  // An account to reset. PLACEHOLDER: or create one through your app's API or seed data.
  await page.goto('/signup');
  await page.getByLabel('Email').fill(email);
  await page.getByLabel('Password').fill('an-old-test-password');
  await page.getByRole('button', { name: 'Create account' }).click();
  await expect(page.getByRole('heading', { name: 'Check your email' })).toBeVisible();

  await page.goto('/forgot-password');
  await page.getByLabel('Email').fill(email);
  const receivedAfter = Date.now(); // just before the app sends the email
  await page.getByRole('button', { name: 'Send reset link' }).click();
  await expect(page.getByRole('heading', { name: 'Check your email' })).toBeVisible();

  // The inbox also holds the signup email; the subject and time filter skip it.
  const message = await waitForEmail(email, { subject: 'Reset your password', receivedAfter });
  const links = await getLinks(email, message._id);

  await page.goto(extractLink(links, new URL('/reset', baseURL).href));
  await page.getByLabel('New password').fill('a-new-test-password');
  await page.getByRole('button', { name: 'Update password' }).click();
  await expect(page.getByRole('heading', { name: 'Password updated' })).toBeVisible();

  // The new password works.
  await page.goto('/login');
  await page.getByLabel('Email').fill(email);
  await page.getByLabel('Password').fill('a-new-test-password');
  await page.getByRole('button', { name: 'Sign in' }).click();
  await expect(page.getByRole('heading', { name: 'Signed in' })).toBeVisible();
});
By the time the reset email arrives, the inbox also holds the signup email. The subject and receivedAfter filters skip it, just as they would skip older messages in a real inbox. If your app can create accounts through an API or seed data, use that instead of the signup form; the reset part stays the same. If your app only allows a reset or sign-in after the email is verified, verify the account first with the steps from the signup test.
Run the tests
Set your key, your private domain and your app’s URL, then run the suite with four workers:
export MAILSAC_API_KEY=your_api_key      # PLACEHOLDER: from your Mailsac dashboard
export MAILSAC_DOMAIN=yourteam.msdc.co   # PLACEHOLDER: your private domain
export BASE_URL=http://localhost:3000    # PLACEHOLDER: an app that sends real email
npx playwright test --workers=4
When each test finds its email, Playwright reports 3 passed. To try the helper without a custom domain, leave MAILSAC_DOMAIN unset: it then uses public @mailsac.com addresses, which suit made-up accounts only.
Run email tests in parallel workers
Email tests run in parallel safely when no two tests share an inbox:
- One address per test. Each test calls
newAddress, so its inbox only receives mail for that test. Workers, retries, shards and separate CI jobs never see each other’s email.
- Parallel inside files too.
fullyParallel: true lets the two signup tests in one file run at the same time, and --workers=4 (or the CI setting in the config) runs up to four tests at once.
- Shared Ops. Parallel tests share your account’s monthly Ops. Each API call is one Op, and each email received by a private address or custom domain is one more. On a private domain, when the email is already there on the first poll, the code test and the link test use 3 Ops each, and the reset test uses 4 because it receives two emails. Mail to public
@mailsac.com addresses isn’t counted, so there each test uses 2. Each extra 2-second poll adds 1, so a test that times out uses about 30.
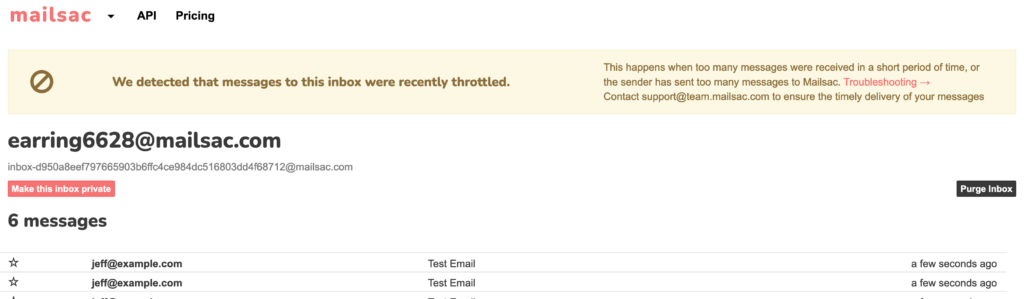
- Throttling. Public addresses are throttled at lower volumes: delivery slows by up to about a minute, then mail is deferred. Busy suites belong on a verified custom domain.
- Fixed accounts. If some tests must share one address, such as a pre-seeded account, give them the same Playwright test lock, for example
{ lock: 'seeded-account' }. They then never run at the same time, while the rest of the suite stays parallel. receivedAfter still stops them from reading older mail in that inbox.
Run the tests in GitHub Actions
Add your key as a repository secret: in your repository’s Settings, open Secrets and variables, then Actions, choose New repository secret and name it MAILSAC_API_KEY. Then save this workflow as .github/workflows/email-tests.yml:
name: Email tests
on:
  push:
    branches: [main]
  pull_request:
permissions:
  contents: read
jobs:
  playwright:
    runs-on: ubuntu-latest
    timeout-minutes: 15
    steps:
      - uses: actions/checkout@v6
      - uses: actions/setup-node@v6
        with:
          node-version: lts/*
      - run: npm ci
      - run: npx playwright install --with-deps chromium
      - run: npx playwright test
        env:
          MAILSAC_API_KEY: ${{ secrets.MAILSAC_API_KEY }}
          MAILSAC_DOMAIN: yourteam.msdc.co # PLACEHOLDER: your private domain
          BASE_URL: https://staging.example.com # PLACEHOLDER: your deployed test app
- GitHub Actions sets
CI, so the config runs 4 workers.
- The workflow runs on pushes to
main (change it to your default branch) and on pull requests, so a pull request doesn’t run the suite, and spend Ops, twice.
BASE_URL points at a deployed test environment whose mail provider sends real email. To test an app started inside the job instead, start it before the test step, or use Playwright’s webServer option, and make sure it can send mail.MAILSAC_DOMAIN isn’t secret, so it can live in the file. The key stays in GitHub’s secret store.- GitHub doesn’t pass Actions secrets to workflows triggered from a forked repository or by Dependabot, so those pull requests fail with
Set MAILSAC_API_KEY. Run email tests on branches in your own repository, and add the key as a Dependabot secret too if you want Dependabot’s pull requests tested.
- This config doesn’t record traces, screenshots or videos. The config that
npm init playwright generates records a trace on the first retry, and traces record the codes your tests type and the URLs they open, including reset links. Keep reports and artifacts private.
Public vs private addresses and custom domains
Where the test email goes decides who else can read it.
- Public
@mailsac.com addresses need no setup and work on every plan, including the free plan. Anyone can view a public inbox on the Mailsac website without an account, and any Mailsac API key can read it or delete individual messages from it. Public inboxes are temporary, and their messages may be recycled quickly.
- Private addresses are reserved in the dashboard or with
POST /api/addresses/{email}. Only your account and team can read their mail. The free plan includes one. A private address suits one fixed test account, not a new address for every test.
- Custom domains, on Indie and higher plans (not the free plan), give every test its own private address. A zero-setup subdomain of msdc.co, such as
yourteam.msdc.co, receives mail right away with no DNS changes. You can also bring your own domain: verify it with a TXT record and point its MX records to Mailsac. Mail to a domain that isn’t verified yet is public. Every address on the domain receives mail without setup, so newAddress works unchanged.
@mailsac.com inboxes are public unless you reserve them as private addresses. Anyone who knows or guesses a public address can read its mail, including reset links and codes. The helper falls back to public addresses only so you can try it on the free plan with made-up accounts. Before you test links or codes that would work on a real account, or emails that contain real personal data, set MAILSAC_DOMAIN to your verified private domain. Plan limits for private addresses and custom domains are on the pricing page.
Troubleshooting
Set MAILSAC_API_KEY: the variable isn’t set in the process that runs Playwright. In GitHub Actions, check the secret’s name, and remember that pull requests from forks and from Dependabot don’t receive Actions secrets.Mailsac API returned 401: Mailsac didn’t accept the key. Look for extra spaces or an old key. A key is shown only once, so create a new one if you’ve lost it.Mailsac API returned 403: the address is a private address owned by another Mailsac account. Check MAILSAC_DOMAIN, and use a key from the account that owns your private addresses and domain.Mailsac API returned 429: the account has used its monthly Ops. The limit is soft: Mailsac emails warnings first, but if usage keeps going, API requests return 429 until the next month, which stops your email tests. Ops reset on the first of each month (UTC). To keep testing, add Ops or move to a larger plan.- Other HTTP errors, such as a 5xx: the helper stops at the first error. If they show up in CI, retry them within your deadline.
No "…" email for … in 60 s: compare the address in the error with the one your app actually sent to, and check that the subject text matches (the match is case-sensitive). Check your email provider’s logs too, because some test or sandbox modes accept mail without delivering it. Keep the test machine’s clock in sync, because the helper compares its own time with Mailsac’s received time. On public @mailsac.com addresses, throttling can delay a busy suite’s mail by up to about a minute, so run busy suites on a verified custom domain. The missing mail guide covers other causes.Expected 1 link to …, found 0: no link in the email has that origin and path. Common causes: your email provider’s click tracking rewrote the link (turn tracking off for test mail), the token is part of the path, as in /verify/abc123, or BASE_URL doesn’t match the host in your emails.Expected 1 link to …, found 2: the email has two different links to that path, for example because the sender hard-wrapped a long link in the plain-text part. Fix the template, or filter the links before calling extractLink.Expected 1 six-digit code: found 0 usually means the code is formatted differently, such as 482 913. Found 2 means another 6-digit number, such as an order number or postcode, is in the email. Make the pattern in extractCode match your email’s wording.- The link opens but your app rejects it: check the plain-text part of the email for HTML leftovers such as
& inside the link.
- Tests pass alone but fail in parallel: two tests share an address or a fixed account. Call
newAddress in every test.
- Reading mail through the Mailsac website instead of the API? Since September 17, 2026, the website shows email HTML in a sandboxed iframe, so page-level selectors won’t find content inside it. The API calls in this tutorial need no selectors. If you automate the website anyway, use Playwright’s frame locators with the preview’s iframe title, as described in the email preview update.
Next steps
- Using Cypress? The Cypress email testing tutorial covers the same password-reset flow with the
@mailsac/cypress plugin.
- See the whole workflow. The Email Testing API page explains the trigger, wait and check loop, how Ops add up, and includes a dependency-free Node.js example.
- Look up endpoints. The API reference lists every endpoint, and the Mailsac documentation covers private addresses, custom domains, webhooks and WebSockets.
- Skip polling. Turn on webhook or WebSocket forwarding for a private address, or for a catch-all address on your custom domain, and Mailsac pushes each new email to you. Domain-wide WebSockets need a Business or Enterprise plan, and pushed messages use Ops.
- Record the UI steps. Playwright Codegen writes the form-filling part of these tests for you.
Create a free Mailsac account to get an API key, then point these tests at your own app.