Our team will be performing database maintenance on Saturday May 22nd, 2021 from 14:00 – 16:00 UTC. During this period, API, email, and website services may be unavailable, intermittent, or slow to respond.
Updates during and on completion of the maintenance will be provided in this blog post.
UPDATE All maintenance has been completed and the team is standing by monitoring performance. No further impact is expected.
Selenium and Mailsac can be used to test the delivery and contents of a signup email sent by a web application.
This example will demonstrate how to configure Selenium and provide code examples to automate and integrate testing with Mailsac.
What is Selenium?
Selenium is an automation tool for testing website user interfaces. It is open-source and supports multiple programming languages such as Java, Python, Javascript etc.
Selenium is not a single tool but is composed a several tools. Our example will focus on the WebDriver component. This will allow us to test our application as if a real person were operating the web browser.
The Selenium WebDriver is installed during step 2 by running npm install.
Clone the selenium-js-example repository and change directories to the cloned repository git clone https://github.com/mailsac/selenium-js-example.git && cd ./selenium-js-example
Install the Selenium WebDriver by running npm install
Download browser driver for the browser that will be tested (see table for download links).
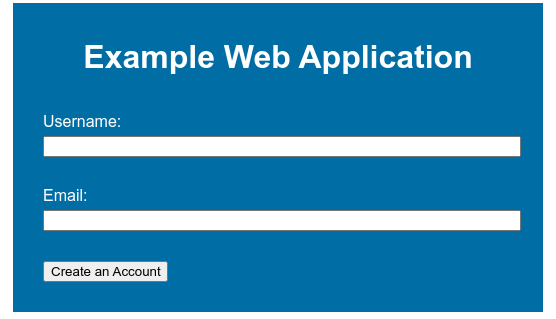
The example web application consists of a single page with a form. The form accepts a username and email address.
Configuring the Web Application
Email will be sent using the Mailsac Outbound Message REST API. You will need to update mailsacAPIKey with your API key. mailsacFromAddress is the address that this example will use are the from address.
const mailsacAPIKey = ""; // Generated by mailsac. See https://mailsac.com/api-keys
const mailsacFromAddress = "[email protected]";
Manual Test of Email Delivery
To manually test email delivery, launch the example web application by running npm start from the command line. Use a web browser to view http://localhost:3000/index.html
Enter a username and email address.
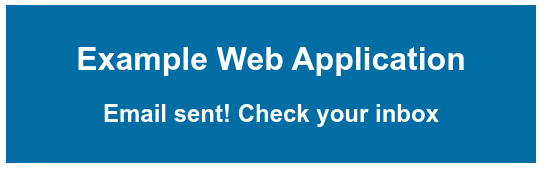
2. If everything went well you should see a confirmation.
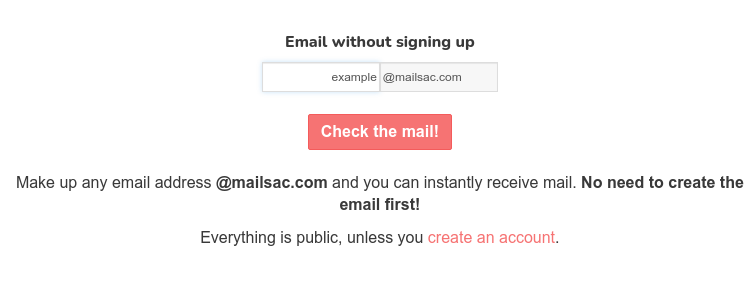
3. Check the inbox of Mailsac address you send to using the form on https://mailsac.com
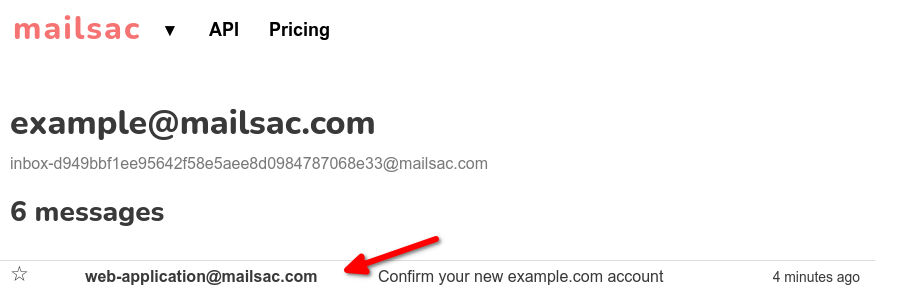
4. Verify the message you sent has been received.
Automated Testing Using Selenium
To automate UI testing a few different components are required:
Selenium WebDriver: Automates input into our web application’s form
Mocha: Test framework to run the tests
HTTP Requests Module: To interact with the Mailsac API
Assert Module: Validates if a given expression is true
Webserver: Runs our web application
All of these components are installed when running npm install
Configure Mailsac API Key
To interact with the Mailsac API an API Key is needed. To generate a new API Key sign in to Mailsac and go to the API Keys Page.
An API Key is available for free to all registered users of Mailsac.
Configure the test to work with your API Key by adding it to the following line in ./test/test.js
const mailsacAPIKey = ""; // Generated by mailsac. See https://mailsac.com/api-keys
Run the Test
Before running the tests your Mailsac API key needs to be configured in ./test/test.js and SMTP settings configured in app.js.
The tests can be executed by running npm test from the command line.
npm test

> [email protected] test /home/user/repos/selenium-js-example
> mocha


  http-server
    register new user
(node:838754) [DEP0066] DeprecationWarning: OutgoingMessage.prototype._headers is deprecated
      ✓ sends email with link to example.com website (1383ms)


  1 passing (1s)
The last line in the above code snippet 1 passing (1s) shows our test passed. If the test failed, an error message will be displayed.
If you are using a browser other than Firefox you will need to add an environment variable when running the tests (eg SELENIUM_BROWSER=chrome npm test).
Using Mocha and Selenium to Automate Tests
This section will cover how Mocha and Selenium work together in this code example to test email delivery.
The integration tests are located in ./test/test.js. The tests are written in Mocha, which uses a behavior driver development model. This allows for the description of tests in easy to understand language.
Mocha Test Introduction
In the following example, the describe block includes a description of what is being tested. The it block describes the expected result. assert is used to test the for truth. If the expected statement is not true, there will be an exception, and the test will fail.
describe("tests truth", () => {
    it('true equals true', function() {
        assert(true); // assert checks for truth
    });
    it('false equals false', () => {
        // assert equal checks the first and second parameter are equal
        assert.equal(false,false);
    });
})
Mocha and Selenium
This section is a line by line explanation of the Mocha tests in the example. The code example is available on GitHub.
Mocha is used to call the Selenium WebDriver to perform actions on the example Web Application. The describe block shows we are going to be testing the process of registering a new user. The it block tells us what we expect to happen.
Inside the it block Selenium WebDriver is instructed to:
open a web browser using the webapp’s localhost URL
find the html element with the id username and enter text in the field
find the html element with the id email and enter specified text in the field
find the html element with the id submitUserCreation and click on it
it("sends email with link to example.com website", async () => {
  await driver.get(webappUrl);
  await driver.findElement(webdriver.By.id("username")).sendKeys("webdriver", "ExampleUser");
  await driver.findElement(webdriver.By.id("email")).sendKeys("webdriver", signupEmailAddress);
  await driver.findElement(webdriver.By.id("submitUserCreation")).click();
...
Our webapp will then email the address submitted by Selenium.
There is a for loop, following the Selenium commands, that uses the Mailsac API to fetch the mail from the specified email address. If an email isn’t found, it will retry 10 times waiting about 5 seconds between tries.
let messages = [];
for (let i = 0; i < 10; i++) {
   // returns the JSON array of email message objects from mailsac.
   const res = await request("https://mailsac.com")
           .get(`/api/addresses/${signupEmailAddress}/messages`)
           .set("Mailsac-Key", mailsacAPIKey);
   messages = res.body;
   if (messages.length > 0) {
      break;
   }
   await wait(4500);
}
If no messages are received from the Mailsac API after 10 tries, assert will create an exception and throw the error Never received messages!. The contents of the email are checked to see if the link https://example.com is in the email. If, the link is not found, an exception is created stating Missing / Incorrect link in email
assert(messages.length, "Never received messages!");
const link = messages[0].links.find((l) => "https://example.com");
assert(link, "Missing / Incorrect link in email");
Next Steps
This example can be modified to automate your team’s UI testing procedures. For another example of Mocha tests using Mailsac see the Integration Tests Blog Post.
Our forums are a great place to discuss usage of Mailsac’s API.