These days, we have better options than writing our test specs by hand.
The open source community has released a variety of frameworks to relieve us from that particular tedium: Cypress, Selenium and Pupeteer. And in this video companion guide, I’ll focus on Playwright. Specifically, how playwright can help automate a lot of the boilerplate involved in writing test specs with CodePen.
The video will do a quick walk you through playwright in itself. This article will provide the core login.spec.ts file I used and where to go from next.
But before we do that, it’s worth mentioning that efficient testing isn’t just about the right tools; it’s also about the seamless integration of these tools into your existing systems. That’s where Mailsac comes in. Our platform offers unique capabilities for email testing within your automated workflows, making it an excellent complement to Playwright for end-to-end testing solutions.
With Mailsac, you can ensure not just the functionality but also the integrity of email interactions in your applications, all within the automation framework you’ll establish with Playwright.
So, What Is Playwright?

Playwright is an open-source automation library created by Microsoft. It’s designed to enable developers and testers to write reliable and efficient tests for web applications.
It’s cross platform and officially compatible with the major browsers.
Diving Into Codegen
Start by installing playwright inside your project
npm init playwright@latest
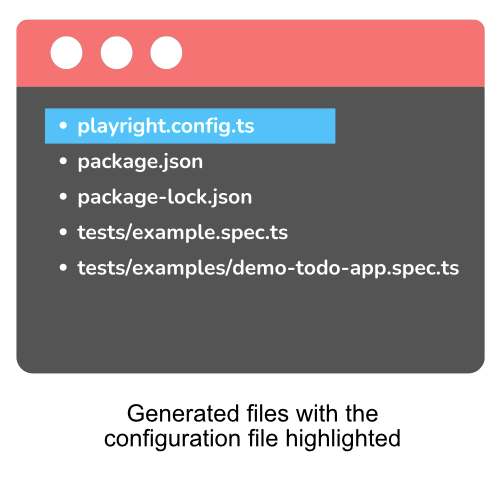
I’ll be using the defaults for this guide. After installation you’ll have these files generated in your project:
Putting Codegen Through Its Paces
First Run
Fire up codegen via the built in console
npx playwright codegen
As you click around your application you’ll see codegen record each click based on its css class.
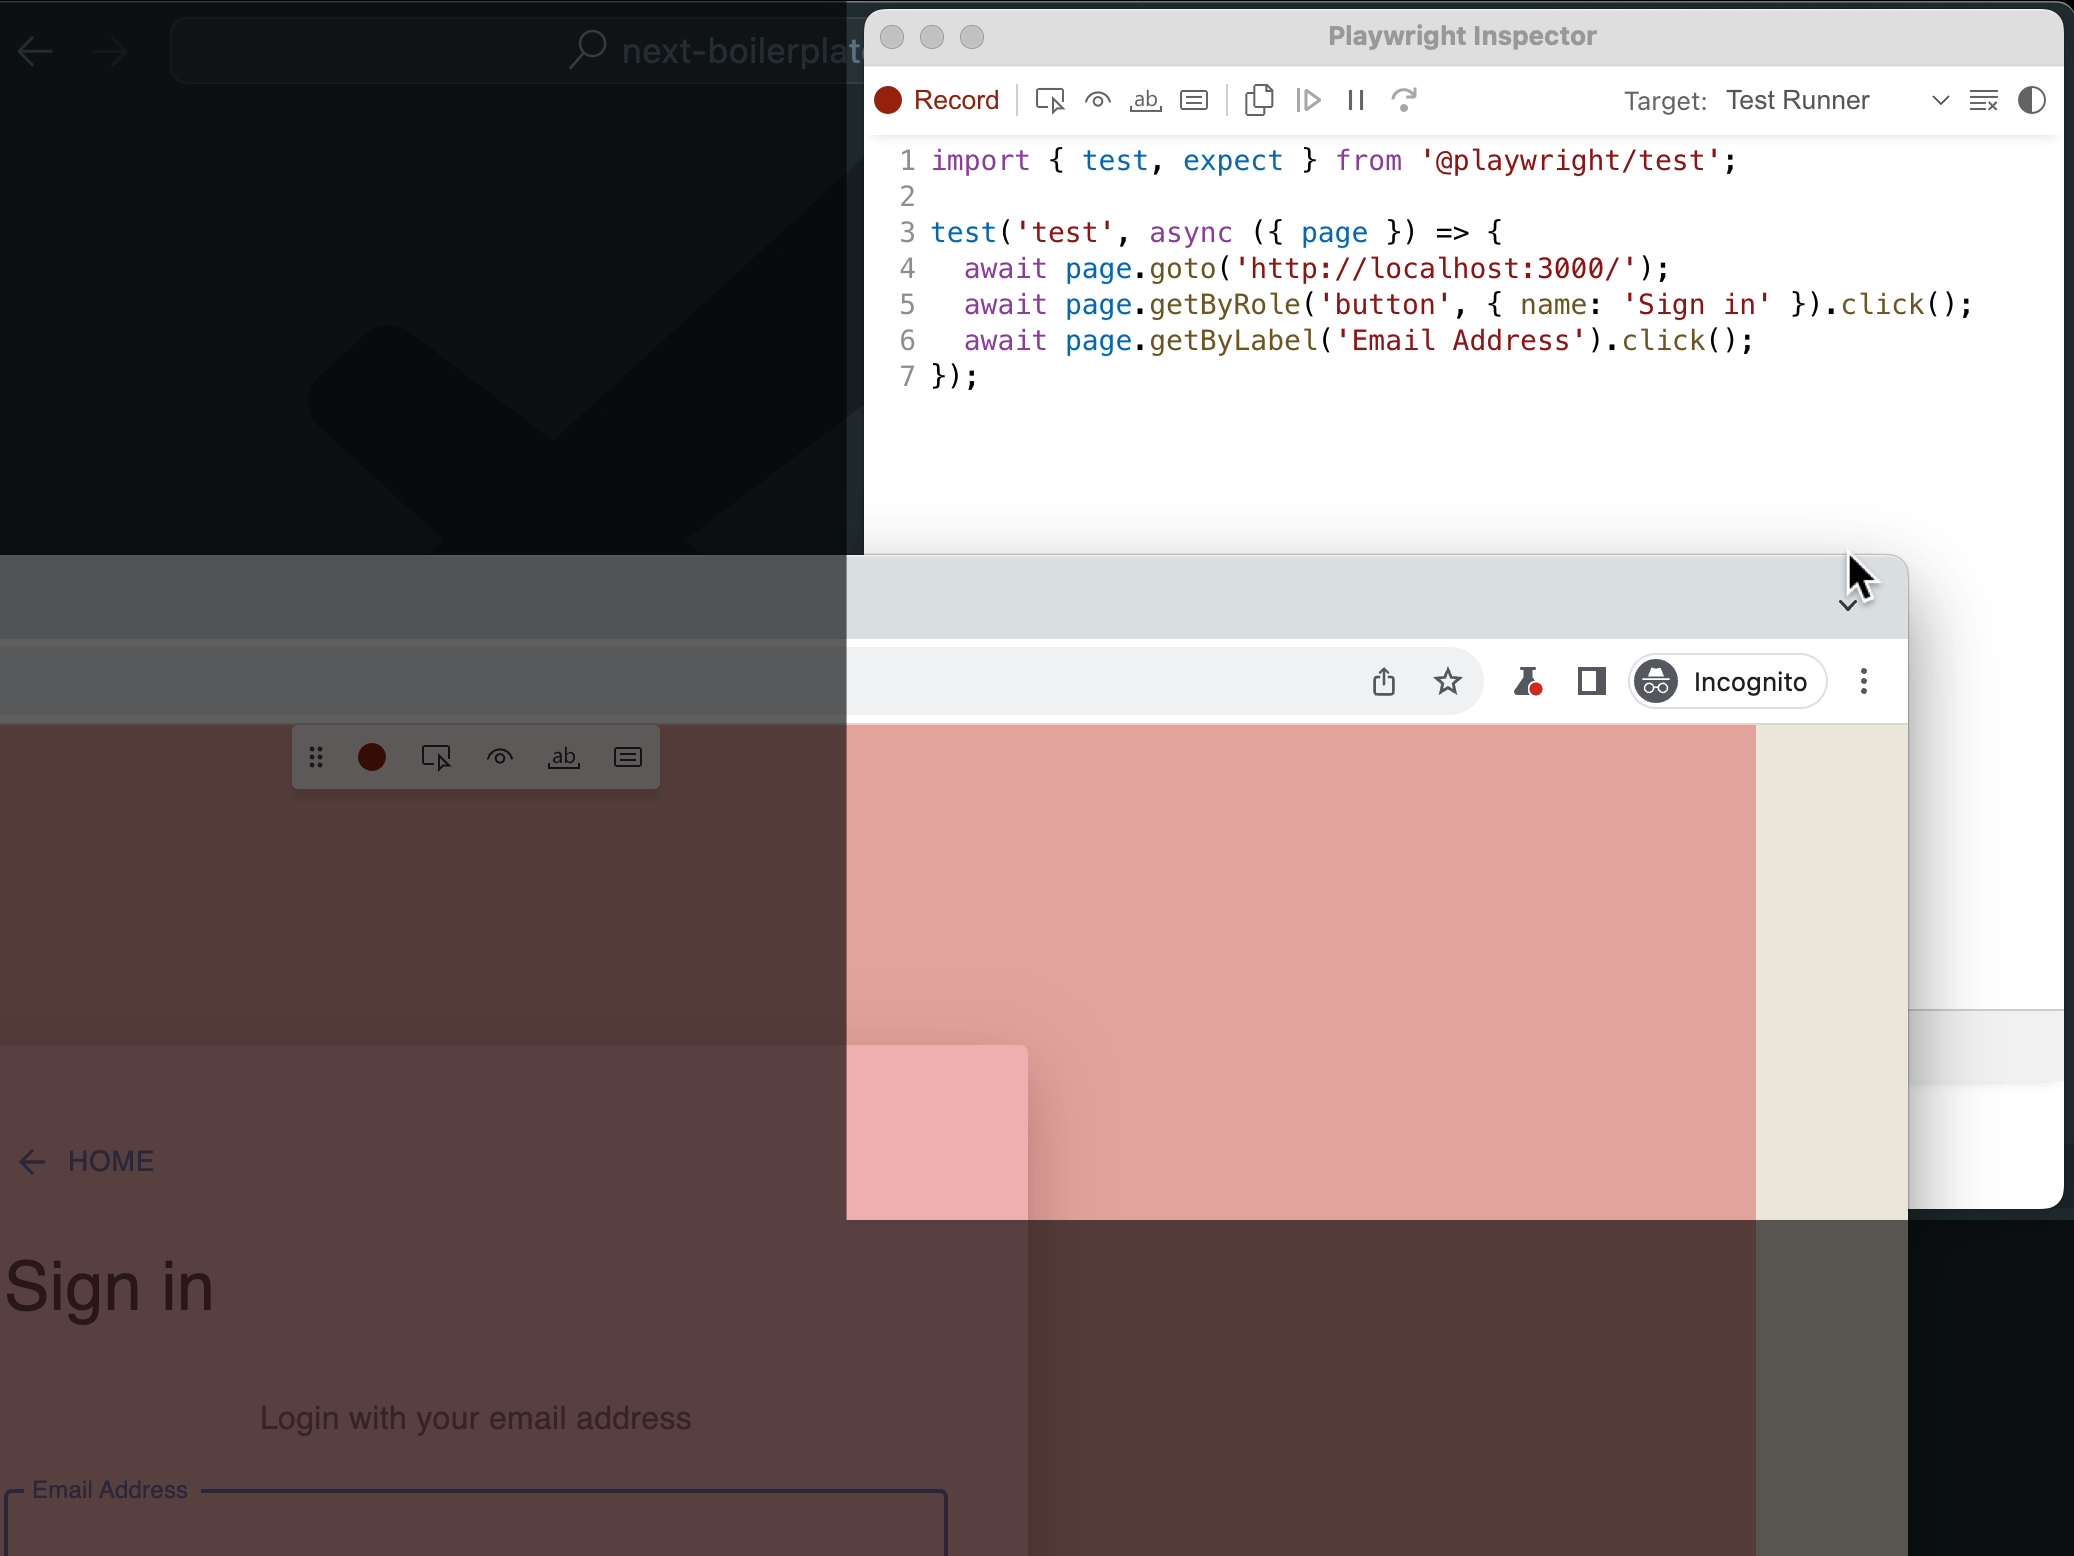
It will build each line as you go about your test. In our video, we perform a login with an incorrect set of credentials and a correct set.
Our login.spec.ts file
Before our manual edits, this is what codegen generated for us:
import { test, expect } from '@playwright/test';

test('test', async ({ page }) => {
  await page.goto('http://localhost:3000/');
  await page.getByRole('button', { name: 'Sign in' }).click();
  await page.getByLabel('Email Address').click();
  await page.locator('form div').filter({ hasText: 'Email AddressEmail Address' }).getByRole('paragraph').click();
  await page.getByLabel('Email Address').click();
  await page.getByLabel('Email Address').fill('[email protected]');
  await page.getByLabel('Email Address').press('Tab');
  await page.getByLabel('Password').fill('password');
  await page.getByLabel('Password').press('Enter');
  await page.getByLabel('Email Address').click();
  await page.getByLabel('Email Address').fill('[email protected]');
  await page.getByLabel('Email Address').press('Tab');
  await page.getByLabel('Password').fill('password123');
  await page.getByLabel('Password').press('Enter');
  await page.getByRole('button', { name: 'Settings' }).click();
  await page.getByText('Note: Your email mailsac.demo').click({
    button: 'middle'
  });
  await page.getByRole('button', { name: 'Next boilerplate' }).click();
});
All we had to do was manually add was the highlighted lines (13 and 19) to turn it into a real test:
import { test, expect } from '@playwright/test';

test('test', async ({ page }) => {
  await page.goto('http://localhost:3000/');
  await page.getByRole('button', { name: 'Sign in' }).click();
  await page.getByLabel('Email Address').click();
  await page.locator('form div').filter({ hasText: 'Email AddressEmail Address' }).getByRole('paragraph').click();
  await page.getByLabel('Email Address').click();
  await page.getByLabel('Email Address').fill('[email protected]');
  await page.getByLabel('Email Address').press('Tab');
  await page.getByLabel('Password').fill('password');
  await page.getByLabel('Password').press('Enter');
  await expect(page).toHaveURL('http://localhost:3000/login');
  await page.getByLabel('Email Address').click();
  await page.getByLabel('Email Address').fill('[email protected]');
  await page.getByLabel('Email Address').press('Tab');
  await page.getByLabel('Password').fill('password123');
  await page.getByLabel('Password').press('Enter');
  await expect(page).toHaveURL('http://localhost:3000/home');
  await page.getByRole('button', { name: 'Settings' }).click();
  await page.getByText('Note: Your email mailsac.demo').click({
    button: 'middle'
  });
  await page.getByRole('button', { name: 'Next boilerplate' }).click();
});
Running the Test
Running the test by default shows no visual progress. But if you’d like to see the browser run through your steps visually, you’ll need to issue the command:
npx playwright test --headed
Where to go next
The most natural next step is integrating playwright tests with a continuous integration platform like Travis or Github Actions. Plugging playwright into a CI system like Github Actions is fully supprted by playwright natively.
Another possible progression is using playwright to test critical paths in your application like user registration or password reset flows. We have a full guide on how to do that with another framework, Cypress.
If you want us to explore how you can integrate playwright with email testing and Github Actions or any other potential playwright integrations, let us know on our forums. We’ve only scratched the very surface of what playwright can do.
Until next time.