Continuous Integration/Continuous Deployment (CI/CD) pipelines are at the heart of modern software development practices, enabling teams to automate testing and deployment processes to increase efficiency and reliability. Integrating email testing into your CI/CD pipeline is crucial for applications that rely on email functionality, ensuring that every update maintains or enhances the quality of email communications. This guide walks you through the process step by step, ensuring a seamless integration of email testing into your CI/CD workflows.
Step 1: Understand Your Email Testing Needs
Before diving into integration, clearly define what aspects of your email functionality need testing. This might include deliverability, content accuracy, responsiveness, and interaction with email clients. Understanding these needs helps in selecting the right tools and defining the scope of testing within your pipeline.
Step 2: Select the Right Email Testing Tools
Choose tools that offer API integration capabilities and can simulate various email scenarios. Tools like Mailsac allow for seamless integration into CI/CD pipelines, offering features such as disposable email addresses, REST API access for automated testing, and custom domain testing capabilities.
Step 3: Set Up Your Email Testing Environment
Configure your chosen email testing tool within your development and staging environments. Ensure it’s capable of capturing and analyzing the emails sent by your application during the automated testing phase. This setup should mimic your production environment as closely as possible to ensure accurate results.
Step 4: Integrate Email Testing into Your CI/CD Pipeline
Incorporate email testing tasks into your CI/CD pipeline configuration. This involves:
Triggering Email Tests: Automate the sending of emails based on specific triggers within your pipeline, such as a successful build or deployment to a staging environment.
Monitoring and Logging: Ensure your email testing tool captures detailed logs and analytics, providing insights into the success or failure of email deliveries and content rendering.
Analyzing Results: Set up mechanisms to analyze the results of email tests, identifying issues like failed deliveries, content errors, or rendering issues across email clients.
Step 5: Automate Feedback Loops
Implement automated feedback loops to alert developers and QA teams of any issues detected during email testing. This can be done through integration with project management tools, sending notifications via email, Slack, or other communication platforms used by your team.
Step 6: Continuous Monitoring and Optimization
Even after successful integration, continuously monitor the performance and effectiveness of your email testing within the CI/CD pipeline. Use insights gained from testing to refine and optimize email functionality, ensuring ongoing improvement and adherence to best practices.
Step 7: Document and Educate Your Team
Document the integration process, tools used, and best practices for email testing within your CI/CD pipeline. Educate your development and QA teams on the importance of email testing and how it fits into the broader context of quality assurance and software reliability.
Conclusion
Integrating email testing into your CI/CD pipeline is a strategic move that enhances the quality assurance process for applications relying on email communications. By following this step-by-step guide, your team can ensure that email functionality remains robust, reliable, and responsive to the needs of your users. Tools like Mailsac can play a pivotal role in this process, offering the flexibility, ease of integration, and comprehensive testing capabilities necessary to meet the demands of modern software development practices.
Email remains a critical communication tool in business, making its reliability and functionality crucial for a wide range of applications. For QA teams, ensuring that emails are sent, received, and displayed as intended across various environments and platforms is a non-negotiable part of the software development process. This checklist provides a comprehensive guide for QA professionals to thoroughly test email functionality, ensuring a seamless user experience.
1. Preparation and Planning
Define Objectives: Clearly outline what you need to test, such as deliverability, content, links, and attachments.
Identify Email Scenarios: List all the scenarios in which an email would be sent. This includes transactional emails, marketing emails, notifications, and any others specific to your application.
Understand the Audience: Know the email clients (e.g., Gmail, Outlook) and devices (e.g., smartphones, tablets) your audience uses.
2. Functional Testing
Deliverability: Ensure emails reach the recipient’s inbox, not the spam folder.
Send and Receive Verification: Confirm that emails are sent and received without errors in all scenarios.
Link and Attachment Testing: Check all links and attachments for correct functionality and security.
Formatting and Layout: Verify that emails display correctly across different email clients and devices.
Accessibility Testing: Ensure emails are accessible, including alternative text for images and readable fonts for those with visual impairments.
3. Content and Design Testing
Spelling and Grammar: Verify the accuracy of content, including spelling and grammar.
Branding Consistency: Ensure the email design aligns with your brand’s guidelines and messaging.
Responsive Design: Test emails on various screen sizes to ensure the design is responsive and elements are clickable.
4. Security and Compliance Testing
Data Protection: Confirm that personal data is handled securely, in compliance with laws like GDPR.
Email Authentication: Check for SPF, DKIM, and DMARC records to prevent phishing and ensure sender authenticity.
5. Performance Testing
Load Testing: Assess the system’s ability to handle high volumes of emails without performance degradation.
Speed Testing: Evaluate the time taken to send, receive, and load emails, ensuring it meets user expectations.
6. Integration and Automation Testing
Integration Checks: Verify that email functionality integrates seamlessly with other systems and workflows.
Automation Suitability: Identify processes that can be automated, such as regression tests for email functionalities.
7. User Acceptance Testing
Real User Simulation: Conduct tests that mimic real-user scenarios to ensure the email meets user needs and expectations.
Feedback Collection: Gather and incorporate feedback from actual users to refine email functionality.
Review
Email testing is a critical component of QA that ensures your application communicates effectively and reliably with users. By following this comprehensive checklist, QA teams can systematically address and rectify potential issues, enhancing the overall user experience.
Interested in simplifying and accelerating your email testing process? Mailsac offers a robust platform designed to streamline email testing for QA teams. With features like disposable email addresses, zero-setup custom domain support, and extensive API access, Mailsac enables you to focus on what matters most—delivering a flawless product. Try Mailsac for free today, getting test email in seconds, and discover how we can elevate your QA email testing to the next level.
If you’re in the business of making or testing software, you’re well aware of the critical role email functionality can play in applications. Particularly in sensitive workflows like user sign-ups and password resets. Testing these features however can often be a complex and daunting task. This is where Cypress and Mailsac come in. Together these two streamline the email testing process; cypress driving it and mailsac capturing and validating any emails that may come out of your testing.
Join me as we explore how you can leverage these powerful tools to automate and enhance your testing workflow, ensuring a seamless user experience in your applications.
This article acts as a companion guide to the video linked at the top. Here, we’ll quickly walk through the topics mentioned in the video but also expand some areas and provide the code that the video uses.
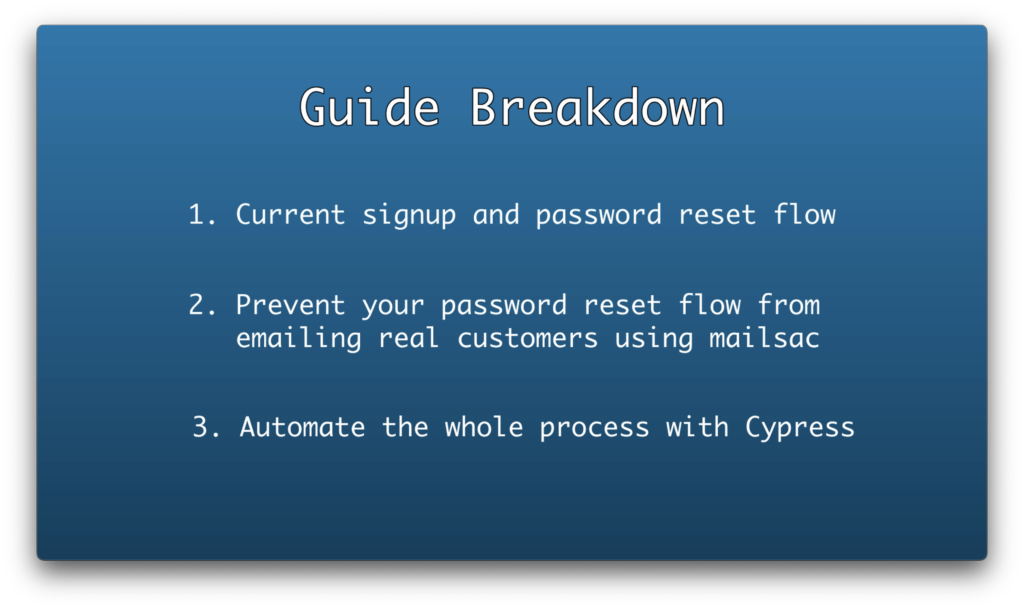
The general path we’ll take in this guide is:
Walk through our application’s reset flow
Safeguard against sending emails to real customers
Automate the password reset process with subject verification with cypress.
Let’s get started!
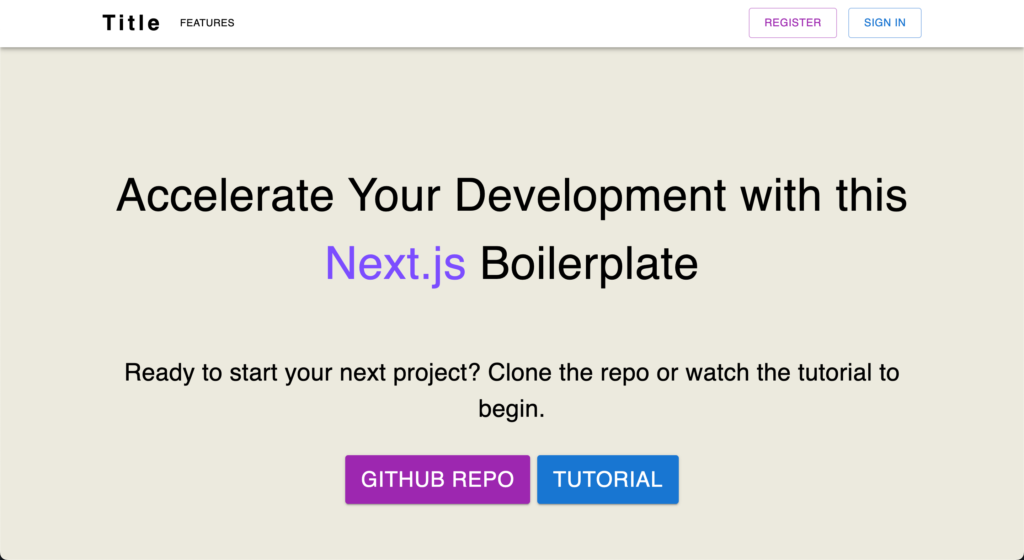
Setting the Stage: Manually Testing our Next.js App
Our main screens of interest
We’ll focus on a simple next.js application equipped with local authentication features. Instead of starting from scratch, we’ll use Martin Persson’s Next.js Authentication Template. The concepts we’ll test are a common part of almost every application, and by using his template we’ll have a starting point (most) of us can agree on. Martin’s application comes complete with login functionality, member-exclusive sections, and importantly, a password reset flow.
Our goal is to show how we can streamline testing the password reset flow, ensuring that branch of your code behaves the same way every time. By the end of this, you’ll have a clear blueprint for applying these techniques in your projects.
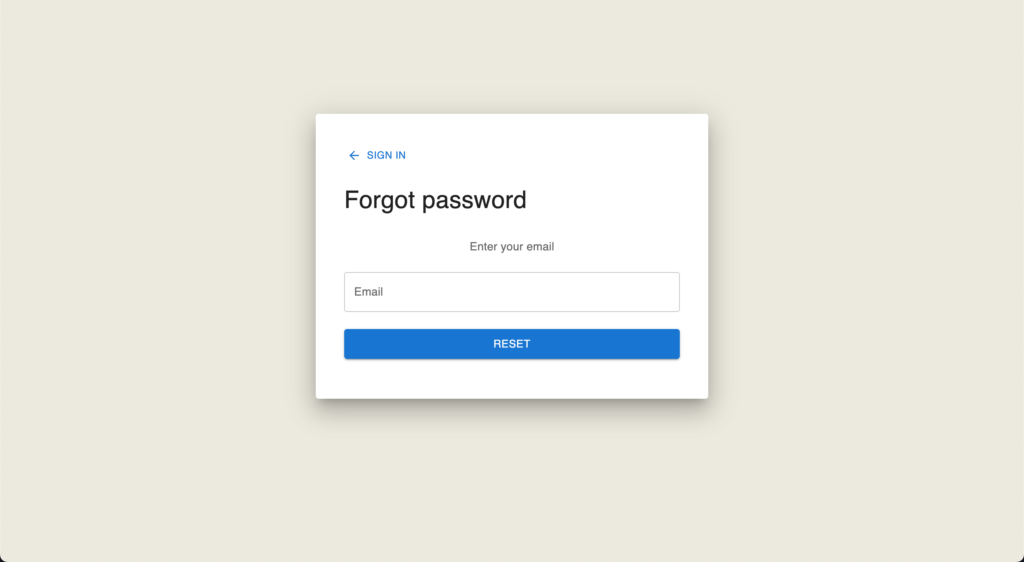
Regular Password Reset Speedrun
Let’s do a quick walk through on how we would reset our password in our app.
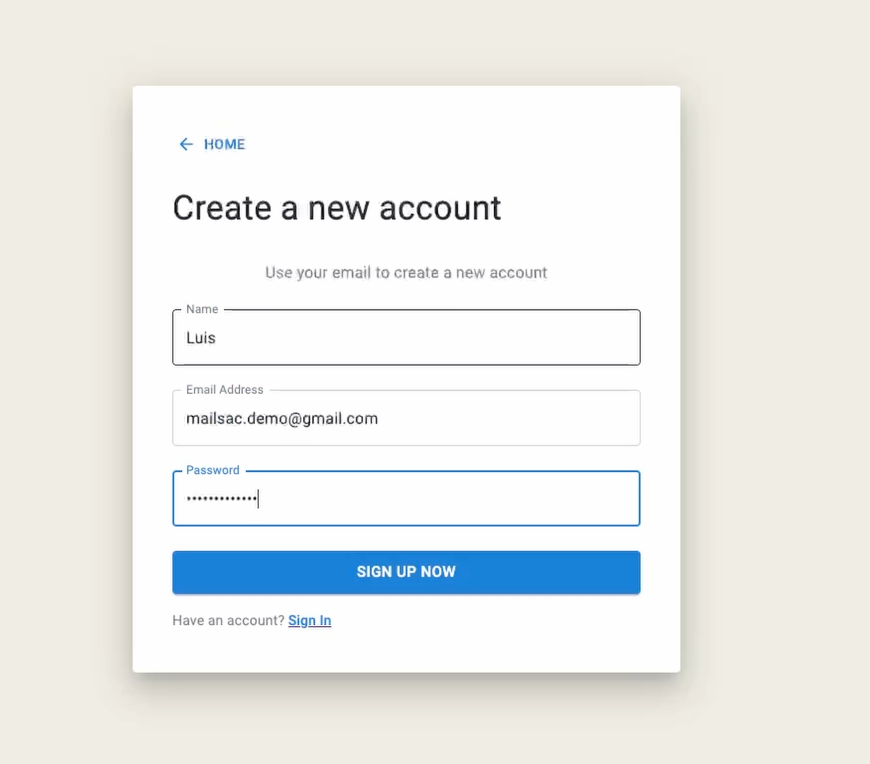
Create an Account
The app doesn’t do any email validation out of the box but it does create and store account credentials in its database.
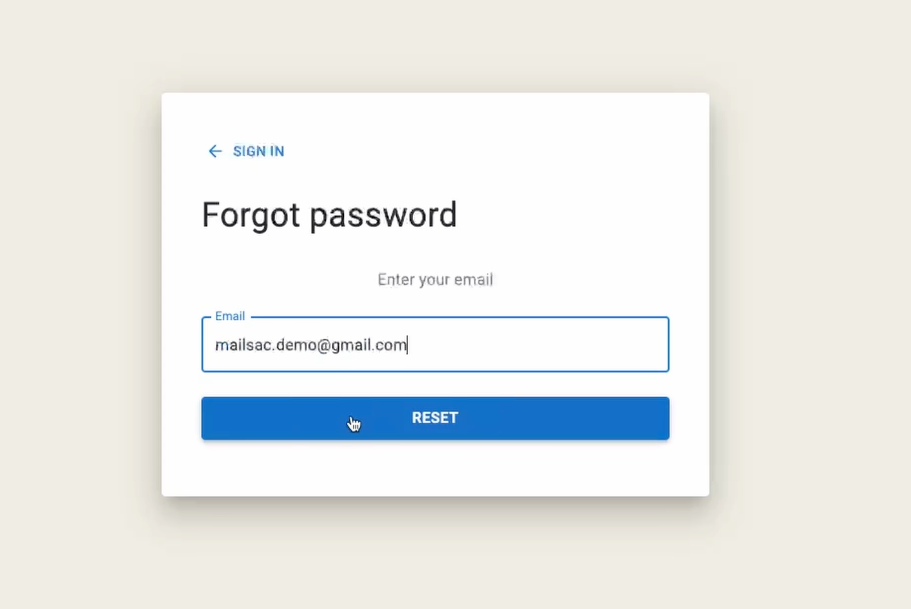
Reset Password To a Real Email Address
This is a standard password reset flow. The main thing to note here is that the application is sending out transactional emails to real email addresses.
Caveats
During continuous testing we could be building our application and testing its capabilities tens to hundreds of times per month. We’ll need to ensure we don’t send any emails real customers.
This is where Mailsac comes in.
Safeguarding Against Sending Emails to Real Customers
Mailsac has an email capture feature that enables customers to “reroute” any emails generated by your application to an inbox on the mailsac platform. Additional testing capabilities are available including verification of delivered content and ensuring the emails that get sent have the correct subject.
Start Capturing Emails from your Application
This guide assumes you have a mailsac user account. If not it’s free to sign up.
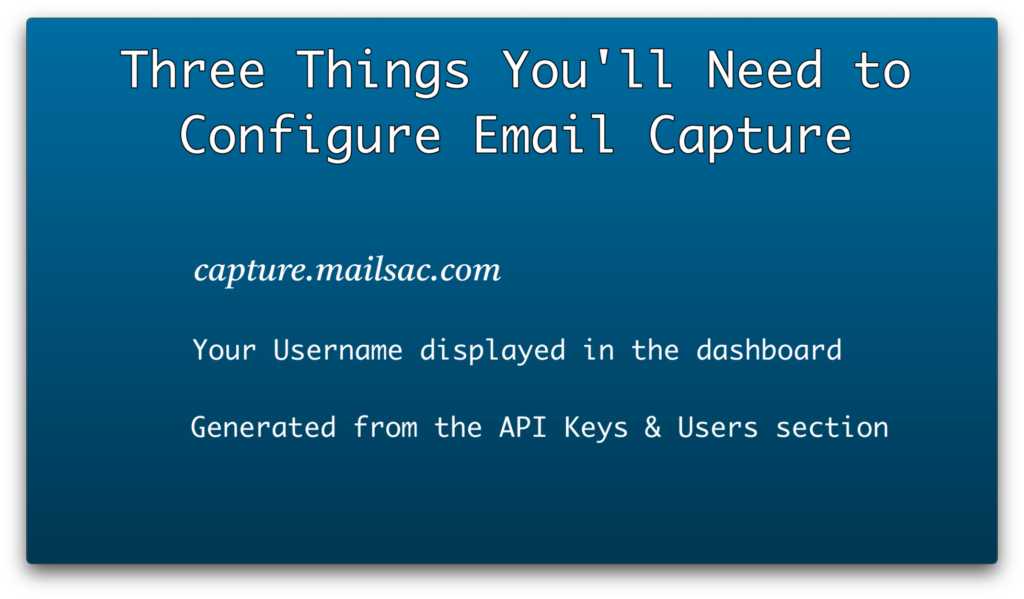
Getting started is extremely easy. Just point your application’s SMTP settings to the mailsac’s servers and all outbound emails will be captured.
Our sample application reads in a .env file:
MONGODB_URI="mongodb://localhost:27017"
WEB_URI="http://localhost:3000"
MAIL_PASSWORD="k_99dfuuifjd"         # Your Mailsac API Key
MAIL_USER="mailsacuser"              # Your Mailsac Username
MAIL_HOST="capture.mailsac.com"
MAIL_PORT="5587"
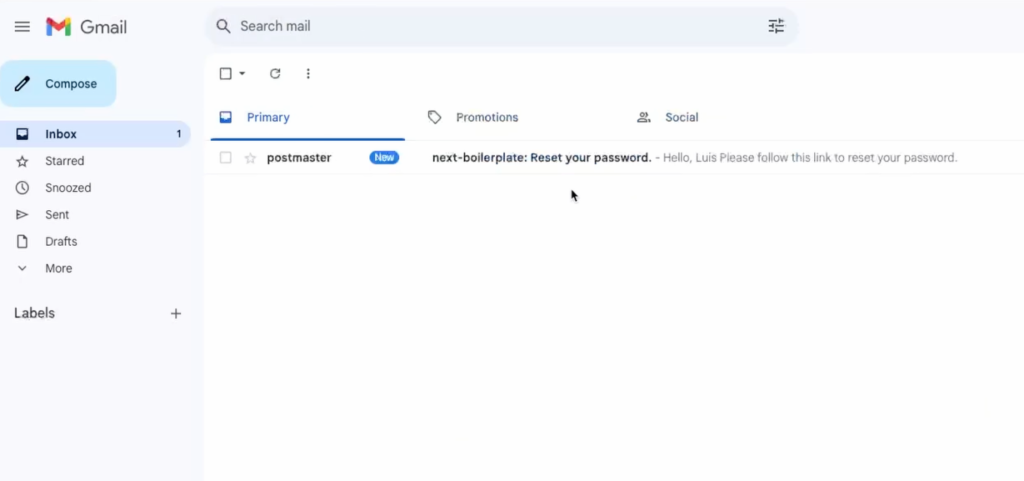
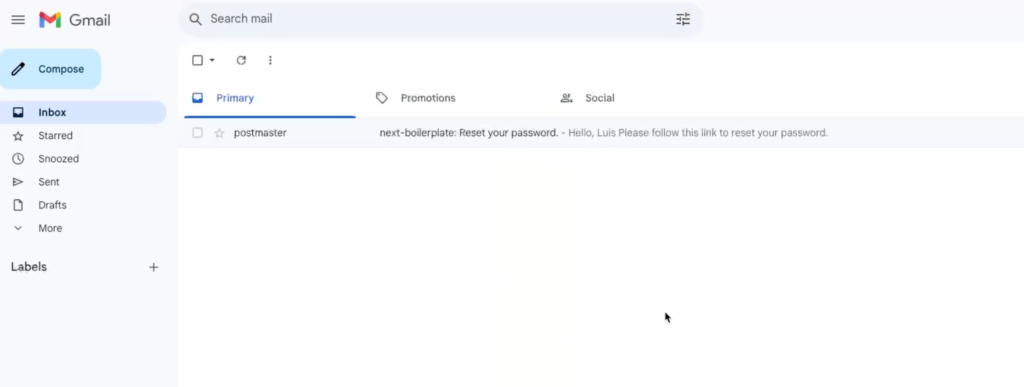
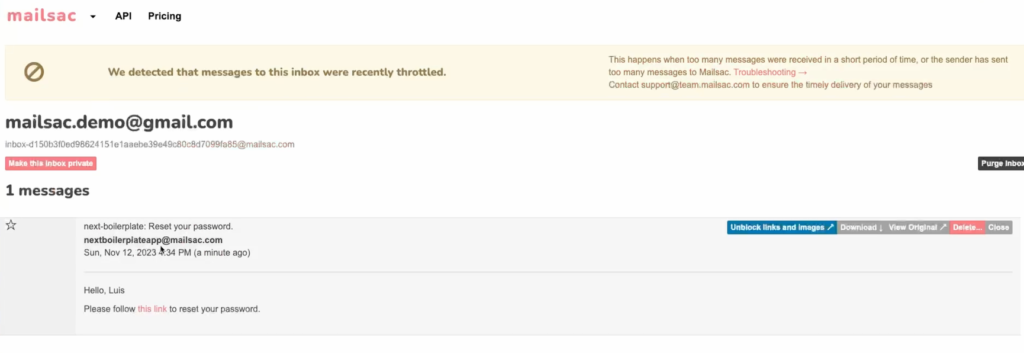
Going through the password reset flow in our application again, we successfully have no emails in our real gmail inbox, and an email in the Mailsac inbox.
Also, we did notcreate this inbox ahead of time. It was done ad-hoc as the email came into mailsac.
No emails in our real inboxAnd a successful password reset on our mailsac inbox.
Success. Now we are safe against sending out real emails to customers. Let’s begin the automated testing processes with Cypress
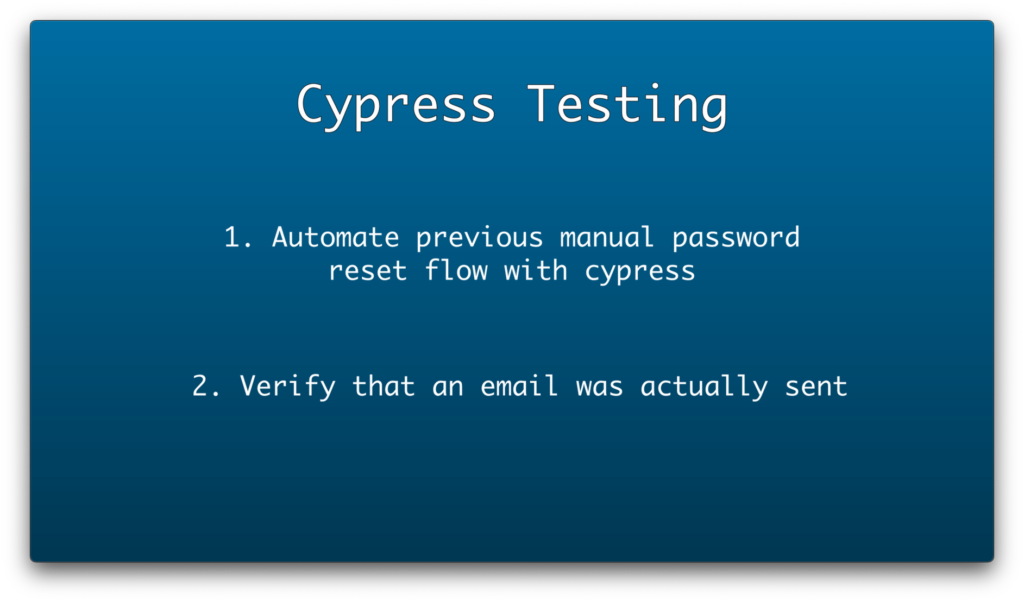
Automatic Testing with Cypress
Our goal with cypress is to automate the clicking of a password reset link, and to verify that an email was actually initiated and sent by our application.
Installing and Configuring Cypress
Let’s start by installing cypress
npm cypress install
And then opening up the cypress testing center
npx cypress open
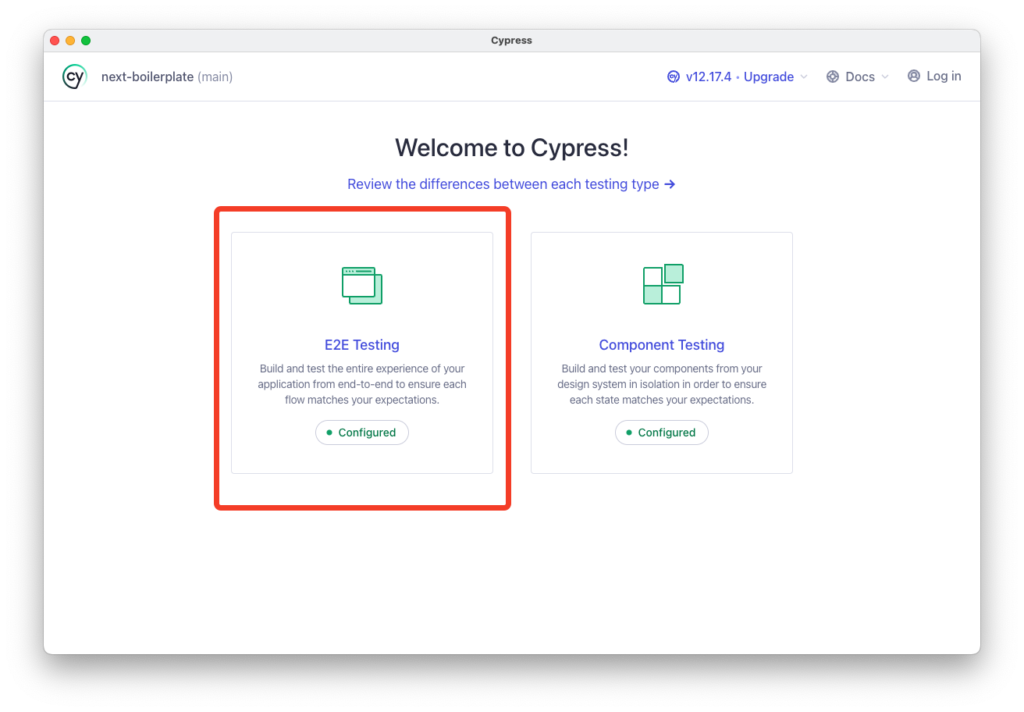
You’ll be greeted by what kind of testing type to initiate. In our case, we’ll use end to end testing
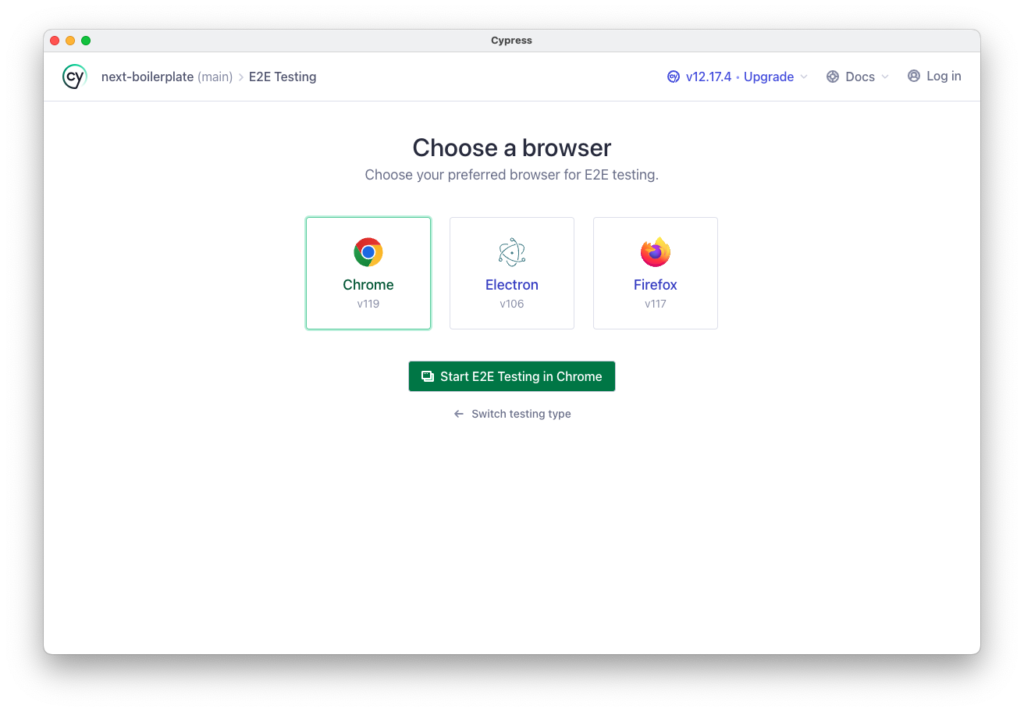
And the included Chrome browser
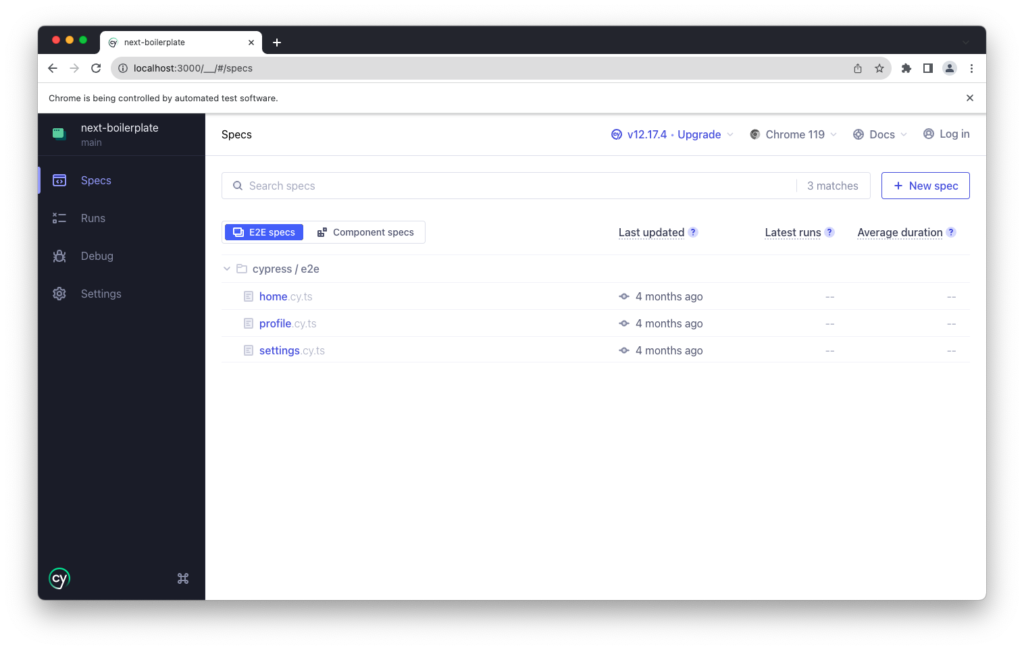
We are then greeted by the testing specs list
And now the real work begins.
Configure Cypress
Our configuration of cypress will need mailsac’s client and dotenv library. Cypress will need this to have the ability to read our application’s .env file
npm install @mailsac/api dotenv
We can now define what exactly a how exactly to execute a checkMailsacMail and deleteAllEmails function
The contents of this file are fully explained in the video (Starting at 6:24) but to call out the highlighted lines (13-30):
checkMailsacMail
The checkMailsacMail function initiates a mailsac client and uses the API key provided from the .env file variable, MAIL_PASSWORD. It then calls the listMessages function and passes it up to the calling function to do as it pleases. The function returns a JSON response as outlined in the Mailsac ListMessages documentation.
deleteAllEmails
Similar to checkMailsacMail but of course, deletes all messages in an inbox. Note that the return is a 204 to confirm deletion.
Let’s move on to the actual password testing spec
Password Reset Flow Test Spec
The spec itself is placed in the cypress/e2e/password_reset_flow_success.cy.ts path and contains:
describe('Password Reset Change', () => {
it('Should successfully change the password', () => {
cy.visit('http://localhost:3000')
// Find a button with class and contains text
cy.get(".MuiButton-root").contains("Sign in").click()
// The new url should include
cy.url().should("include", "/login")
const { username, password } = Cypress.env()
cy.get("a").contains("Forgot password").click()
cy.url().should("include", "/forgot-password")
cy.get("input[name='email']").type(username)
cy.get("input[name=email]").should("have.value", username);
cy.get(".MuiButton-root").contains("Reset").click();
cy.url().should("include", "/login")
cy.task("checkMailsacMail", username).then((messages) => {
const resetUrl = messages[0].links[0];
const subject = messages[0].subject;
const originalInbox = messages[0].originalInbox;
expect(subject).to.eq("next-boilerplate: Reset your password.");
expect(originalInbox).to.eq(username);
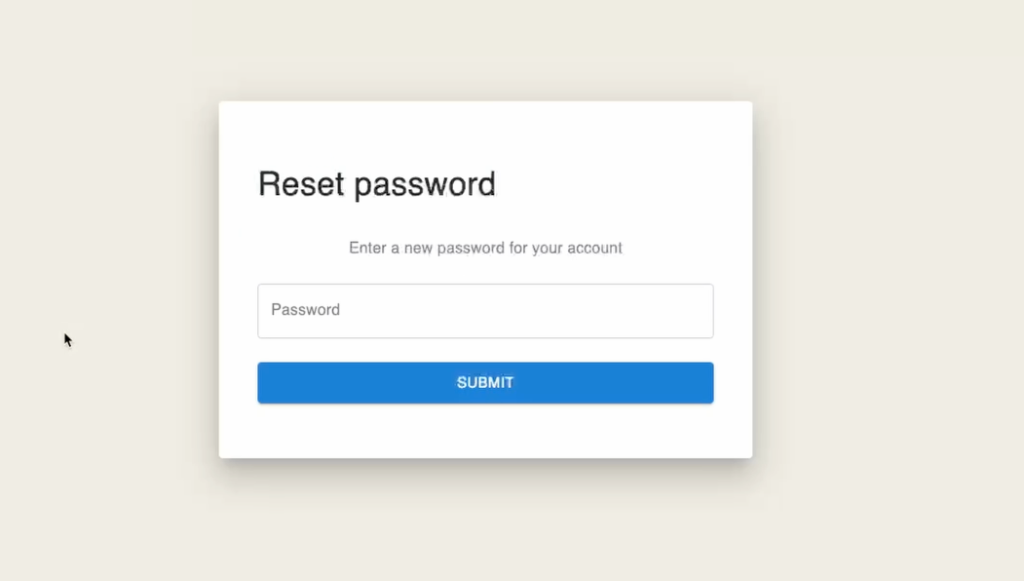
cy.visit(resetUrl);
cy.url().should("include", resetUrl);
cy.task("deleteAllEmails", username).then((result) => {
expect(result).to.eq(true);
});
});
})
})
Cypress will run through this spec file line by line and execute the steps we manually ran through at the beginning of the guide. The highlighted lines are really the structure of the returned JSON from mailsac’s ListMessages API
Final Automation
The the spec file in place, go ahead and run the spec
Wrap up
Combining Cypress and Mailsac is like giving your email testing a super boost. We’ve walked you through the nitty-gritty of automating a password reset flow, making sure your emails hit the mark without bothering real customers. It’s all about making your software solid while keeping things simple and stress-free. Give it a try, save time, and keep your users smiling.
If you have any questions about the guide or if you get stuck feel free to ask us anything in our forums.
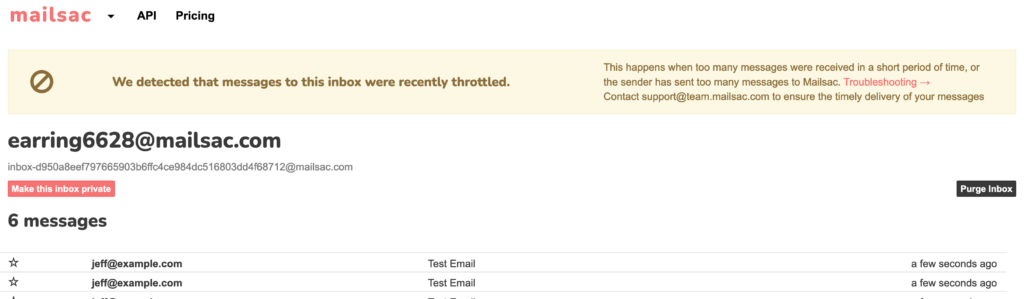
Custmers will start seeing informational messages in the inbox view https://mailsac.com/inbox/{{ email address }} when there has been throttling imposed on the inbox or sender to the inbox.
Paying customers will very rarely experience throttling. In almost all cases, throttling happens because they were sending to a public inbox, not a custom domain or private address.
We only throttle incoming messages to protect the stability of our service for all of our customers. These protections have been in place for years, but were not transparent to customers.
If you are on a paid plan and you are seeing throttling messages, reach out to [email protected], we can help you configure a custom domain or private addresses. These both can be done in seconds with no need for DNS changes.
If you are on our free tier and seeing these messages, this is a nudge for you to sign up for a paid plan. We would love to have you as a customer.
Unified Inbox, UI Modernization Efforts, and Maintenance Notifications
We do our best to be customer-focused by listening to our customer feedback and making sure your issues are addressed.
This month, we focused on UI issues that customers reported or we noticed when we were using our service.
Improved Maintenance Notifications
During a major database upgrade in September we noticed our maintenance notification on the website wasn’t always working properly. This resulted in customers seeing an unfriendly error.
From now on, customers will see a friendlier error page or API message when we are down for maintenance. That’s typically rare – once a year on average. We deploy often. Mailsac’s architecture has several load balancers and caches, and redundancies – we avoid stop-the-world events. But sometimes that’s unavoidable, and we hope it won’t be confusing.
Unified Inbox
The navigation bar for the Unified Inbox now works properly under Safari. It should no longer be cut-off (missing pagination buttons) in other browsers while viewing a message.
Starred messages for non-owned inboxes will now appear in the Unified Inbox.
UI Modernization
As noted in previous posts, we are migrating the entire Mailsac user interface to React and Next.js. After all pages are migrated, we will give the styling a facelift.
For now the migration should look seamless – perhaps slightly faster and more solid (thank you static typing and pre-compilation).
The account details page has been converted over to Next.js.
A bug that didn’t allow a customer to remove an invoice email was fixed.
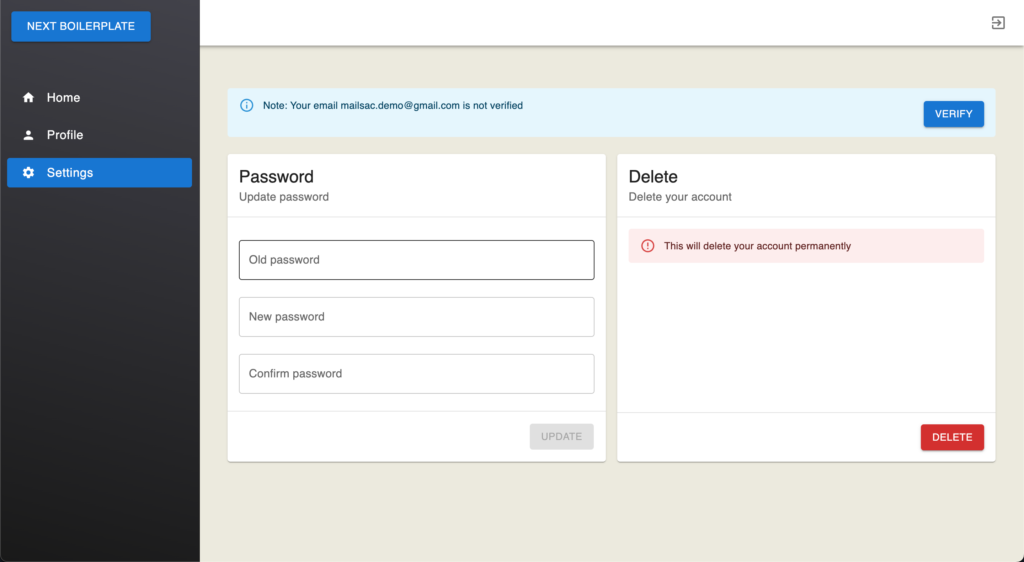
The password reset and account deletion functions were moved to their own pages.
We added many more integration tests to account management features.
Backend upgrades
On a weekly basis we patch, upgrade and improve the many backend systems of Mailsac across several environments. Typically this involves making small change to ansible, terraform, docker, code dependencies, or other infra-as-code. We often migrate portions of the 12+ year old Node.js JavaScript codebase to TypeScript or Go. If we’re luckily, we can delete unnecessary code or remove a dependency.
To run this SaaS smoothly, every day we get onto the software treadmill. We we enjoy running this service immensely, and hope you enjoy using it.
Mailsac remains committed to continuous improvement. Every day we improve the product based on customer feedback and SaaS best practices.
Here’s a summary of the latest enhancements.
New homepage and header navigation enhancements.
SAML Configuration Fix: enabled customer-supported account deletion when SAML is configured.
Testing: refactored and extended test coverage to payment processing.
Database: A series of database upgrades have been applied. This will continue through October to ensure we are leveraging the latest fixes and performance improvements.
Next.js: we continue overhauling the entire site using Next.js, in anticipation of a major restyle in 2024.
There are no breaking changes to any public API in these releases.
We want to inform you about a scheduled maintenance window set for October 7th between 0600 and 0800 PST (1300 – 1500 UTC). During this period, our team will be conducting a database upgrade to enhance the performance and reliability of our services.
Please note that requests to the REST API and the Web application may fail during this maintenance window. We recommend avoiding making requests to our services during this time to prevent any inconveniences.
We appreciate your understanding and cooperation. Rest assured that we are working hard to minimize the downtime and to continue delivering quality service to all our valued users.
We’re delighted to announce a significant enhancement to our free tier plan, specifically tailored to meet the needs of Quality Assurance (QA) teams and automated testers. Effective immediately, all free Mailsac users will have access to one free private address, enabling them to maintain confidentiality during email testing and ensure privacy for sensitive testing communications.
The addition of the free private address empowers QA teams and automated testers with an extra layer of control over their email testing activities. With the free private address, they can separate and safeguard their testing correspondence, ensuring the confidentiality of valuable testing data. By seamlessly managing both public and private email addresses within a single Mailsac account, QA teams and automated testers can streamline their workflow and simplify the management of their testing environments.
“At Mailsac, we understand the critical importance of data privacy and confidentiality in the testing process. We are excited to offer QA teams and automated testers the advantage of one free private address to enhance their email testing capabilities,” stated Michael Mayer, managing executive at Mailsac. “This enhancement is a testament to our commitment to empowering professionals in the QA field with robust email solutions that prioritize privacy and security.”
In addition to the free private address, Mailsac’s free tier plan includes a comprehensive range of features designed to cater to the unique needs of QA teams and automated testers. These features include rolling message storage space, customizable email addresses, and reliable email forwarding and routing capabilities. The ability to forward emails to various testing integrations environments, via Slack, webhooks, websockets, and other Mailsac addresses, facilitates seamless communication and collaboration within a company’s testing ecosystem. Furthermore, Mailsac provides a robust REST API, enabling QA teams and automated testers to check and manage email messages with ease during their testing cycles.
To benefit from enhanced privacy, advanced email testing capabilities, and a comprehensive range of features, QA teams and automated testers can sign up for Mailsac’s free tier plan at https://mailsac.com/pricing. The inclusion of the free private address and the expanded email testing options demonstrate Mailsac’s commitment to meeting the specific requirements of QA professionals, enabling them to conduct thorough and secure email testing.
About Mailsac: Mailsac is the leading provider of secure and flexible email testing services, catering to the needs of individuals, small businesses, and organizations worldwide. With a strong emphasis on user privacy and data protection, Mailsac empowers QA teams and automated testers to conduct rigorous and secure email testing while maintaining control over their digital identities. From the free tier plan to enterprise offerings, Mailsac delivers unmatched email solutions and exceptional customer support.
For media inquiries, please contact: Michael Mayer Email: [email protected]
Email deliverability testing, and QA testing web apps with multiple account permissions, are critical aspects of software development and Quality Assurance (QA). Although disposable email websites and gmail addresses are a common choice for this task, they present several significant drawbacks for enterprises. This article will detail the advantages of using dedicated email deliverability platforms like Mailsac instead.
Limitations of Disposable Email
1. Security and Privacy
Disposable email platforms typically make all emails public. These websites are frequently crawled by scammers to acquire sensitive information.
Disposable email services often lack robust security measures, exposing sensitive test data. This lack of security can compromise the integrity of testing and risk breaches of confidential information. They rely on security through obscurity – random email addresses that are hopefully unguessable.
Disposable email providers typically do not have Information Security and Assurance programs, and cannot pass a Vendor Risk Assessment.
2. Business Agreements
The terms of service for disposable email services are often unsuitable for professional development and testing contexts. They can include problematic clauses and offer limited protections for users, which isn’t ideal for businesses. The terms and privacy policies tend to be non-negotiable.
3. B2B Interfaces
Disposable email services often lack capabilities for Business-to-Business (B2B) interfacing. This limitation can hinder the integration of these services into larger, automated testing suites, significantly limiting their usefulness in professional testing scenarios.
4. Uptime and Performance
Disposable email services are often slow and lack reliable uptime. These performance issues can introduce unnecessary delays into the testing process and create uncertainties around the reliability of test results. If an email was delayed, it can be hard to know if it was on your end, or theirs.
Advantages of Using Mailsac
Mailsac, as a dedicated email deliverability platform, provides a solution to these limitations and offers considerable advantages for professional QAs and software devs.
1. Enhanced Security
Mailsac prioritizes security, providing secure paid private inboxes and whole subdomains for testing.
You can test your application’s email functionality without risking sensitive data being leaked or public, or sold to a data broker.
2. Professional Business Agreements
Mailsac offers business-friendly terms of service, custom terms, P.O.s, multiple users, SSO and other features designed with the needs of professional QAs and software developers in larger companies with legal and security requirements. This provides a more suitable environment for business operations and testing.
3. Integration and functional testing
Mailsac provides powerful REST APIs, webhooks, and web sockets for integrating into CI/CD and workflows. Companies frequently integrate mailsac seamlessly into their automated testing suite. Using a consumer disposable provider often results in unexpectedly failed builds. Using a professional provider gives you comprehensive and efficient testing and enables continuous deployment.
4. Reliable Performance
Mailsac has high uptime and quick API and UI performance, ensuring a smooth and reliable email testing process. We believe performance is a feature.
5. Share test environment account email addresses
When you are testing a web application, you can use email addresses that are private to your Mailsac account to sign up for your app. Then share those inboxes with your teammates. For example, you may be testing a web app with two RBAC roles – administrator and readonly user. Each can have a unique mailsac email address. Your web app sends a sign-in link via email. All team members can access it (using mailsac’s multi-user or SSO feature). And since it’s not disposable email, the sign-in link to your app’s dev environment won’t be public.
While disposable email services may appear convenient, they come with considerable drawbacks for professional QAs and software devs. They can be against company policies because they may leak proprietary business information. Mailsac, with its robust features and focus on business needs, provides a far more effective solution for email deliverability testing.
The importance of Quality Assurance (QA) testing in software development and operations cannot be overstated. It ensures the product or system performs as expected, minimizing the risk of unexpected failures in production environments. A crucial aspect of QA testing involves testing email deliverability. This article will focus on how to use Mailsac, a leading tool in email testing, to execute this task effectively.
What is Mailsac?
Mailsac is a service providing temporary, “for-test-only” email addresses that can be used for testing and development purposes. Mailsac’s uniqueness lies in its capability to accept emails sent to any unique, auto-generated email addresses under its domain, thus eliminating the need for pre-generating email addresses or setting up a dedicated testing email server.
Why Use Mailsac for Email Deliverability Testing?
Email deliverability testing is vital to ensure emails are correctly dispatched from your application and are appropriately received by your users. Mailsac offers the flexibility to test various email formats and content, inspect the received emails, and verify they are correctly formatted and contain the correct data. This helps mitigate common issues such as emails being marked as spam, lost emails, or broken email formats.
How to Perform QA Testing with Mailsac
Let’s delve into the steps to conduct QA testing for email deliverability using Mailsac.
Step 1: Set Up a Mailsac Account
First and foremost, you need to create a Mailsac account. Visit the Mailsac website and follow the sign-up instructions.
Step 2: Send Emails to Mailsac
Next, send emails from your application to any addresses on the mailsac.com domain. Mailsac is designed in such a way that you don’t need to pre-generate the email addresses. Just decide on the address you want to use and send the email. The inbox will be created automatically when an email is received.
You can send the emails from anywhere, too – personal or work addresses, fake senders, CLI tools, software applications – without a separate sending gateway.
Step 3: Check Email Deliverability
After sending the emails, you can verify their delivery in the Mailsac interface. Here, you can view the received emails, check their contents, and confirm they are correctly formatted. Mailsac also enables you to check if attachments are included correctly using the Unified Inbox or API, and whether the links and images in the email are functioning properly.
Advanced Testing with Mailsac API
For more sophisticated or comprehensive testing, Mailsac offers a robust JSON REST API and Web Socket API. This empowers you to automate the process of sending emails, checking their delivery, and verifying their contents. These API calls can be integrated into your automated testing suite, enabling you to conduct in-depth email deliverability tests as a part of your regular testing process.
Wrapping Up
Mailsac presents a powerful and versatile method to test email deliverability as a part of your QA process. It allows you to send emails to any address on its domain, and the inboxes are created automatically when an email is received. By integrating Mailsac into your QA testing, you can significantly enhance the quality and reliability of your email notifications, thus offering a better user experience. Sign up and start receiving email in seconds.