When I say “You need to test your code”, do you wince? Is it a feeling of guilt, one of “I know I should, but…”. Testing may not conjure up the sexiest of images. We as developers frequently put tests off until the end of our feature cycle. Or respond to a production bug by issuing a quick patch. Or worse, just bury our heads in the sand and pretend that we don’t have any bugs in our code at all. (Note: All code has bugs).
The reality is that testing is an incredible investment in your code’s future. Investing in tests is like an insurance policy: hedging your bets against an unknown future. An unknown future consisting of bitrot, dependency deprecations, or service API changes. Testing provides the ability to patch those unknowns through refactoring or flat-out removing stale dependencies. Testing can also buffer against those risks, providing peace of mind.
In this post, I’ll outline 3 different types of testing tools:
- Selenium WebDriver
- Selenium IDE
- Puppeteer
To do an apples-to-apples comparison the testing scenario will be the same for all three tools. I’ll also model my testing after a user’s typical behavior. Behaviors like login attempts, searching, and form submissions. They also try to hit every layer of the application, from the user interface to the database.
Benefits of Testing a User Interface
Testing isn’t just limited to the backend. Testing your interface can provide complete end-to-end testing scenarios such as:
- Repeated calls to your modal. Does the modal come back after the first call?
- Does your submit button produce an error if the form has an incorrect value?
- Does the UI load after a successful login to an empty state in your application?
- Does a specific result come back after a form search?
I’m going to walk through a straightforward testing scenario with three tools. Not to rank them, but to touch on the nuances of each. Some of these tools allow you to create tests through simple browsing. Others are headless, allowing you to drive through programming languages.
What’s a headless browser?
Conventional browsing involves rendering forms, buttons, and images to the user. A headless browser interacts with websites through code without displaying any controls. Headless browsing opens up possibilities that are tough to achieve with conventional browsers like:
- Integration with your build systems
- Consistency in testing
- Decreasing the duration of your tests
- Layout screen captures and comparisons
Tools of the Automated Browser Trade
Onto the good stuff: The tools and testing scenarios.
The Most Popular – Selenium WebDriver
Selenium is by far the most popular testing tool out there. It covers headless testing and both local and remote tests.
WebDriver targets as its core base Developers and QA Team members who can write code.
The Easiest To Get Started with – Selenium IDE
Selenium designed the IDE version for exploratory testing and bug replication. It’s perfect for walking through a bug with someone else or creating a recording of a bug for your ticketing system.
The NodeJS Fan Favorite – Puppeteer
Puppeteer is a favorite of the NodeJS community due to its easy integration into your existing build system. It automates form submission, UI testing, keyboard inputs, and more. It’s main limitation however is the browsers it supports. As of this writing Puppeteer only supports Chrome. Firefox support is, as of this writing, experimental.
Puppeteer’s killer feature is that it installs the browser binary for you, making the integrating into your build system easy.
Testing Scenario: A Failed Login to dev.to
Here’s our testing scenario:
- Load https://dev.to
- Click the “Log in” button
- Load a page with “Welcome! – DEV Community” in its title.
- Click on the “Continue” button
- Ensure an “Unable to login” banner appears on the page.
For consistency throughout the walkthrough, I’ll use:
- Chrome as my browser
- Javascript as the programming language of choice
Test Case 1 – Selenium WebDriver
Let’s begin with an empty directory and selenium package installation:
npm init tests
cd tests
npm install selenium-webdriver
Next, download a browser driver. You can find the full supported list in selenium’s code repository. You can place the binary anywhere. For this walkthrough, I’ll place it in the current project directory under the bin/ path.
Set your specific browser driver path:
export PATH=$PATH:$PWD/bin
I’ll be using this quick test setup (selenium.js):
const {Builder, Browser, By, Key, until} = require('selenium-webdriver');

(async function example() {
  let driver = await new Builder().forBrowser(Browser.CHROME).build();
  try {
    await driver.get('http://dev.to');
    await driver.findElement(By.linkText('Log in')).click();
    await driver.wait(until.titleIs('Welcome! - DEV Community'), 3000);
    await driver.findElement(By.name('commit')).click();
    await driver.wait(until.titleIs(''), 3000);
    let errorBox = await driver.findElement(By.className('registration__error-notice'));
    await driver.wait(until.elementIsVisible(errorBox));
    let errorText = await errorBox.getText();

    if (!errorText.includes('Error')){
      throw new Error(`Error text does not contain expected value: ${errorText}`);
    }

  } finally {
    await driver.quit();
  }
})();
Set your driver and run the file
SELENIUM_BROWSER=chrome node selenium.js
In general I like to ensure my tests fail from the start, followed by working towards passing the tests:
const {Builder, Browser, By, Key, until} = require('selenium-webdriver');

(async function example() {
  let driver = await new Builder().forBrowser(Browser.CHROME).build();
  try {
    await driver.get('http://dev.to');
    await driver.findElement(By.linkText('Log in')).click();
    await driver.wait(until.titleIs('Welcome! - DEV Community'), 3000);
    await driver.findElement(By.name('commit')).click();
    await driver.wait(until.titleIs(''), 3000);
    let errorBox = await driver.findElement(By.className('registration__error-notice'));
    await driver.wait(until.elementIsVisible(errorBox));
    let errorText = await errorBox.getText();

    if (!errorText.includes('Unable to login')){
      throw new Error(`Error text does not contain expected value "${errorText}"`);
    }

  } catch(e) {
    console.error(`Error running test suite: ${e.message}`)
  }
  finally {
    await driver.quit();
  }
})();
With line 15 fixed, rerun the script:
Success!
The above was a taste of what you can do with Selenium. You can even break out of the testing mindset and use Selenium for scraping and populating activity trackers.
On to the next tool.
Test Case 2 – Selenium IDE
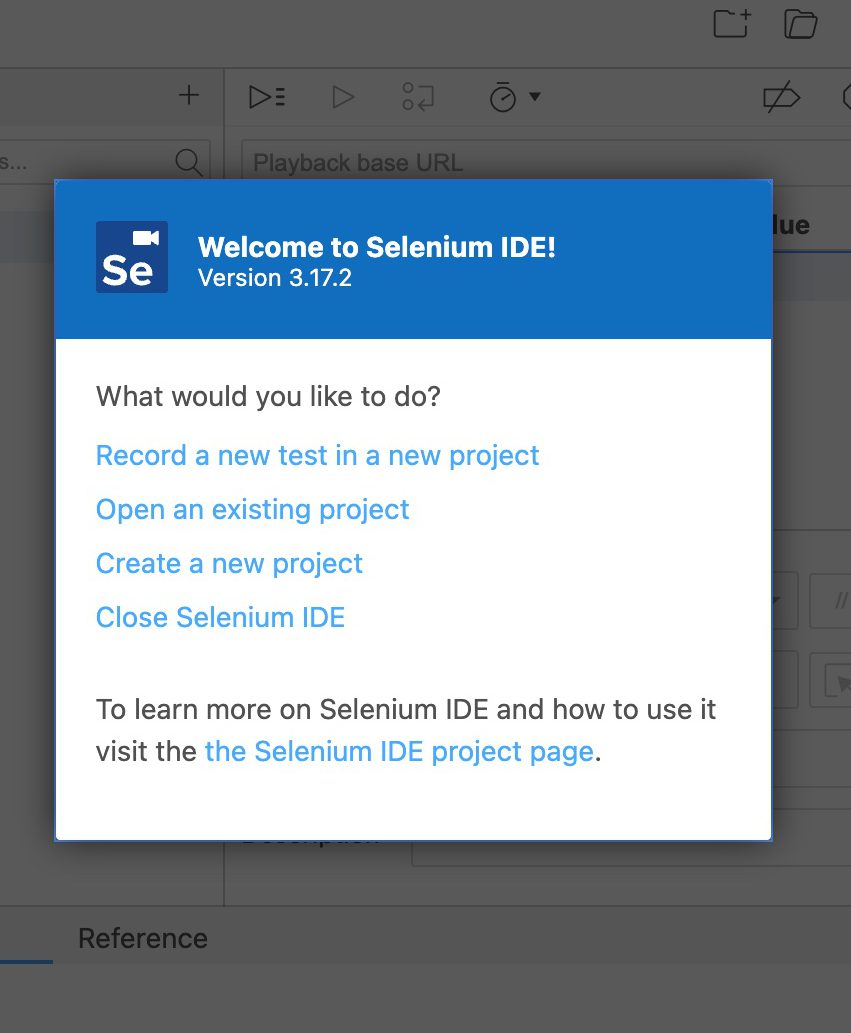
While the previous test requires some programming ability, Selenium IDE is friendly to anyone who can drive a browser. The IDE version’s main use case is bug discovery, recording and profiling.
First, download the package from the Selenium page.
After installing the plugin, start a new project:
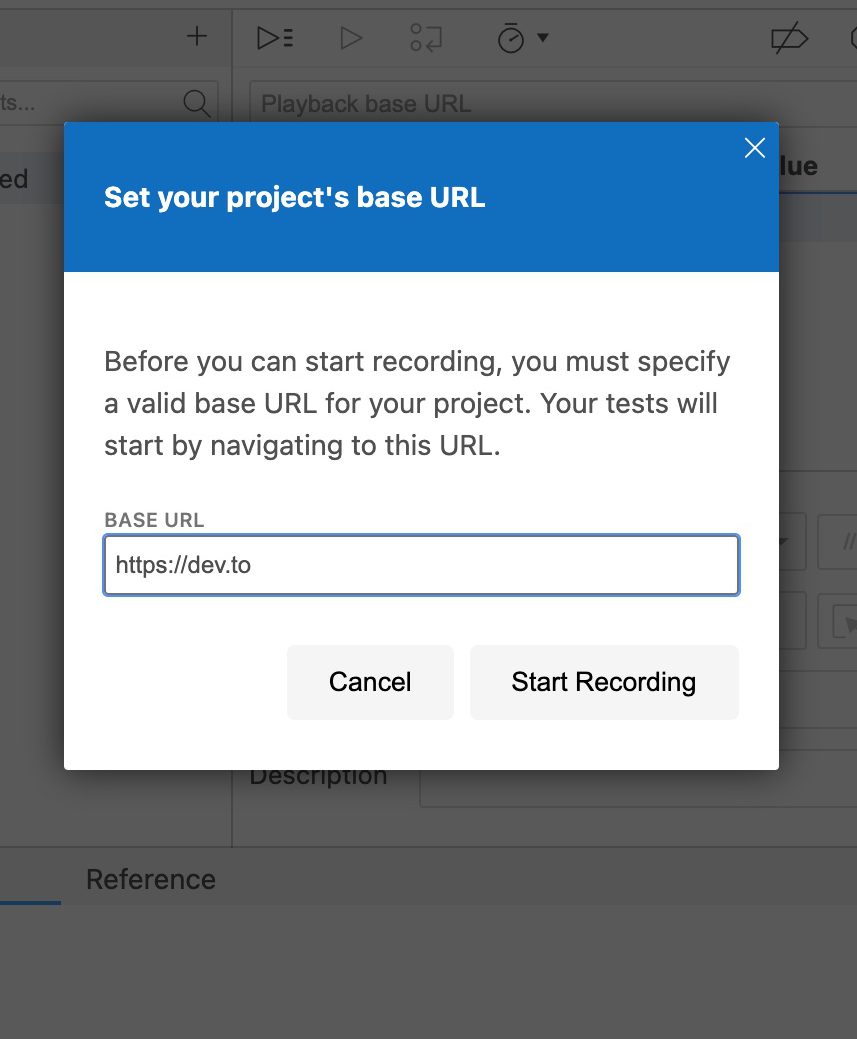
After you hit “Start Recording”, Selenium will launch a new Chrome window and redirect you to dev.to
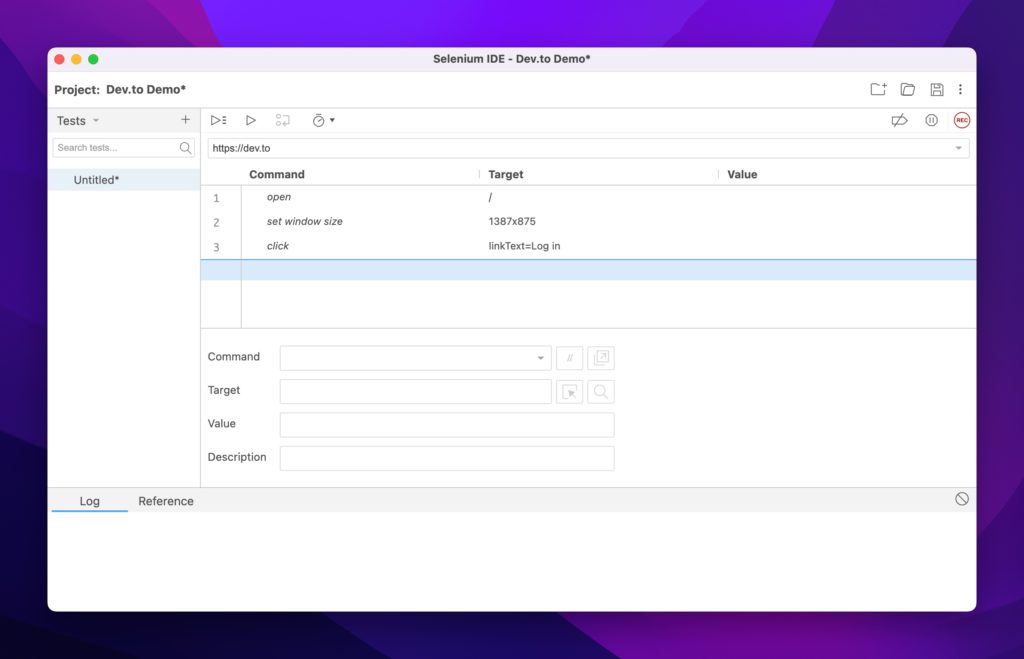
From the video, we:
- Let the initial dev.to page load
- Clicked on the “Log in” button
- Clicked on the Selenium IDE extension
- Stopped the Extension recording
- Arrived at the Commands window below
To continue our test scenario, let’s ensure that the page title is Welcome! - DEV Community and that our login attempt fails with an empty submission.
Again, I always like to have my tests fail first, so let’s start with that case. Use Selenium’s assert title command to ensure the title is what we expect. Add it to the command list:
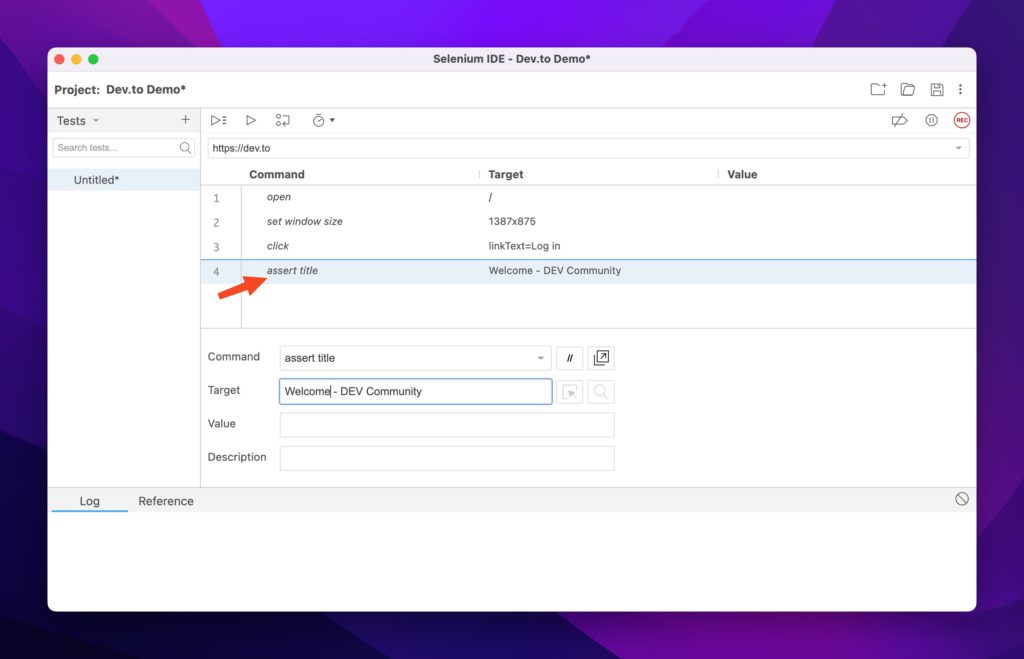
If you run the test, it should fail:
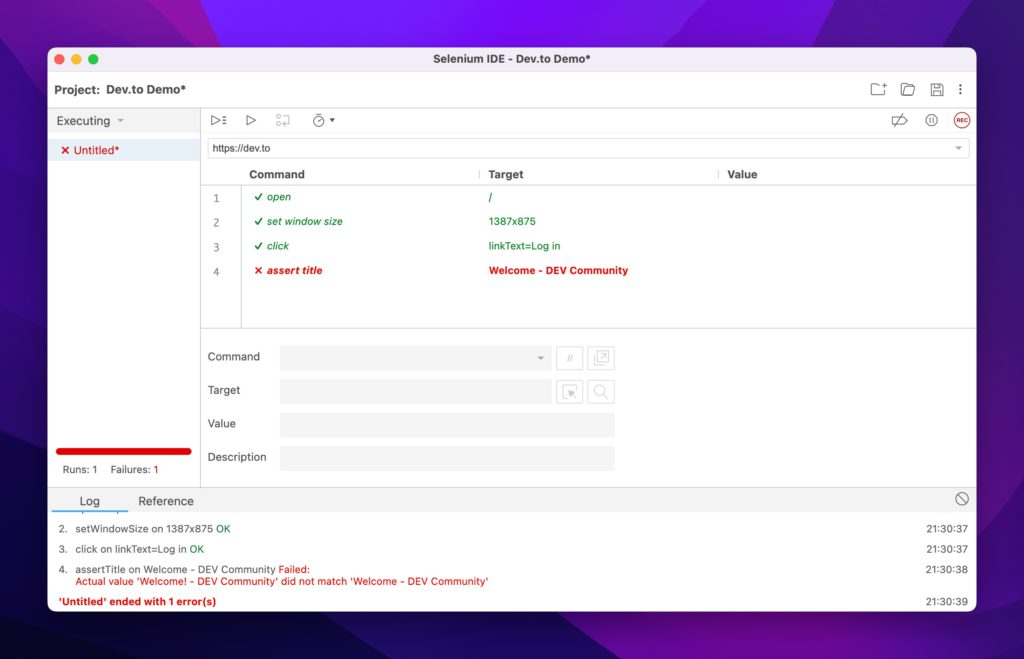
Let’s go ahead and fix it with the correct title and rerun the test:
And success! Now let’s add the login check:
To summarize the video, we:
- Started a new recording
- Hit the
Log inbutton - Clicked Continue without supplying credentials
- Used the Selenium element picker to pick out the element we were interested in asserting.
The Commands window should now look like this:
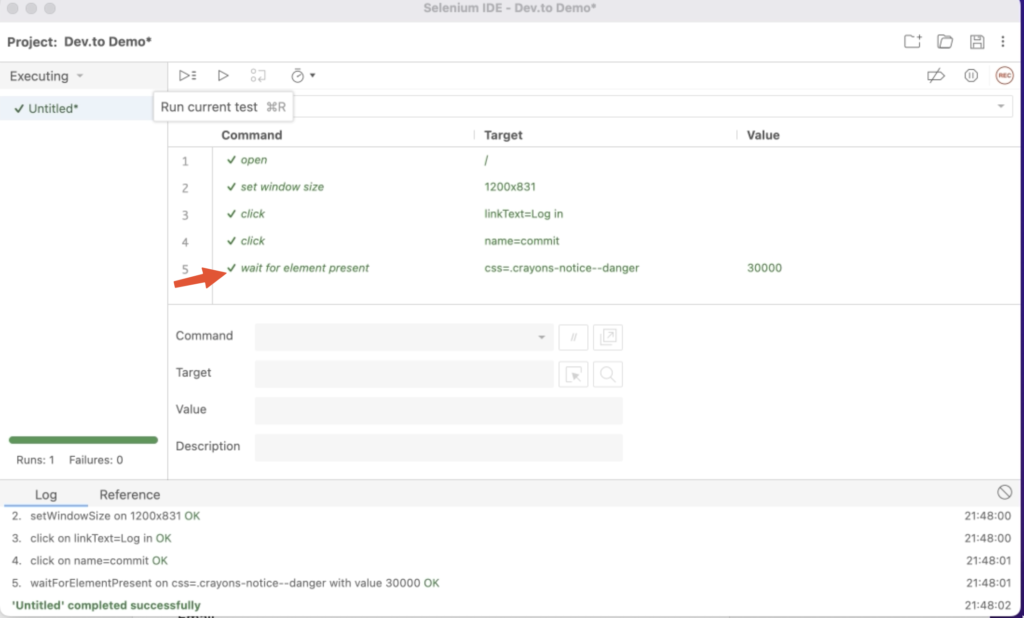
Success!
The IDE version is the simplest to get started with and I recommend it for initial test write-ups. It can help you identify which elements you need to test against, think about app flow and what counts as a failure.
One question remains: Rendering the browser is nice, but I want to hook this into my continuous integration system. How can I do that when every test wants to load an application that requires a windowing system?
The answer is to go headless.
Test Case 3 – Puppeteer
Puppeteer is the perfect match to test web UI components inside a continuous integration system. It’s fast, headless, brings its own dependencies and runs the latest versions of Chrome and Firefox.
Let’s start by installing puppeteer on a new project:
mkdir tests
npm i puppeteer
Keep in mind that this automatically installs the chrome driver we had to manually download in the Selenium example. From Puppeteer’s documents:
When you install Puppeteer, it downloads a recent version of Chromium (~170MB Mac, ~282MB Linux, ~280MB Win) that is guaranteed to work with the API (customizable through Environment Variables).
https://pptr.dev/#installation
With that said, let’s create a test file that will run (and fail) our test scenario (puppeteer.js):
const puppeteer = require('puppeteer');

(async () => {
  const browser = await puppeteer.launch({headless: false});
  const page = await browser.newPage();
  const loginSelector = 'a[href="/enter"]';
  const submitLoginSelector = '[name="commit"]';
  const errorBoxSelector = '.bad notice';
  try {
    await page.goto('https://dev.to');
    await page.waitForSelector(loginSelector,{ timeout: 3000 });
    await page.click(loginSelector);
    const pageTitle = await page.title();

    if (pageTitle !== 'Welcome! - DEV Community'){
      throw new Error(`Page title ${pageTitle} does not match expected value`);
    }
    await page.waitForSelector(submitLoginSelector,{ timeout: 3000 });
    await page.click(submitLoginSelector);
    await page.waitForSelector(errorBoxSelector,{ timeout: 3000 });

  }catch(e){
    console.error(`Error in test suite: ${e.message}`)
  }finally {
    await browser.close();
  }
})();
Some notes on the above code:
- Lines 6-8 are Puppeteer’s method of selecting elements on the page.
- Like Selenium WebDriver, you have to manually check a page’s attributes and decide on what to do should they fail
- In the above code it’s line 15, asserting the title matches the expected value
- It’ll also implicitly fail on line 20, due to the error div class not matching what dev.to sends to the browser.
- I’ve disabled the headless feature to show that Puppeteer lets you do that!
Let’s fix the test. Change it to the correct value *and* turn on headless mode:
const puppeteer = require('puppeteer');

(async () => {
  const browser = await puppeteer.launch({headless: true});
  const page = await browser.newPage();
  const loginSelector = 'a[href="/enter"]';
  const submitLoginSelector = '[name="commit"]';
  const errorBoxSelector = '.registration__error-notice';
  try {
    await page.goto('https://dev.to');
    await page.waitForSelector(loginSelector,{ timeout: 3000 });
    await page.click(loginSelector);
    const pageTitle = await page.title();

    if (pageTitle !== 'Welcome! - DEV Community'){
      throw new Error(`Page title ${pageTitle} does not match expected value`);
    }

    await page.waitForSelector(submitLoginSelector,{ timeout: 3000 });
    await page.click(submitLoginSelector);
    await page.waitForSelector(errorBoxSelector,{ timeout: 3000 });
  }catch(e){
    console.error(`Error in test suite: ${e.message}`)
  }finally {
    await browser.close();
  }
})();
Now rerunning the test simply gets you the empty prompt:
tests:DreamMachine % node puppeteer.js
tests:DreamMachine %
Nice, simple, and clean.
Conclusion
I’ve gone through three different sets of tools for different needs. The best part about these tools is that you can string them all together or pick and choose the ones that are right for you.
I hope the main takeaway is the same: Testing can be painless and even fun!
Selenium can also be used to test email signups with Mailsac.
Questions or comments? Stop by the Mailsac Forums, we’d love to hear from you!